Shannon: Flat-Front Shirts over Bras or Binders
This tutorial will show you how to adapt a pattern for a button-front shirt marketed as “menswear” to fit a body with a fuller chest and hips. These adjustments result in a pattern that maintains the flat-front appearance of “menswear” shirts, without any darts or princess seams for shaping, while accommodating bodies with fullness at the chest and hips.
I developed this adjustment for my own body first. I wanted to be able to wear more traditional “menswear” shirts with either a bra or a binder, without gaping across the chest or at the hips, and with well-fitting shoulders and collar. The most difficult part of figuring this out was the math and measurements involved, so I’ve tried to simplify that and lay it out for you here.
This tutorial will work for wearing a bra of any kind or a binder – you’ll just adjust where you take your measurements, as I’ll show below. If you want to be able to wear your shirt with either a bra or a binder, you’ll use the measurement where your chest is larger and higher, which is generally going to be when wearing a bra.
Supplies
A button-front shirt pattern designed as “menswear”
A ruler
Tracing paper and/or scrap tissue or pattern paper
A pencil or pen
A measuring tape
Step One: Measurements
You’ll need three measurements to start. I am not including here how to adjust length – if you wish to do so, you’ll want to also take torso and/or arm length measurements and make those adjustments after you have completed the full chest adjustment.
When taking these measurements, wear the undergarments you’d like to wear with the shirt. Each measurement should be taken with the tape measure parallel to the ground all the way around, held snug but not tight.
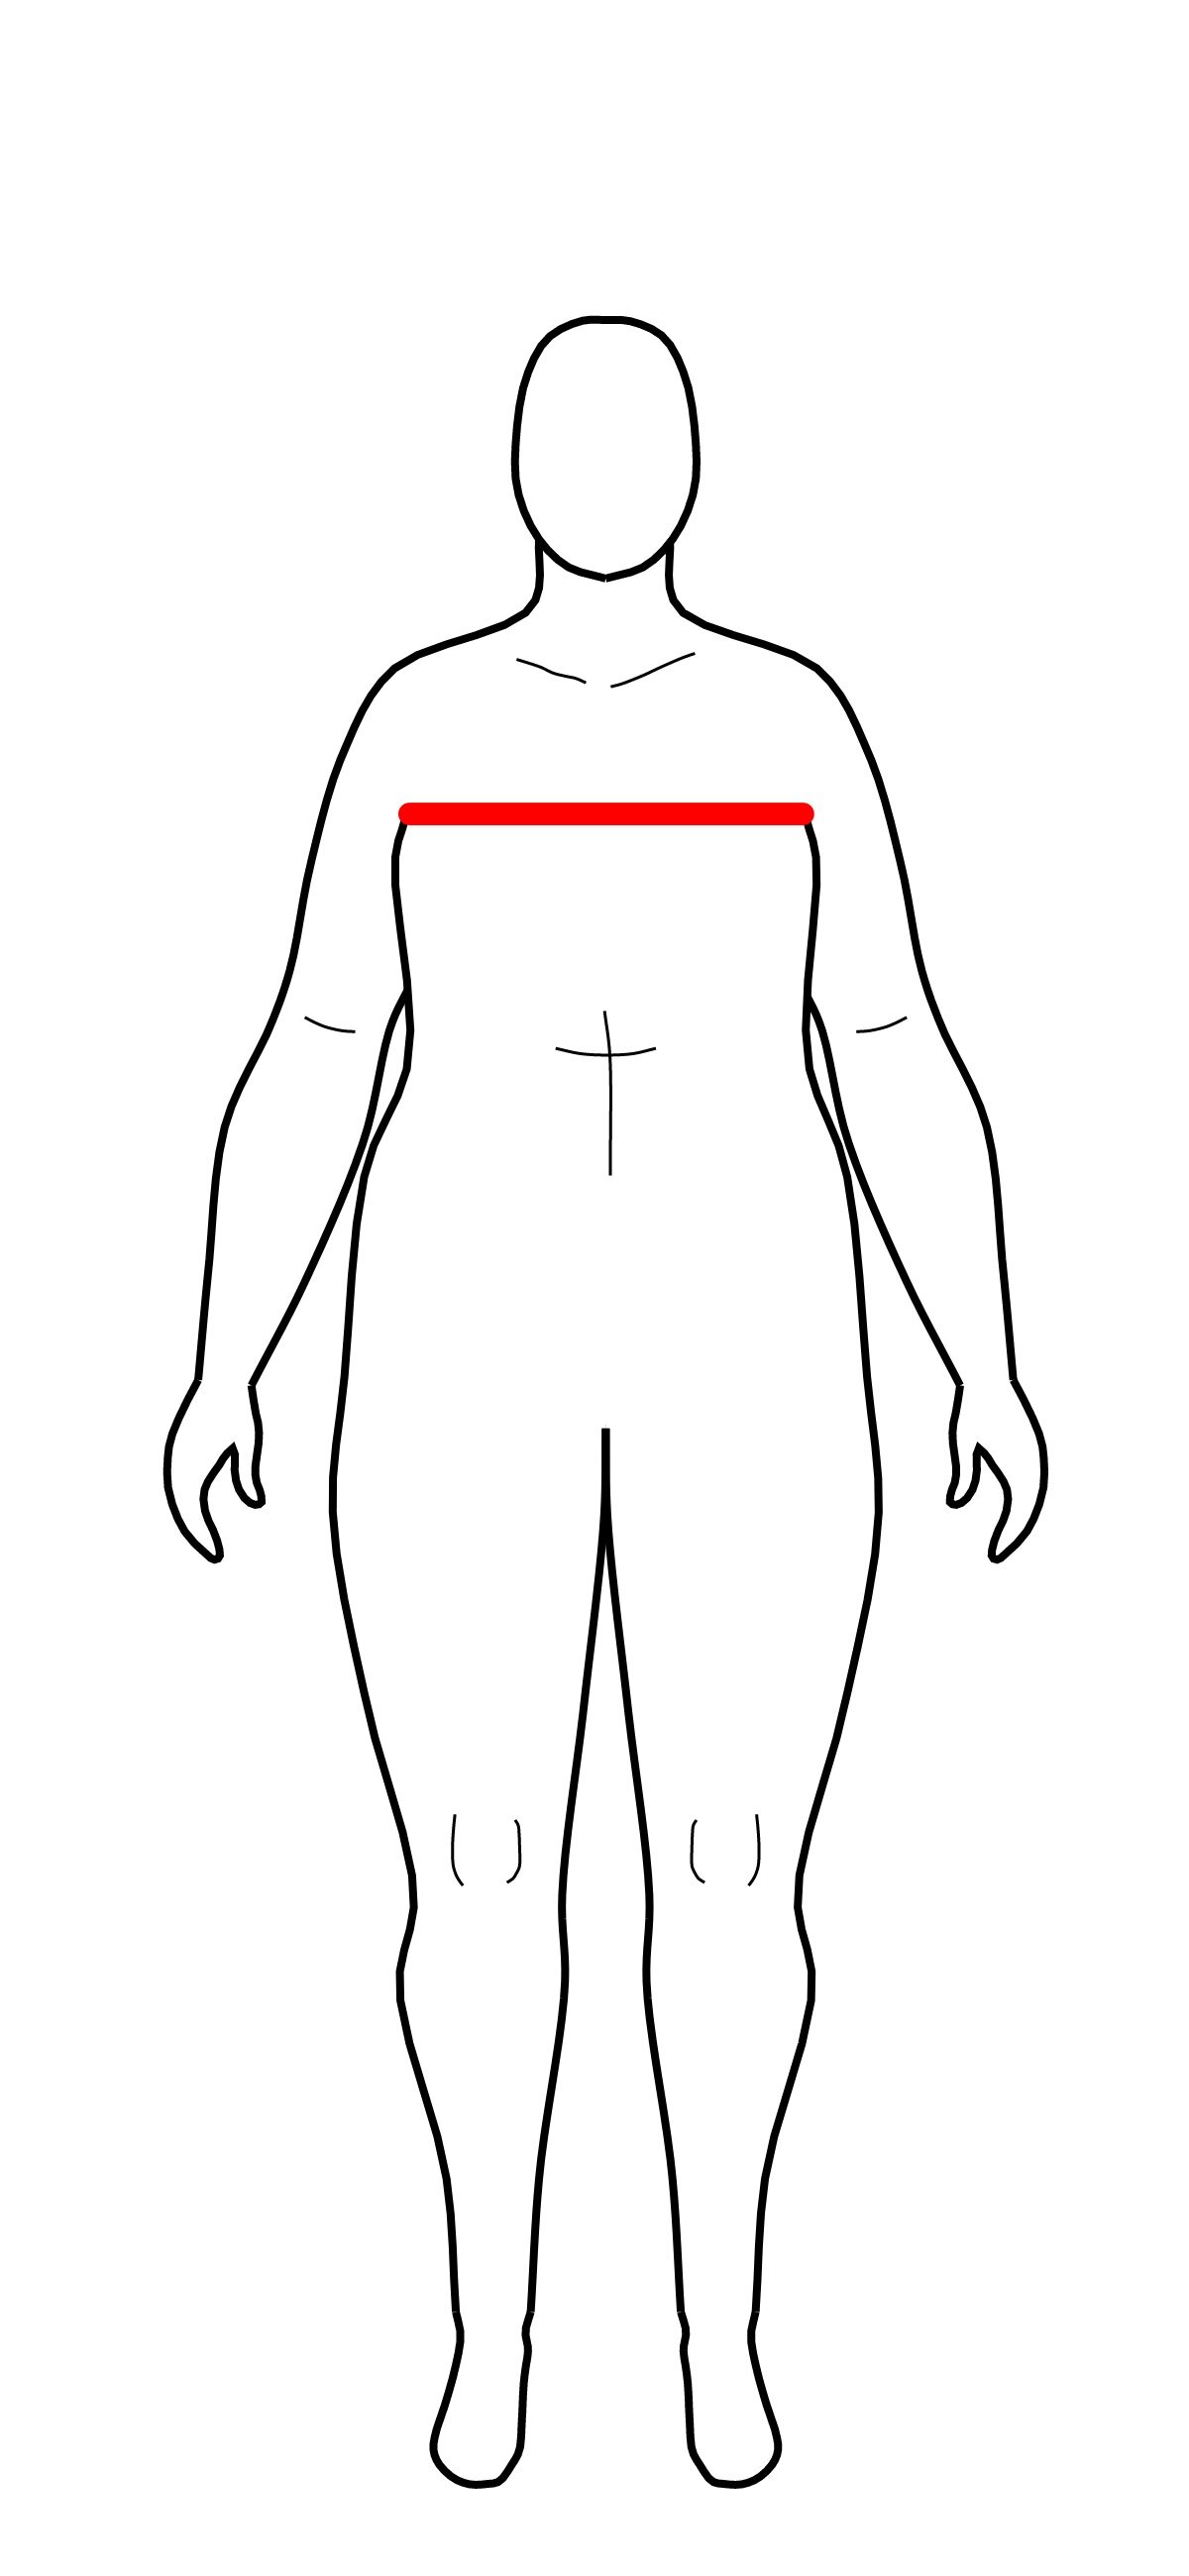
First measurement: upper chest circumference. Measure around your chest just under your armpits. This is usually above the majority of breast tissue.
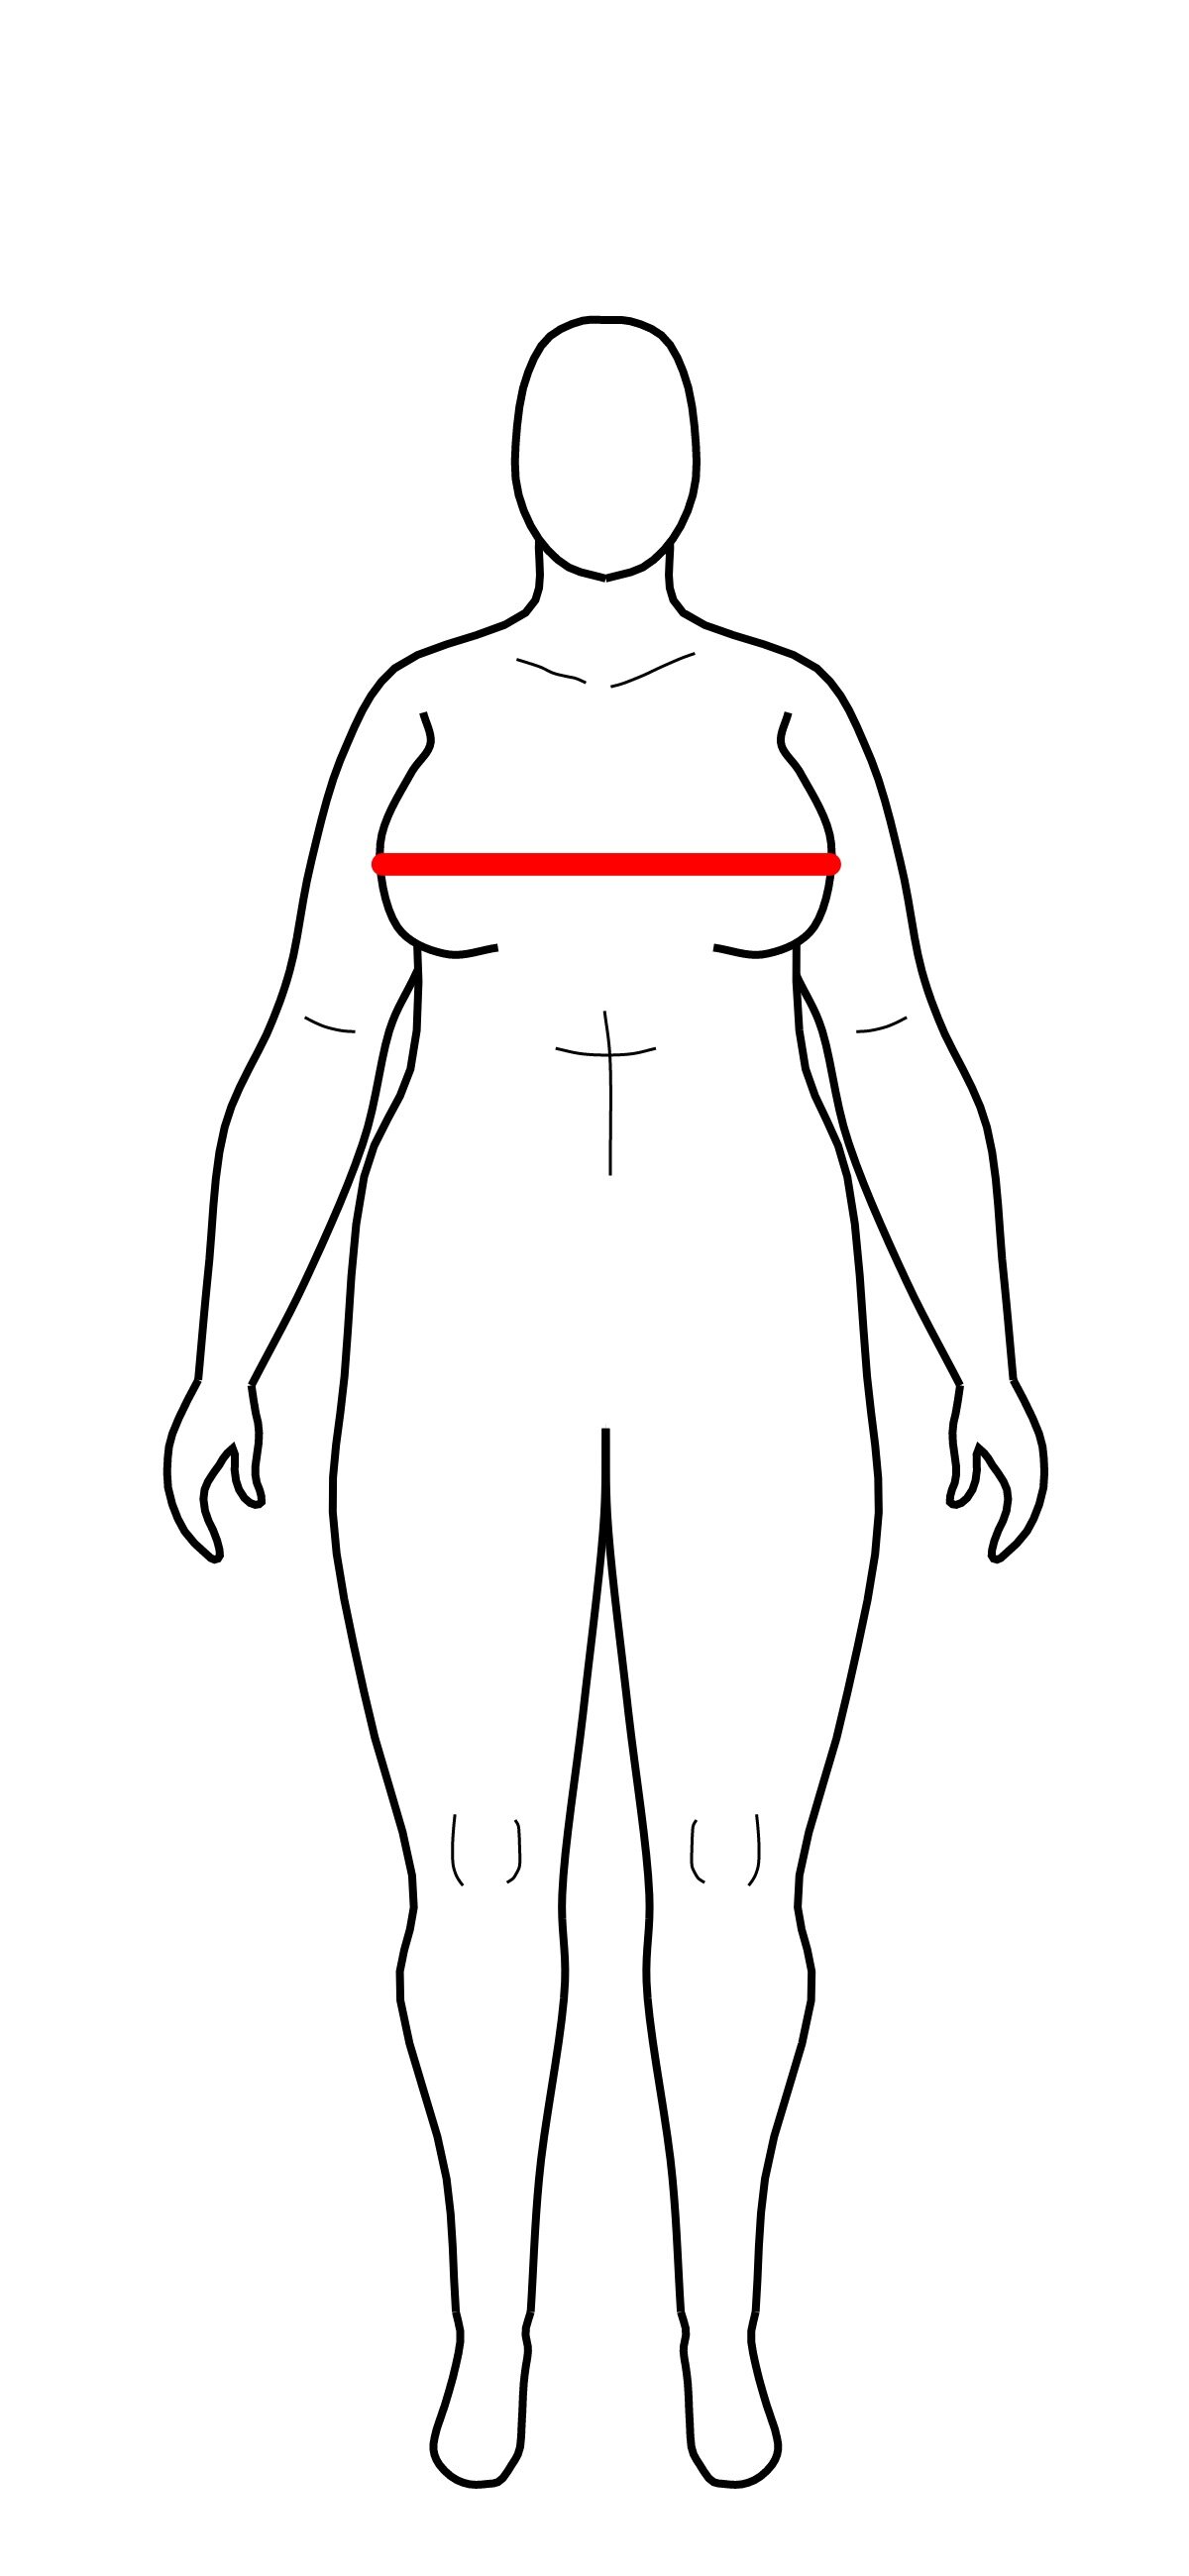
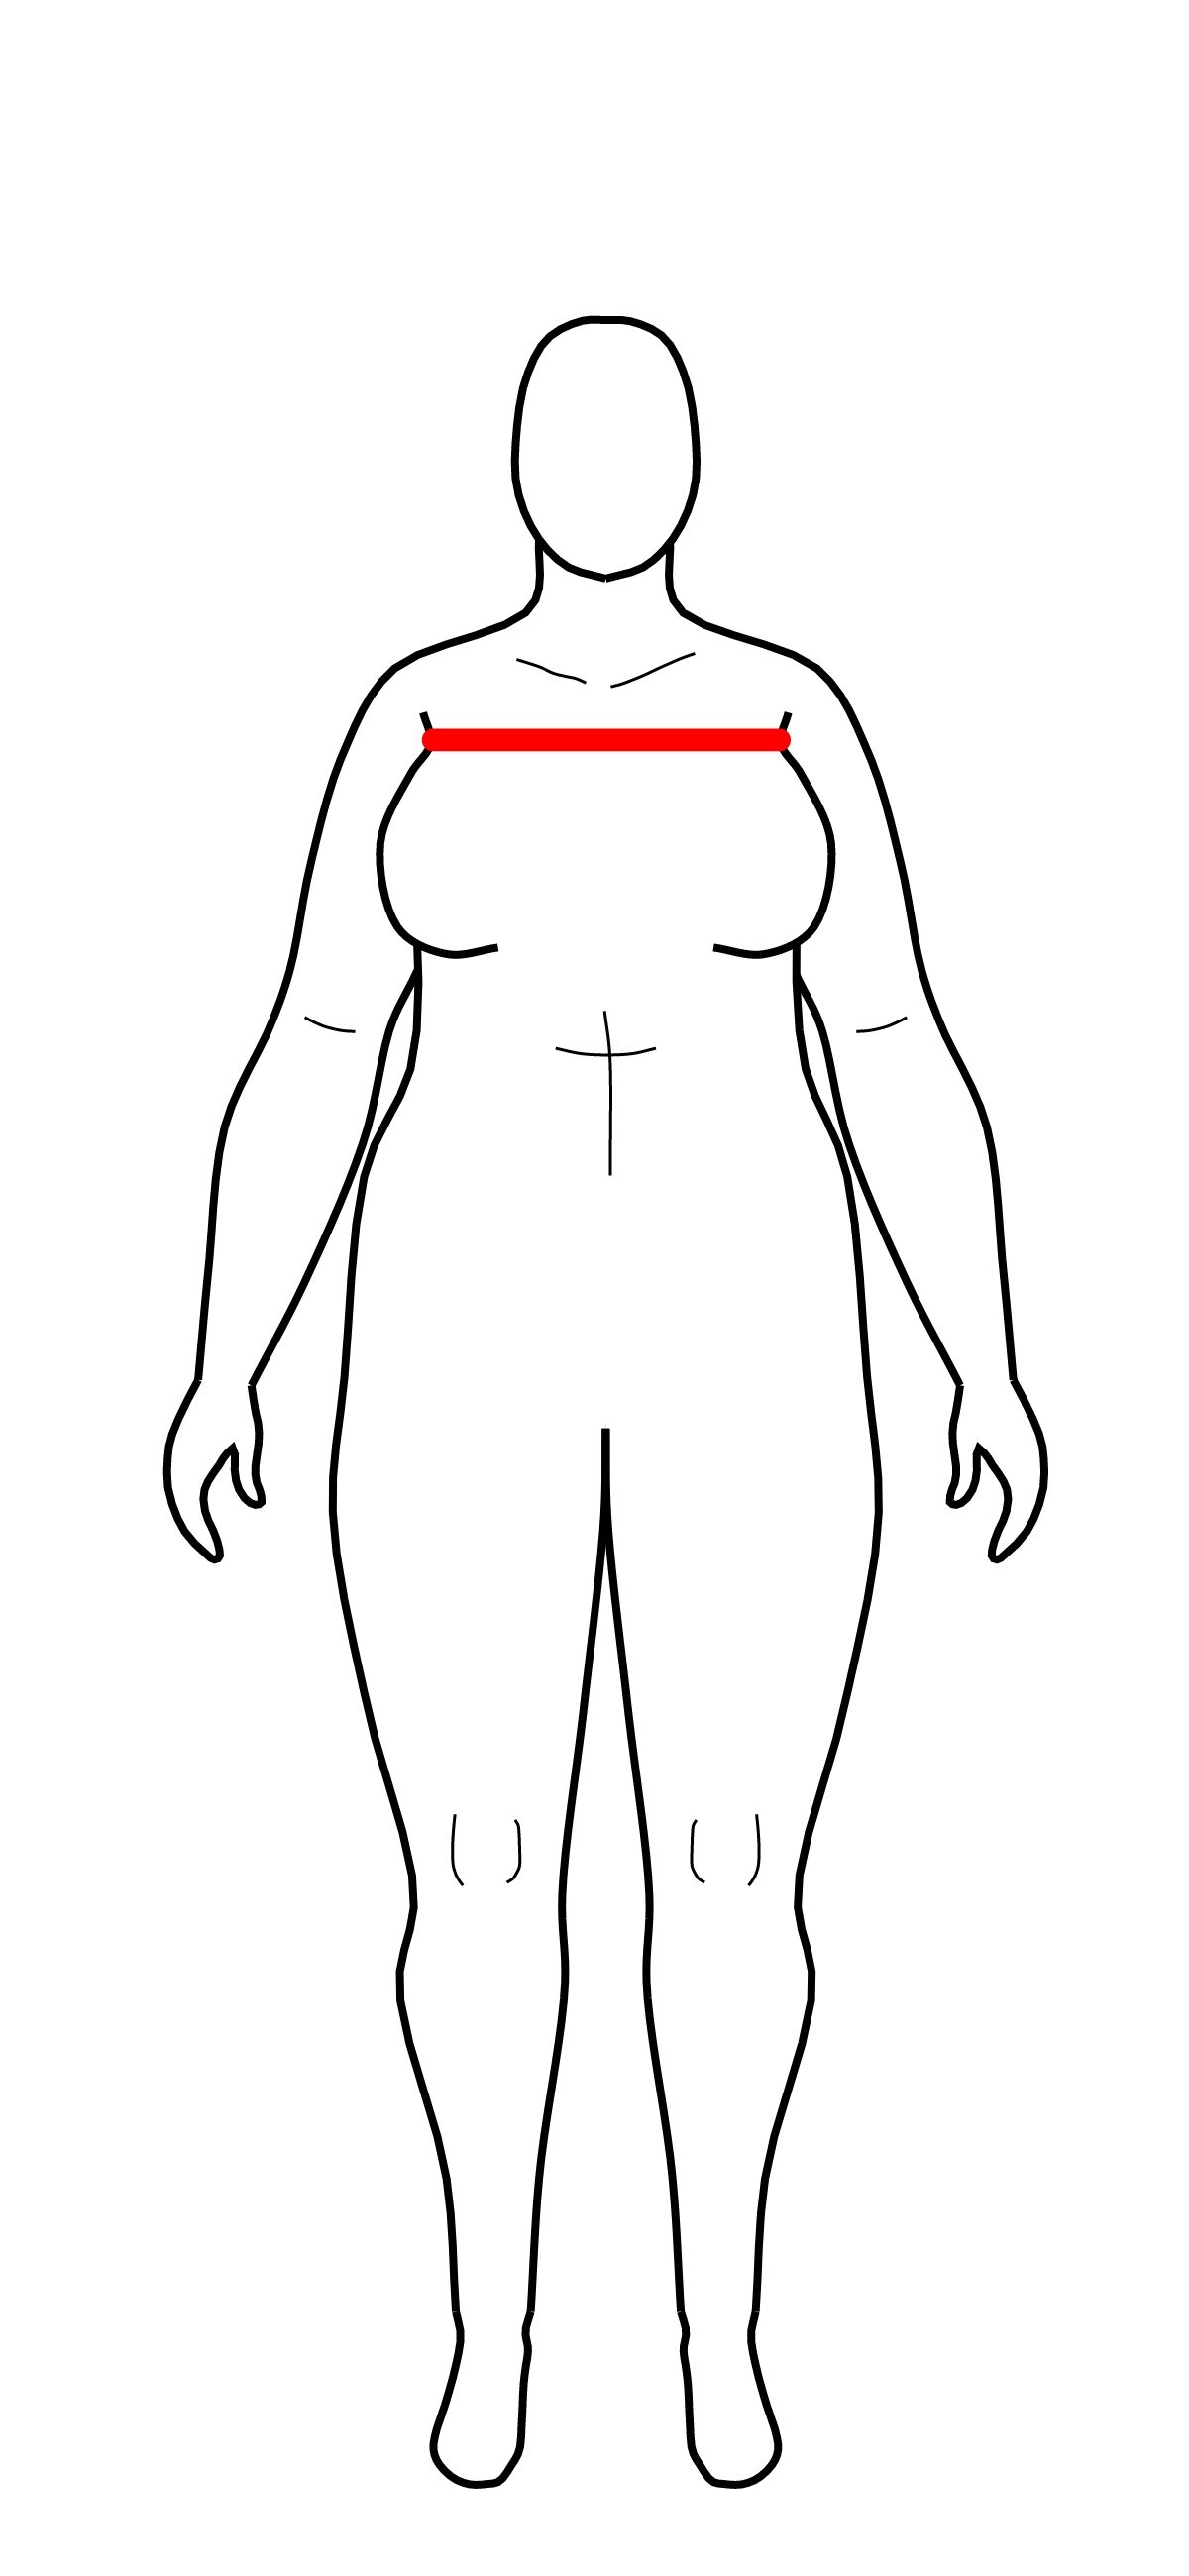
Second measurement: full chest circumference. Measure around your chest at its fullest part. This will vary depending on the undergarment worn and/or the method used for redistributing breast tissue under a binder.
NOTE: If you’re designing your shirt pattern to fit with multiple undergarments, use the full chest circumference that is LARGER and HIGHER.
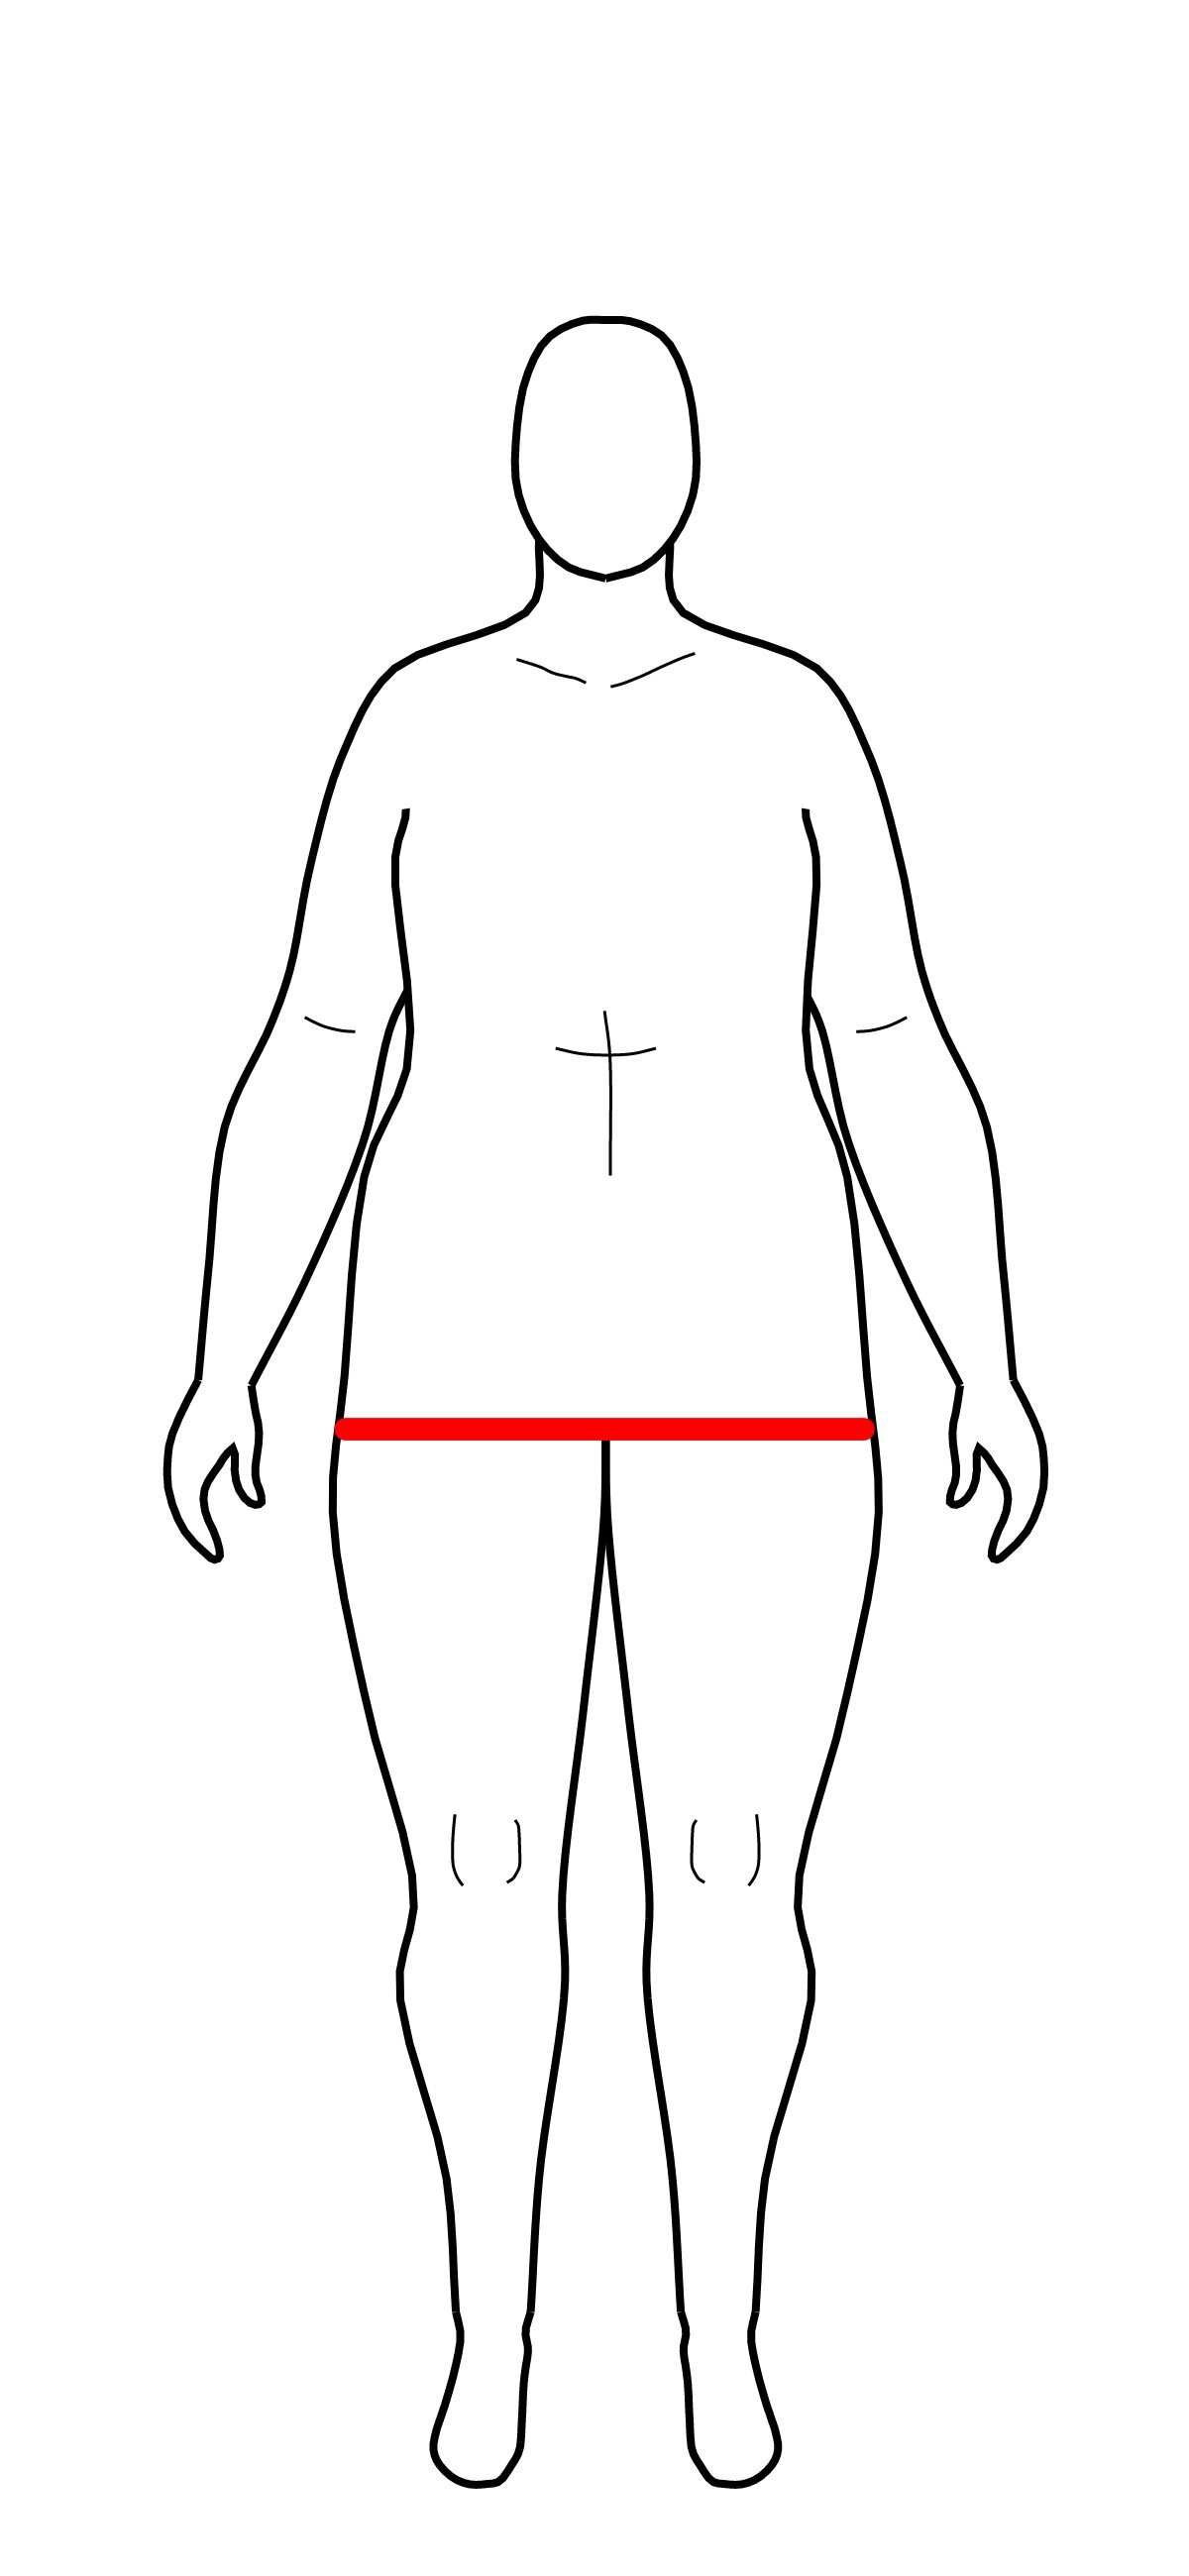
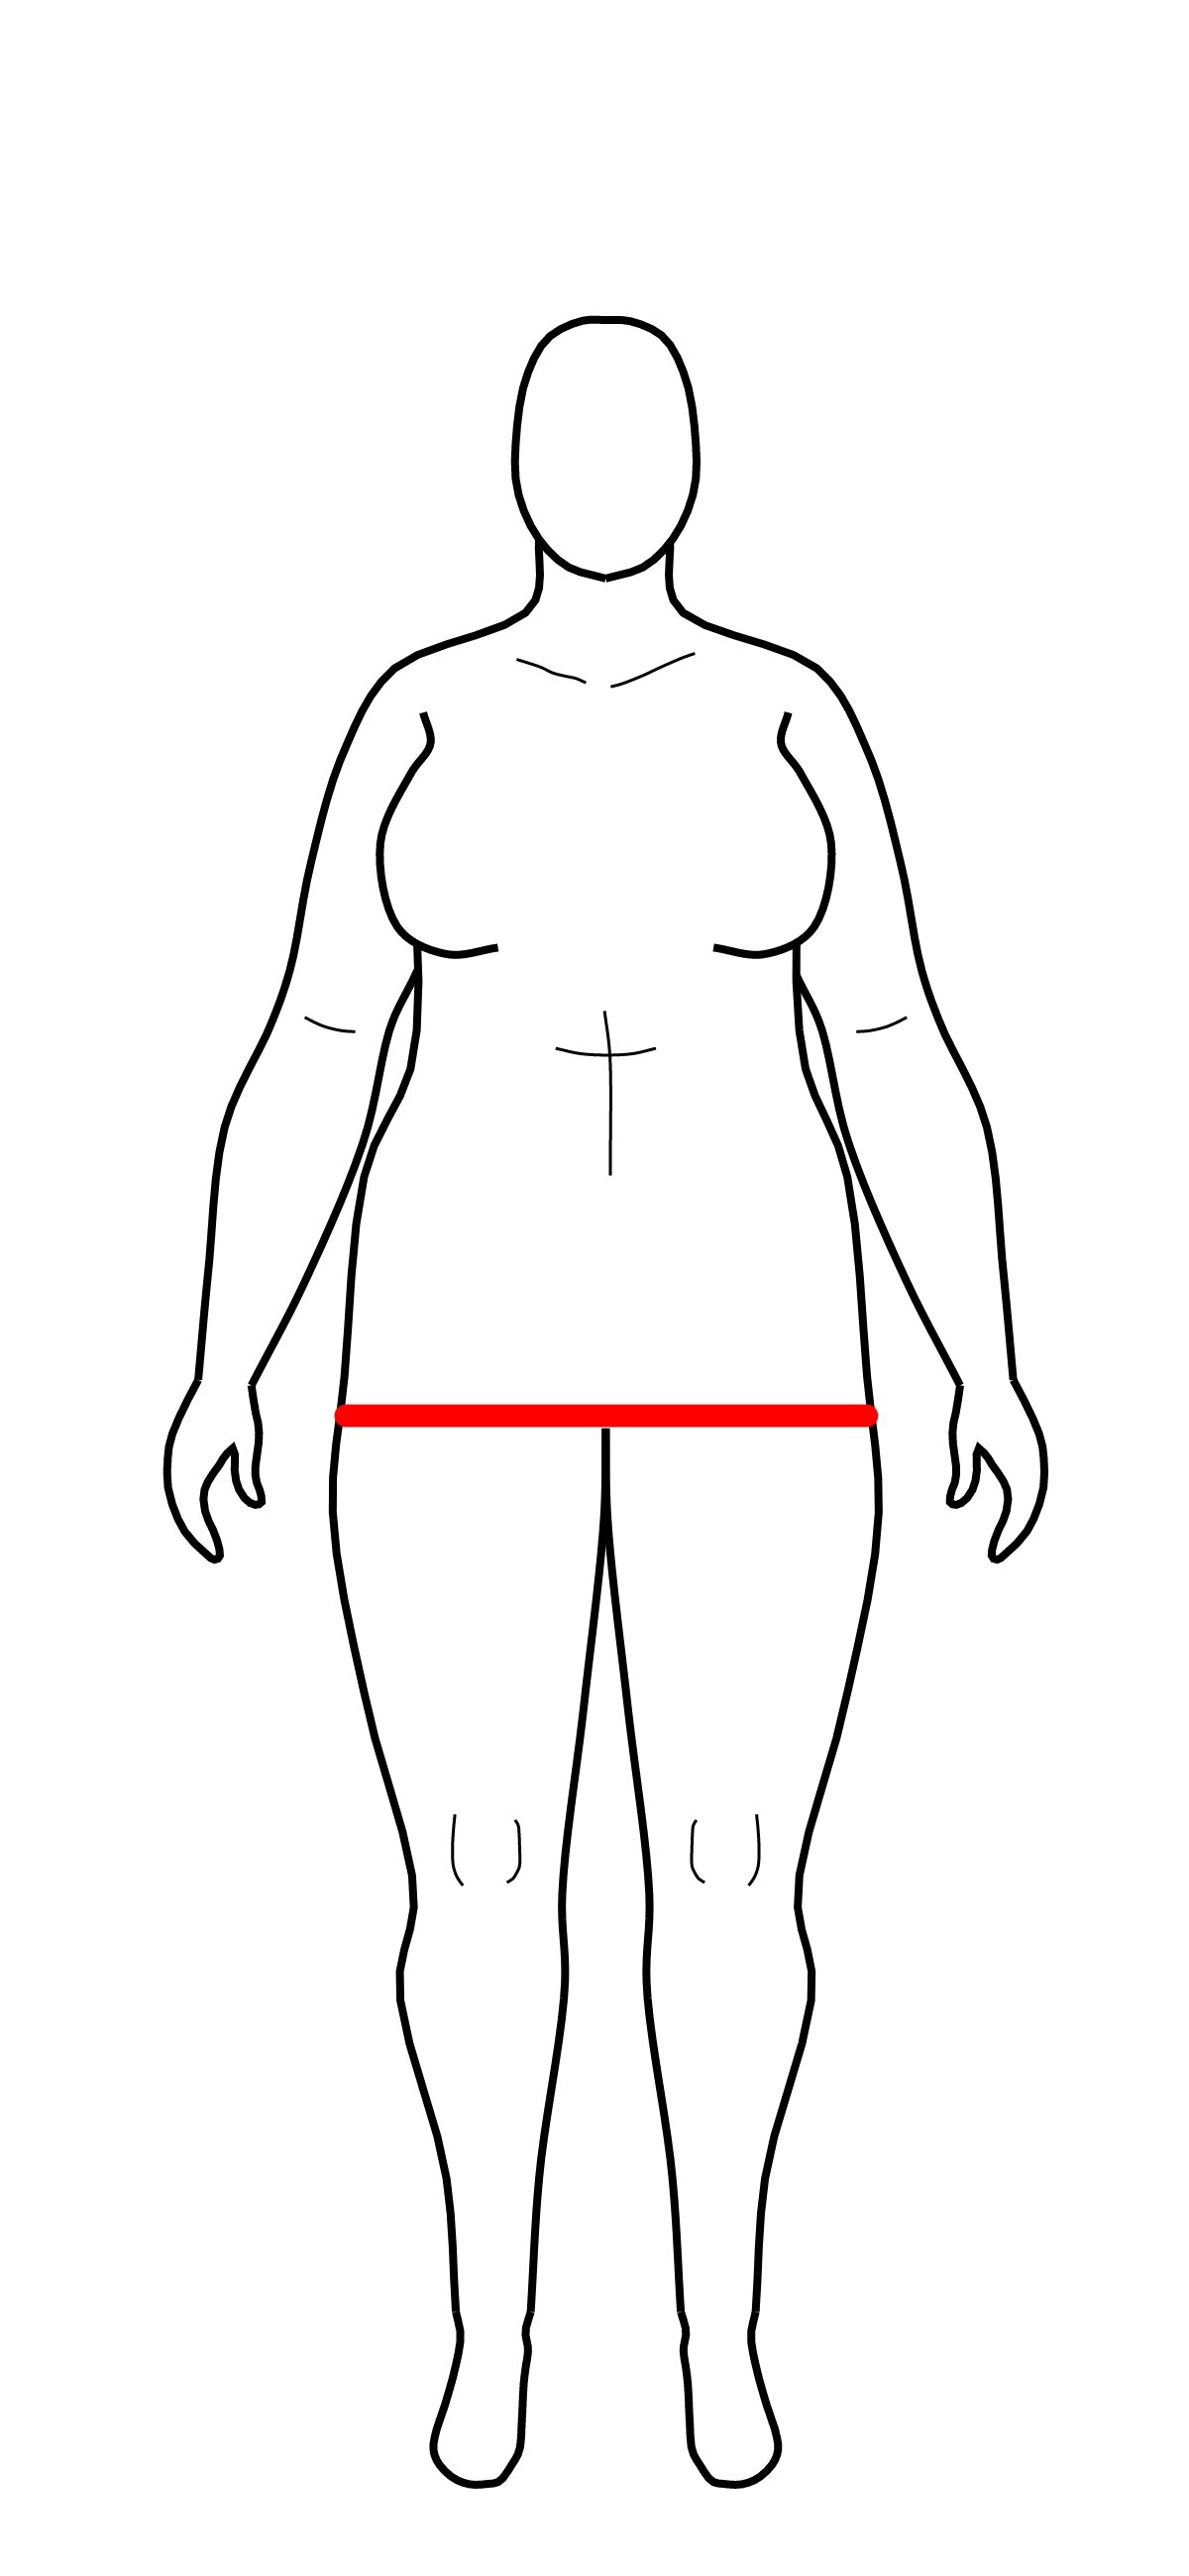
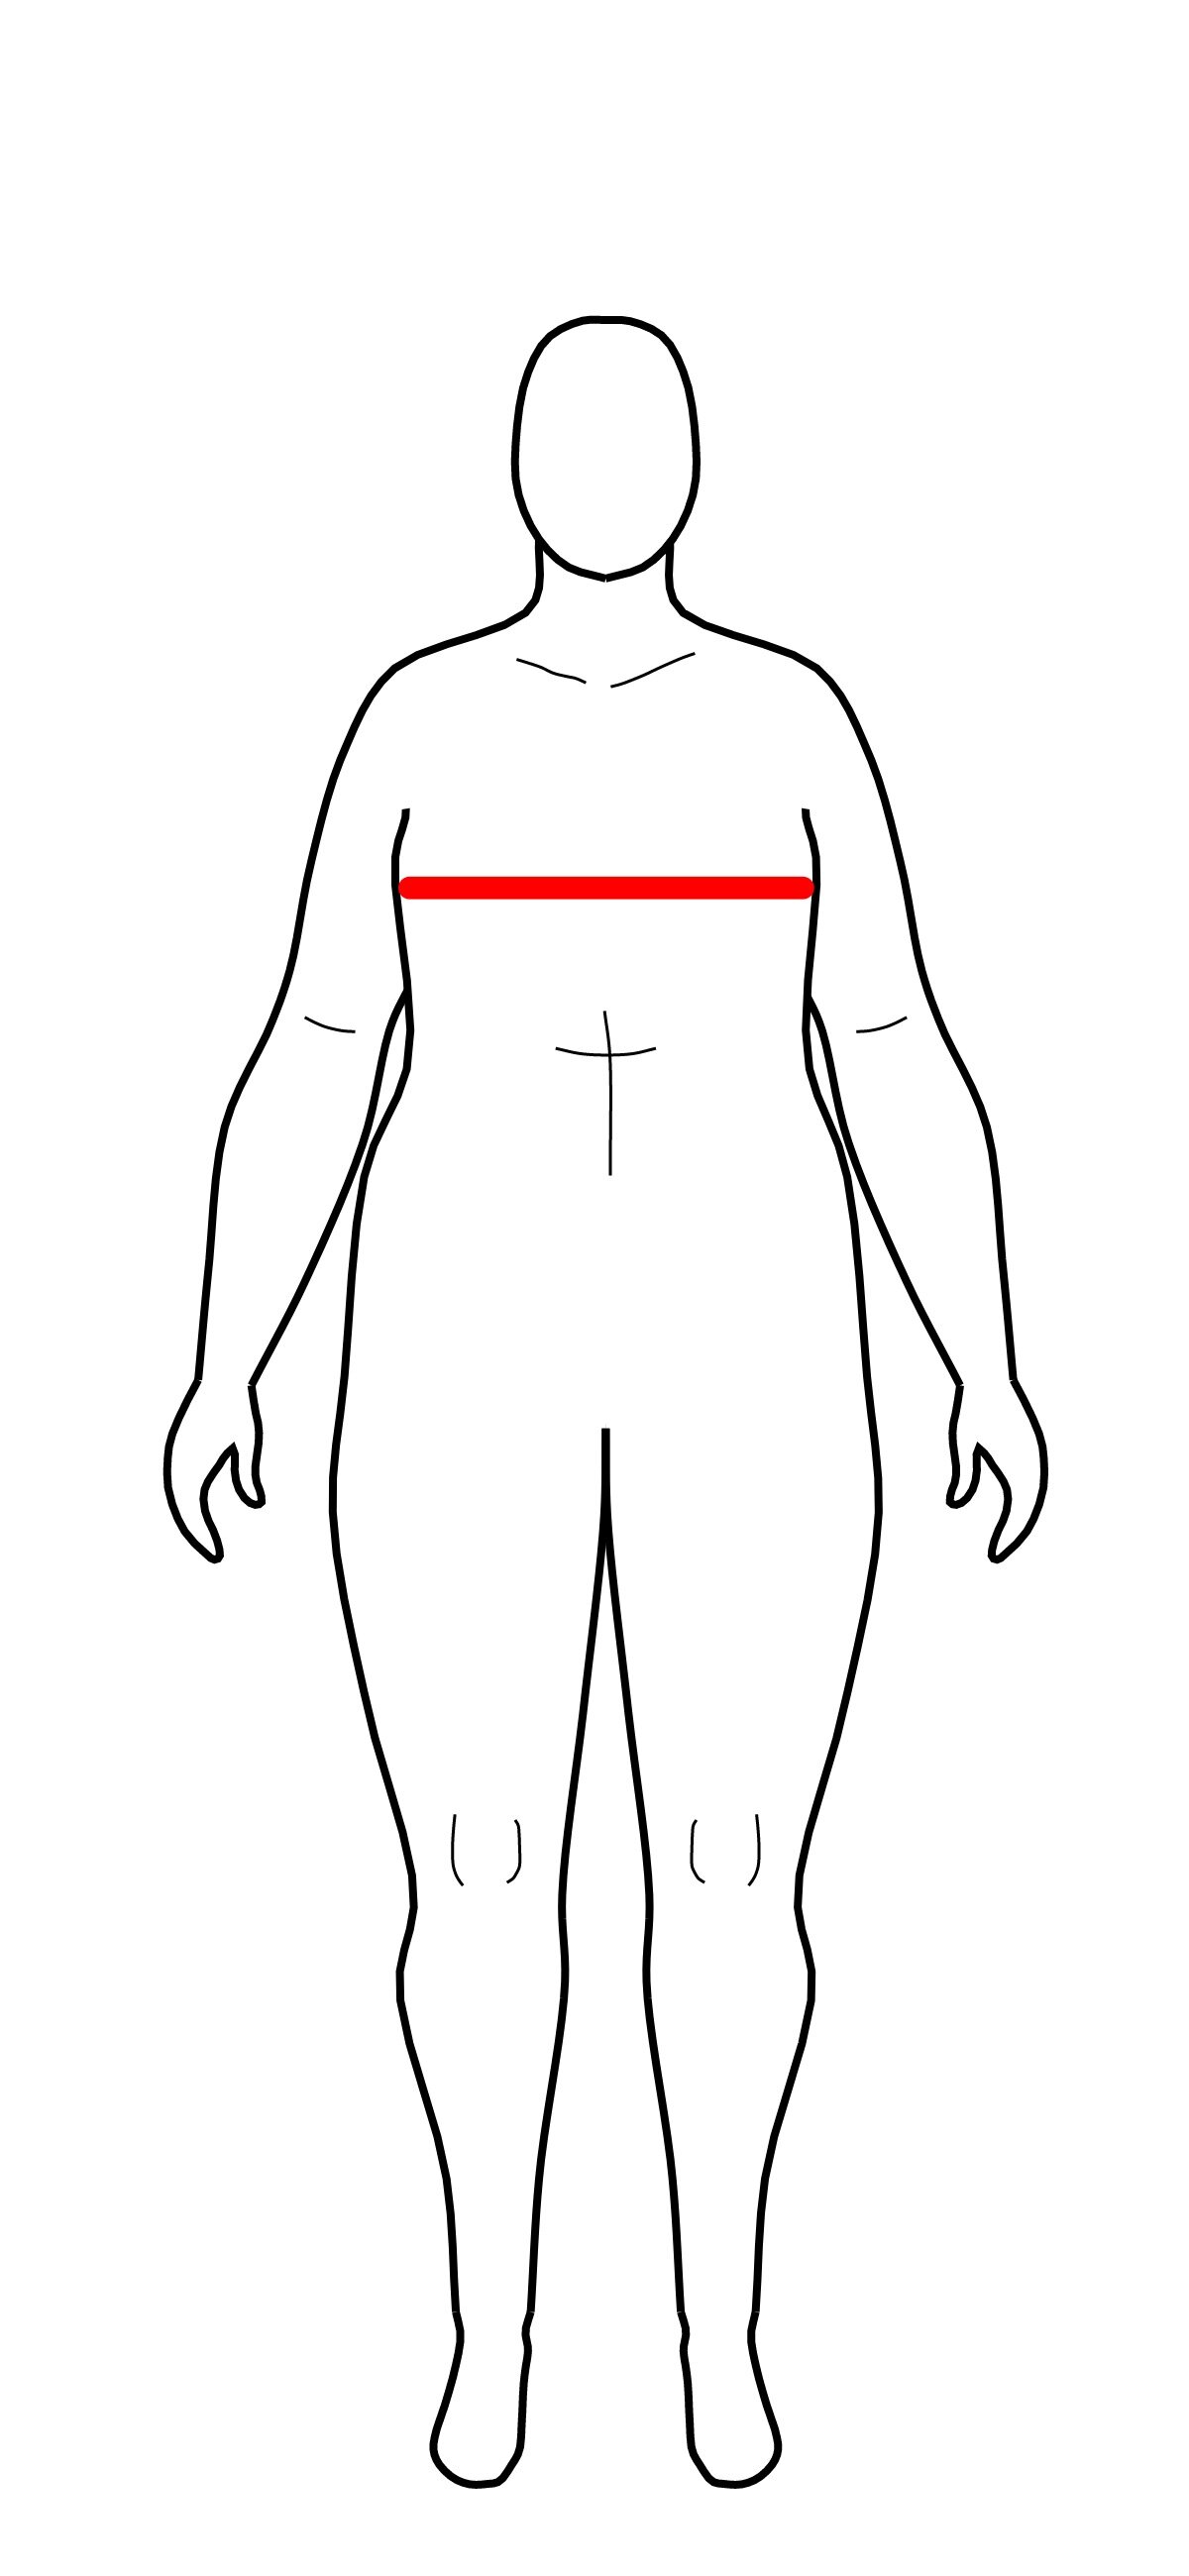
Third measurement: full hip and/or belly circumference. The goal here is to measure at the fullest part of your lower torso, which for some might be at the belly and others at the low hip. Note if this measurement is larger, smaller, or the same as the full chest circumference.
Step Two: Picking an Initial Size
This is where math starts to come in! To pick our initial size, we’re going to choose something that fits in the shoulders and neck using the upper chest circumference measurement as our “chest” measurement. For this tutorial, I’ll use my own measurements.
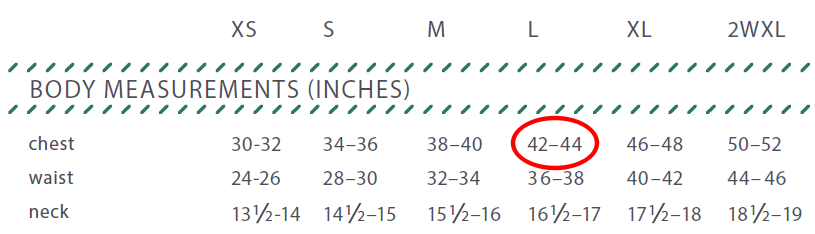
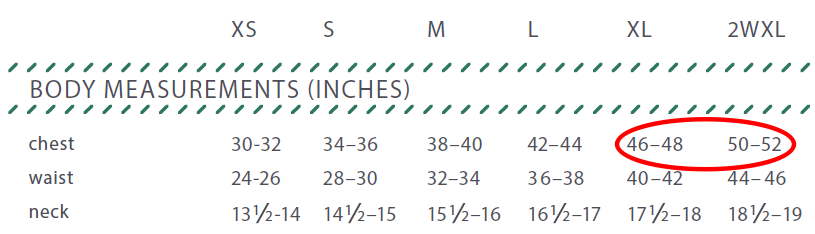
Size chart with the chest measurement corresponding to size L circled in red.
My upper chest circumference is 44”. So, I’ll use the size L as my beginning point for the upper part of the shirt. This way, the shirt will fit in my shoulders and neck.
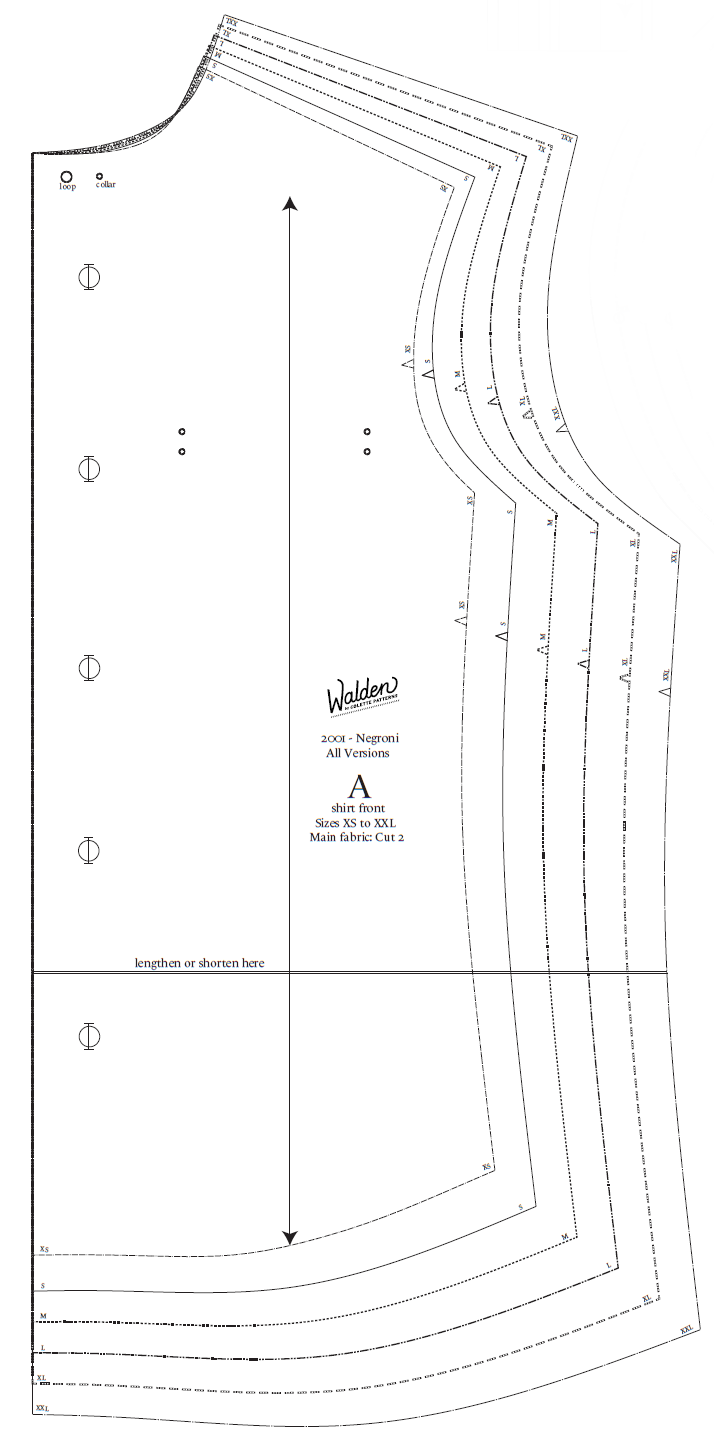
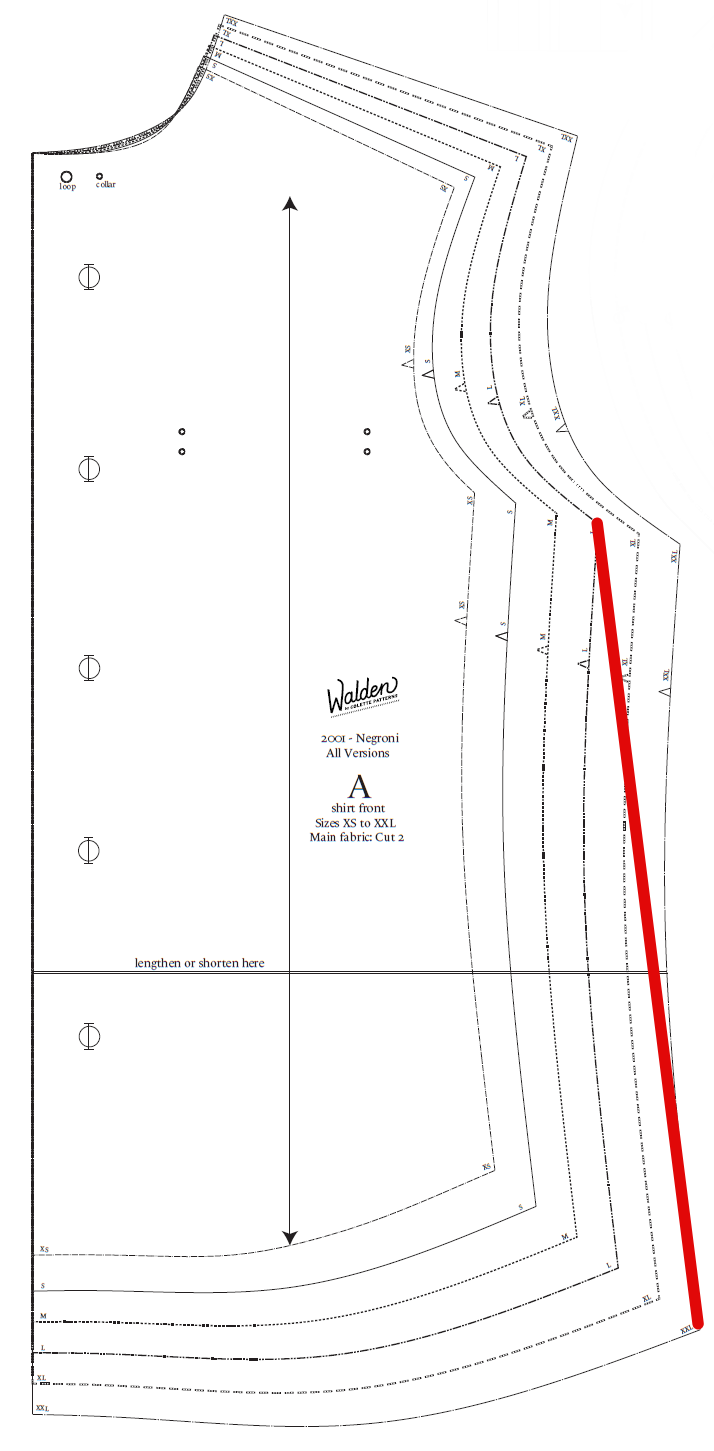
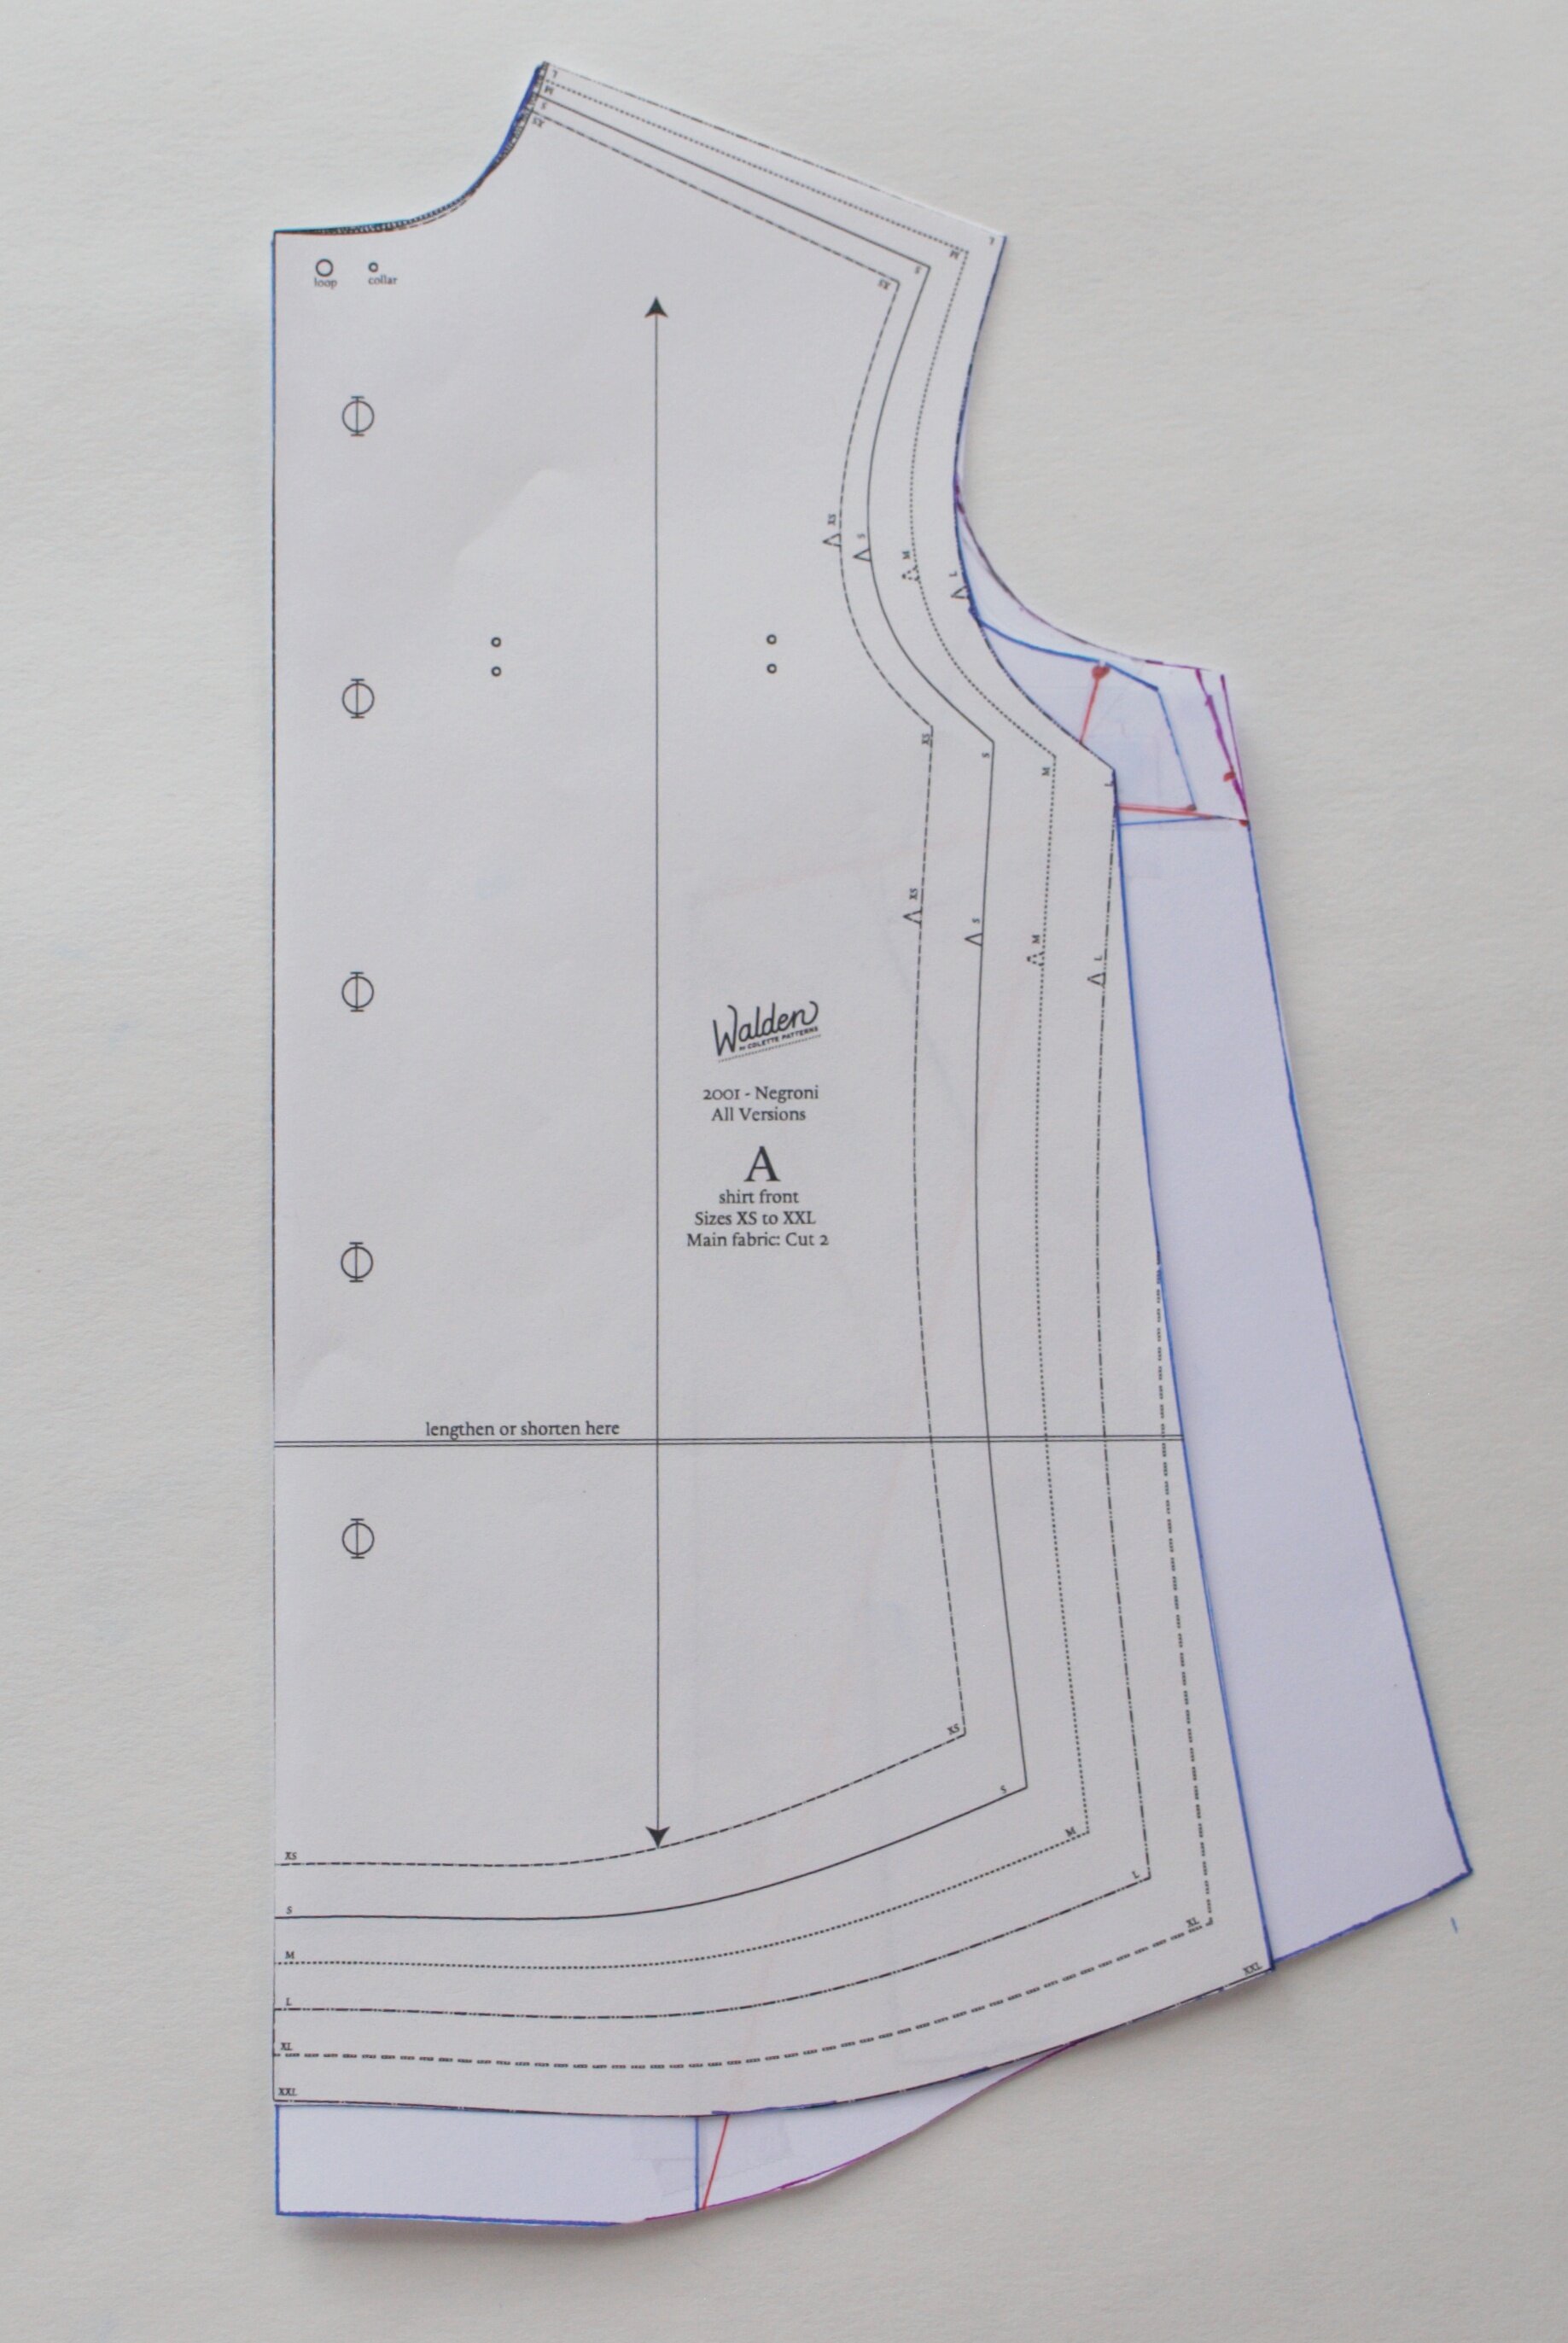
Shirt front piece from the Colette Negroni, show a slightly curved side seam.
Most “menswear” shirts have a relatively straight side seam that does not dip in very much at the waist or flare out much at the hip. However, many bodies with breast tissue have hips or a belly larger than the fullest part of the chest. In that case, a slightly more flared shape is necessary.

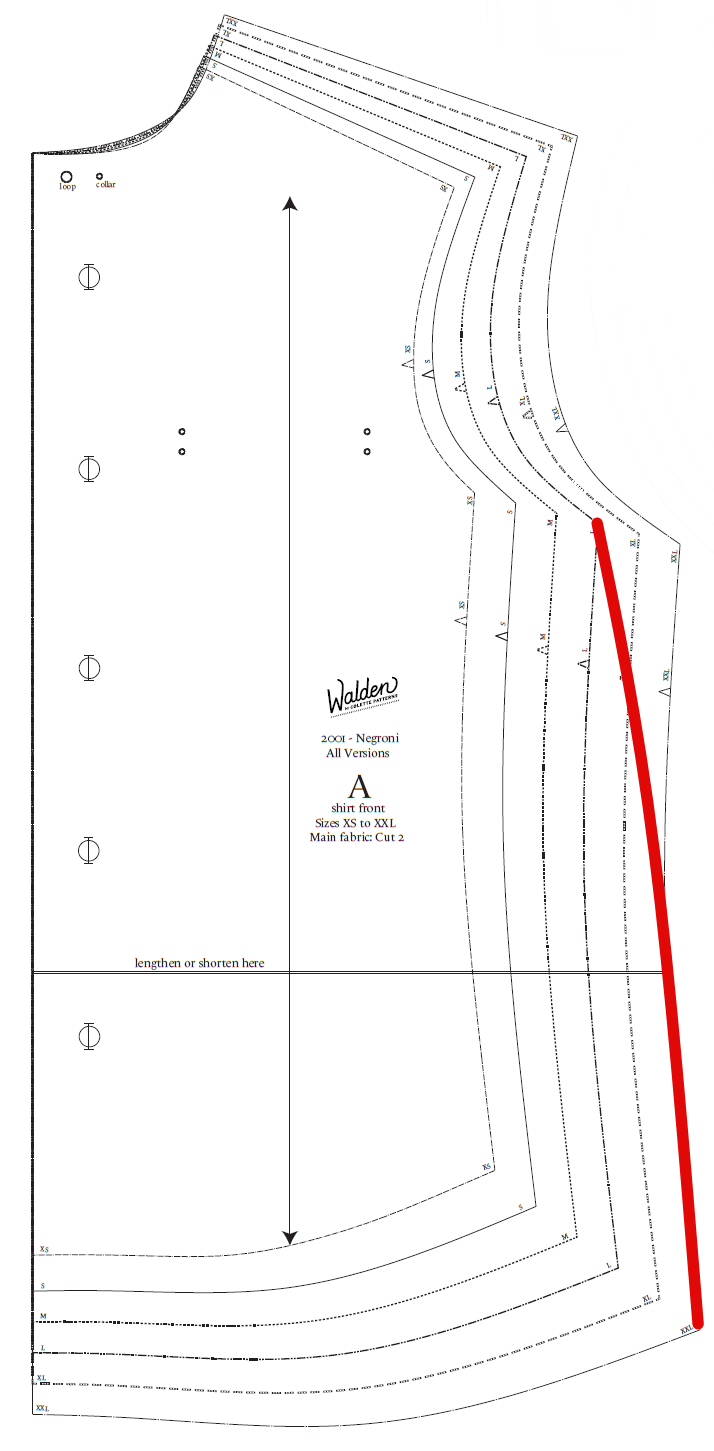
Compare the full chest to hip/belly circumference.
Compare the full chest circumference to the full hip and/or belly circumference. If the chest circumference is larger or the two are the same, proceed to use a single size as your starting point. If, however, the hip/belly circumference is larger than the chest, you’ll need to grade between sizes.
First, subtract the high chest circumference from the full chest circumference. This is the amount you’ll be adding in the next step. Because it will be added from the chest downwards, it will also give you more room in the belly and hips. My high chest is 44” and my full chest is 50”, so the difference is 6”.
Size chart with a circle indicating the hip size of 49” falling between XL and 2XL
Next, subtract that number from the full hip/belly circumference. My full hip is 55”, so subtracting 6” gives me 49”. To get your beginning point for the lower torso, compare this measurement to the hip measurement on your pattern, or, if it doesn’t have one, to the chest measurement (because the side seam is relatively straight, these will be about the same). In my pattern, that is just between an XL and a 2XL. I’ll go with the larger size for plenty of ease.
Step Three: Trace and/or Cut Your Pattern Pieces
I prefer to trace everything so I can go back to the original if need be, but you do you! Cut out all of your pattern pieces using the sizes worked out here.
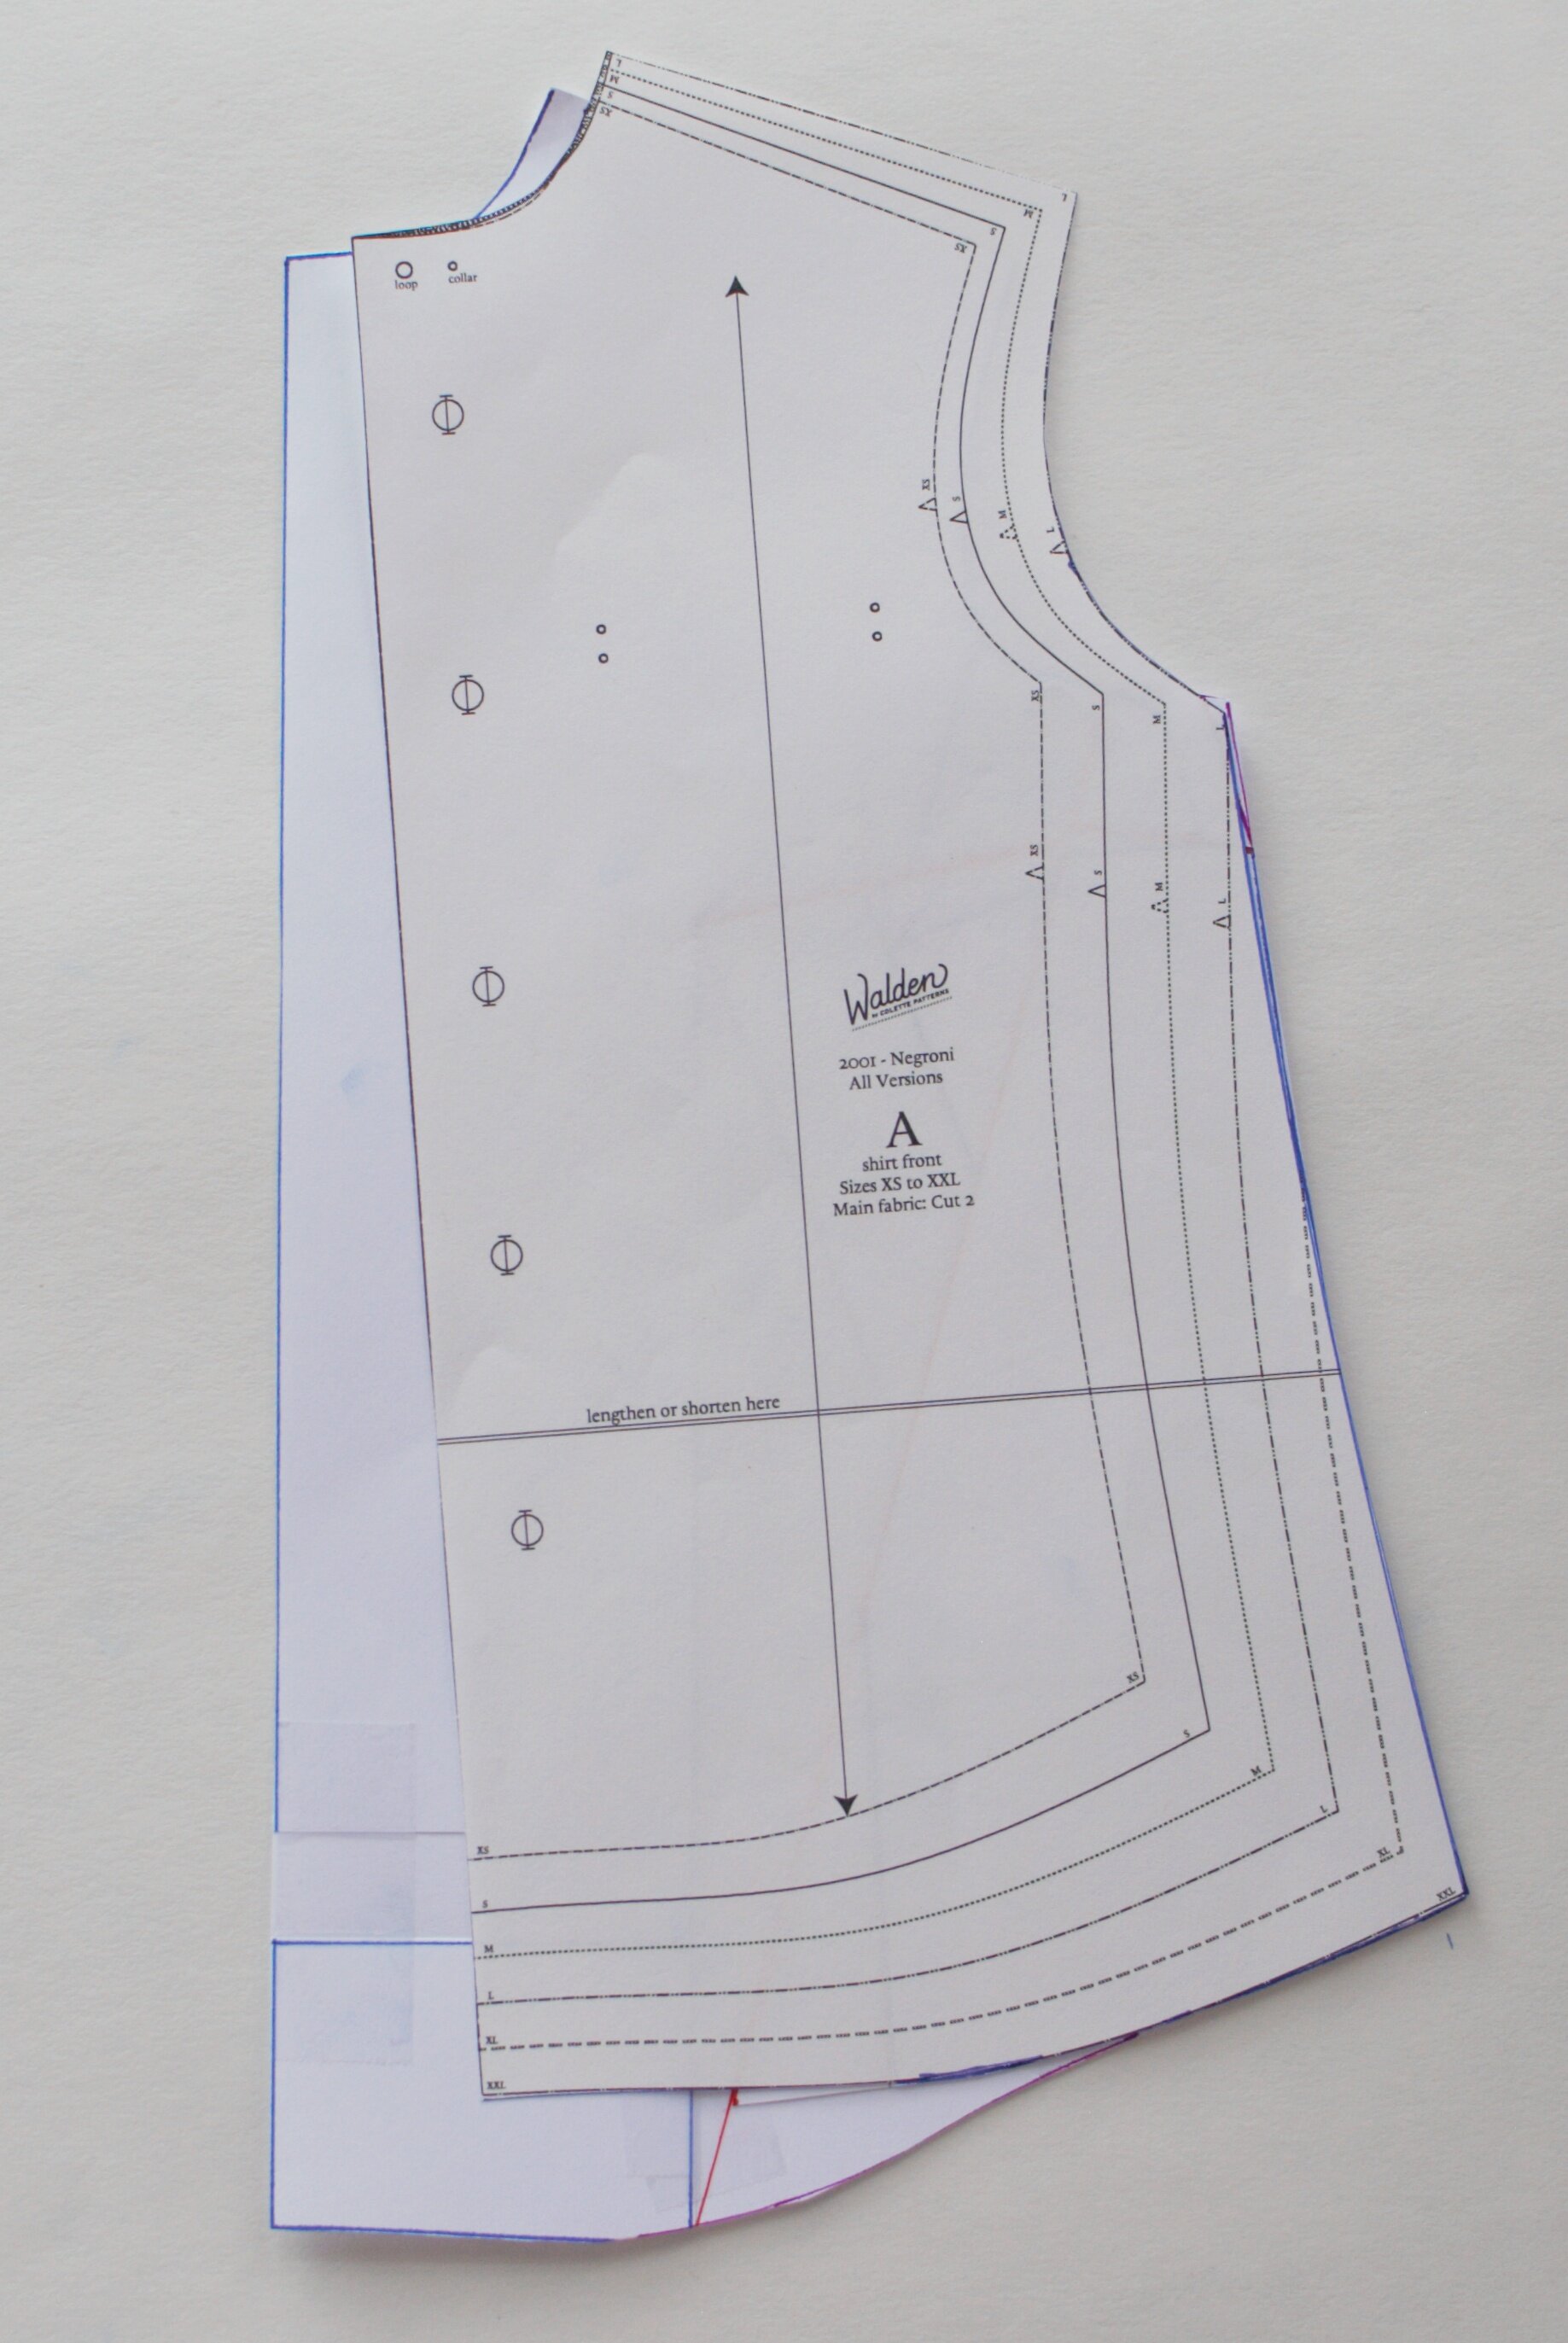
For the rest of this tutorial, we’ll only be working with the shirt front piece, which should be cut using the sizes determined in the last step (L>2XL here).

Grade at the side seam between your upper torso size (Size L here) and your lower torso size (Size 2XL here) by sketching a line between the two sizes. You can connect them with a straight line for a boxier profile or a slightly concave line if you’d like it to curve inward at the waist a little.
If the fullest part of your lower torso is your high belly, rather than your hips, you might grade a slightly convex curve or meet the lower torso size higher up.
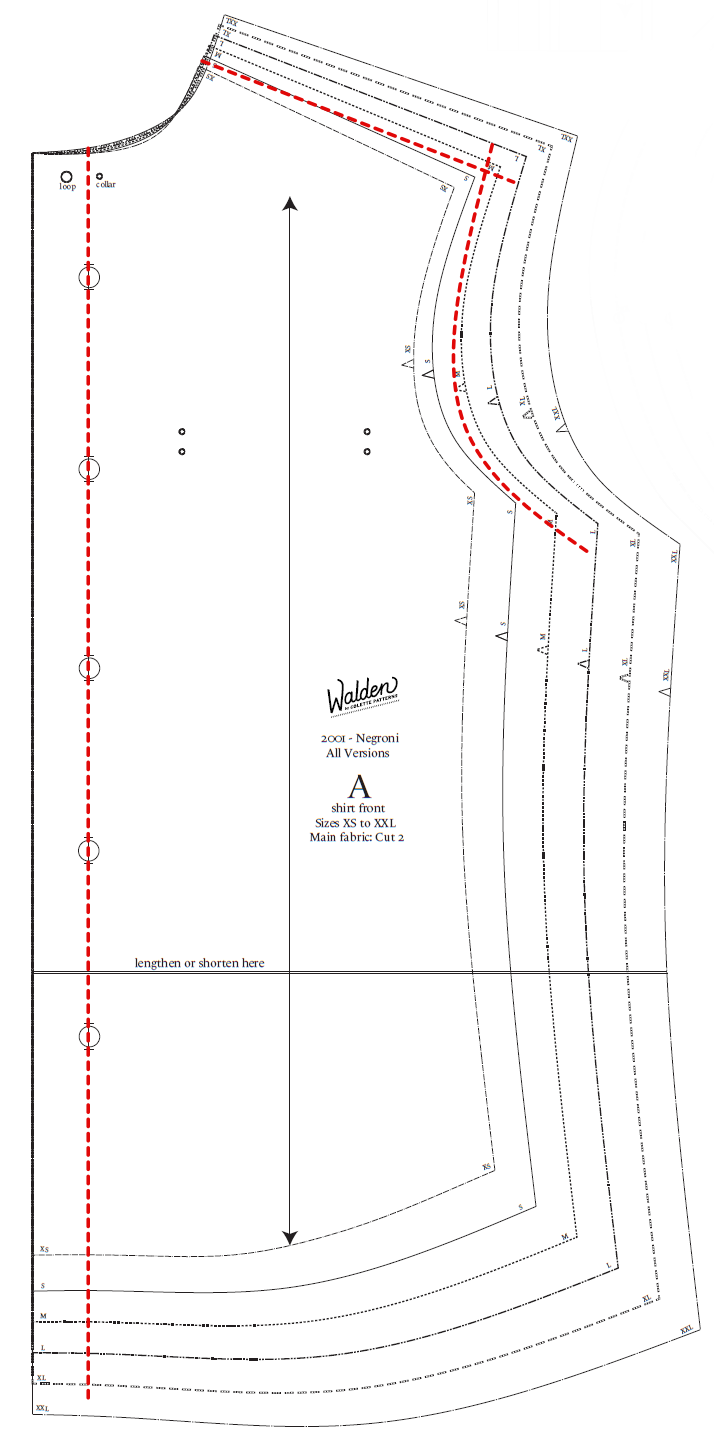
A shirt front pattern piece with center front and shoulder and armscye seams drawn in.
On your shirt front piece, draw in: 1. The center front line (patterns often include button/buttonhole markings on the center front); 2. The seam allowance of the shoulder; 3. The seam allowance of the armscye (armhole).
Cut the rest of the pieces as follows:
The shirt back piece should be cut using the same sizes, including any grading and side seam adjustments you made.
Any button bands or front facings should be cut using the width/upper part of your upper torso size (Size L here) but the length of your lower torso size (Size 2XL here). Again, you might wish to adjust the length later but I recommend starting here.
The rest of the pieces (yoke, collar/collar stand, sleeves, sleeve plackets, cuffs) should be cut using the upper torso size only.
Step Four: Find your apex
More math! Start with the difference between your upper chest and full chest measurements (we used this above already – mine is 50”-44” = 6”). Divide that number in two (because you’ll be making the adjustment on one half of the front, then cutting two.) Mine is 3”. This is the amount you’ll add in width in this step.
Wearing the undergarment you’d like to wear with your shirt, take your shirt front piece cut out in the last step. Hold it up against your body, lining up the seam line you drew in at the should with the top of your shoulder and the center front line with the center of your body. Having a friend to help hold this up is useful! The side seam will not yet wrap around to the side of your body.
We want to find and mark the “apex” of your chest with a dot. The “apex” is less obvious if you’re wearing something that flattens or minimizes your chest, but don’t worry, because there are no darts to place, it doesn’t need to be exact.
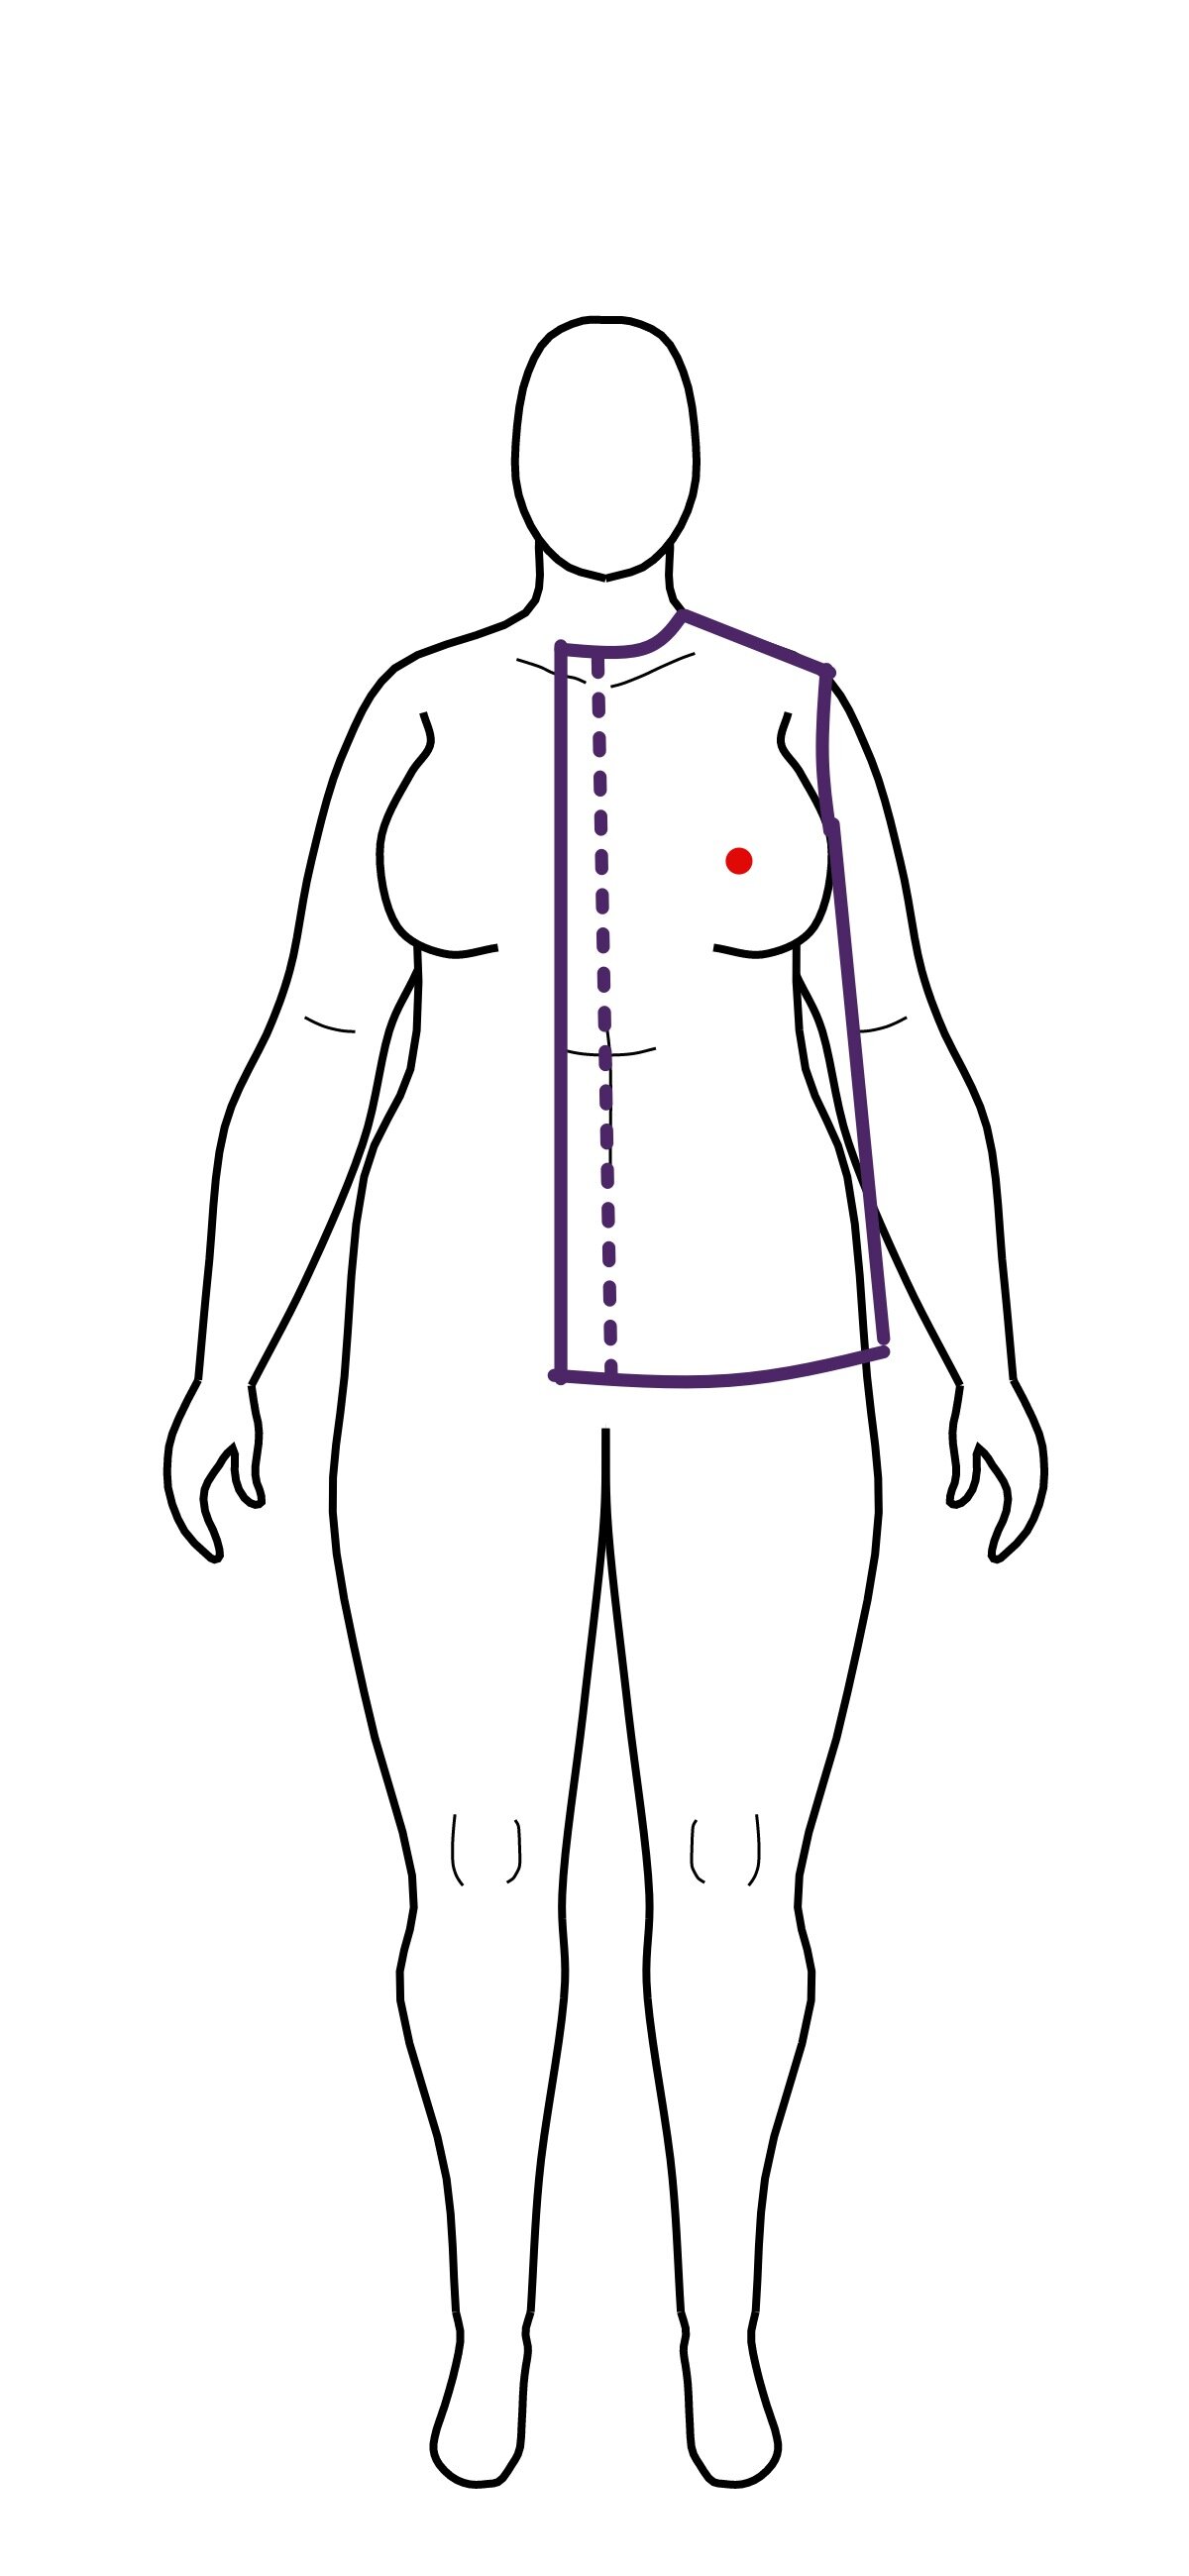
If you’re wearing a bra or something that projects your chest tissue forward, the “apex” is the most-forward part of your chest. On some people this is the nipple, but not on everyone. The important part is that where you mark your “apex” is level with the fullest part of your chest as measured in step one.
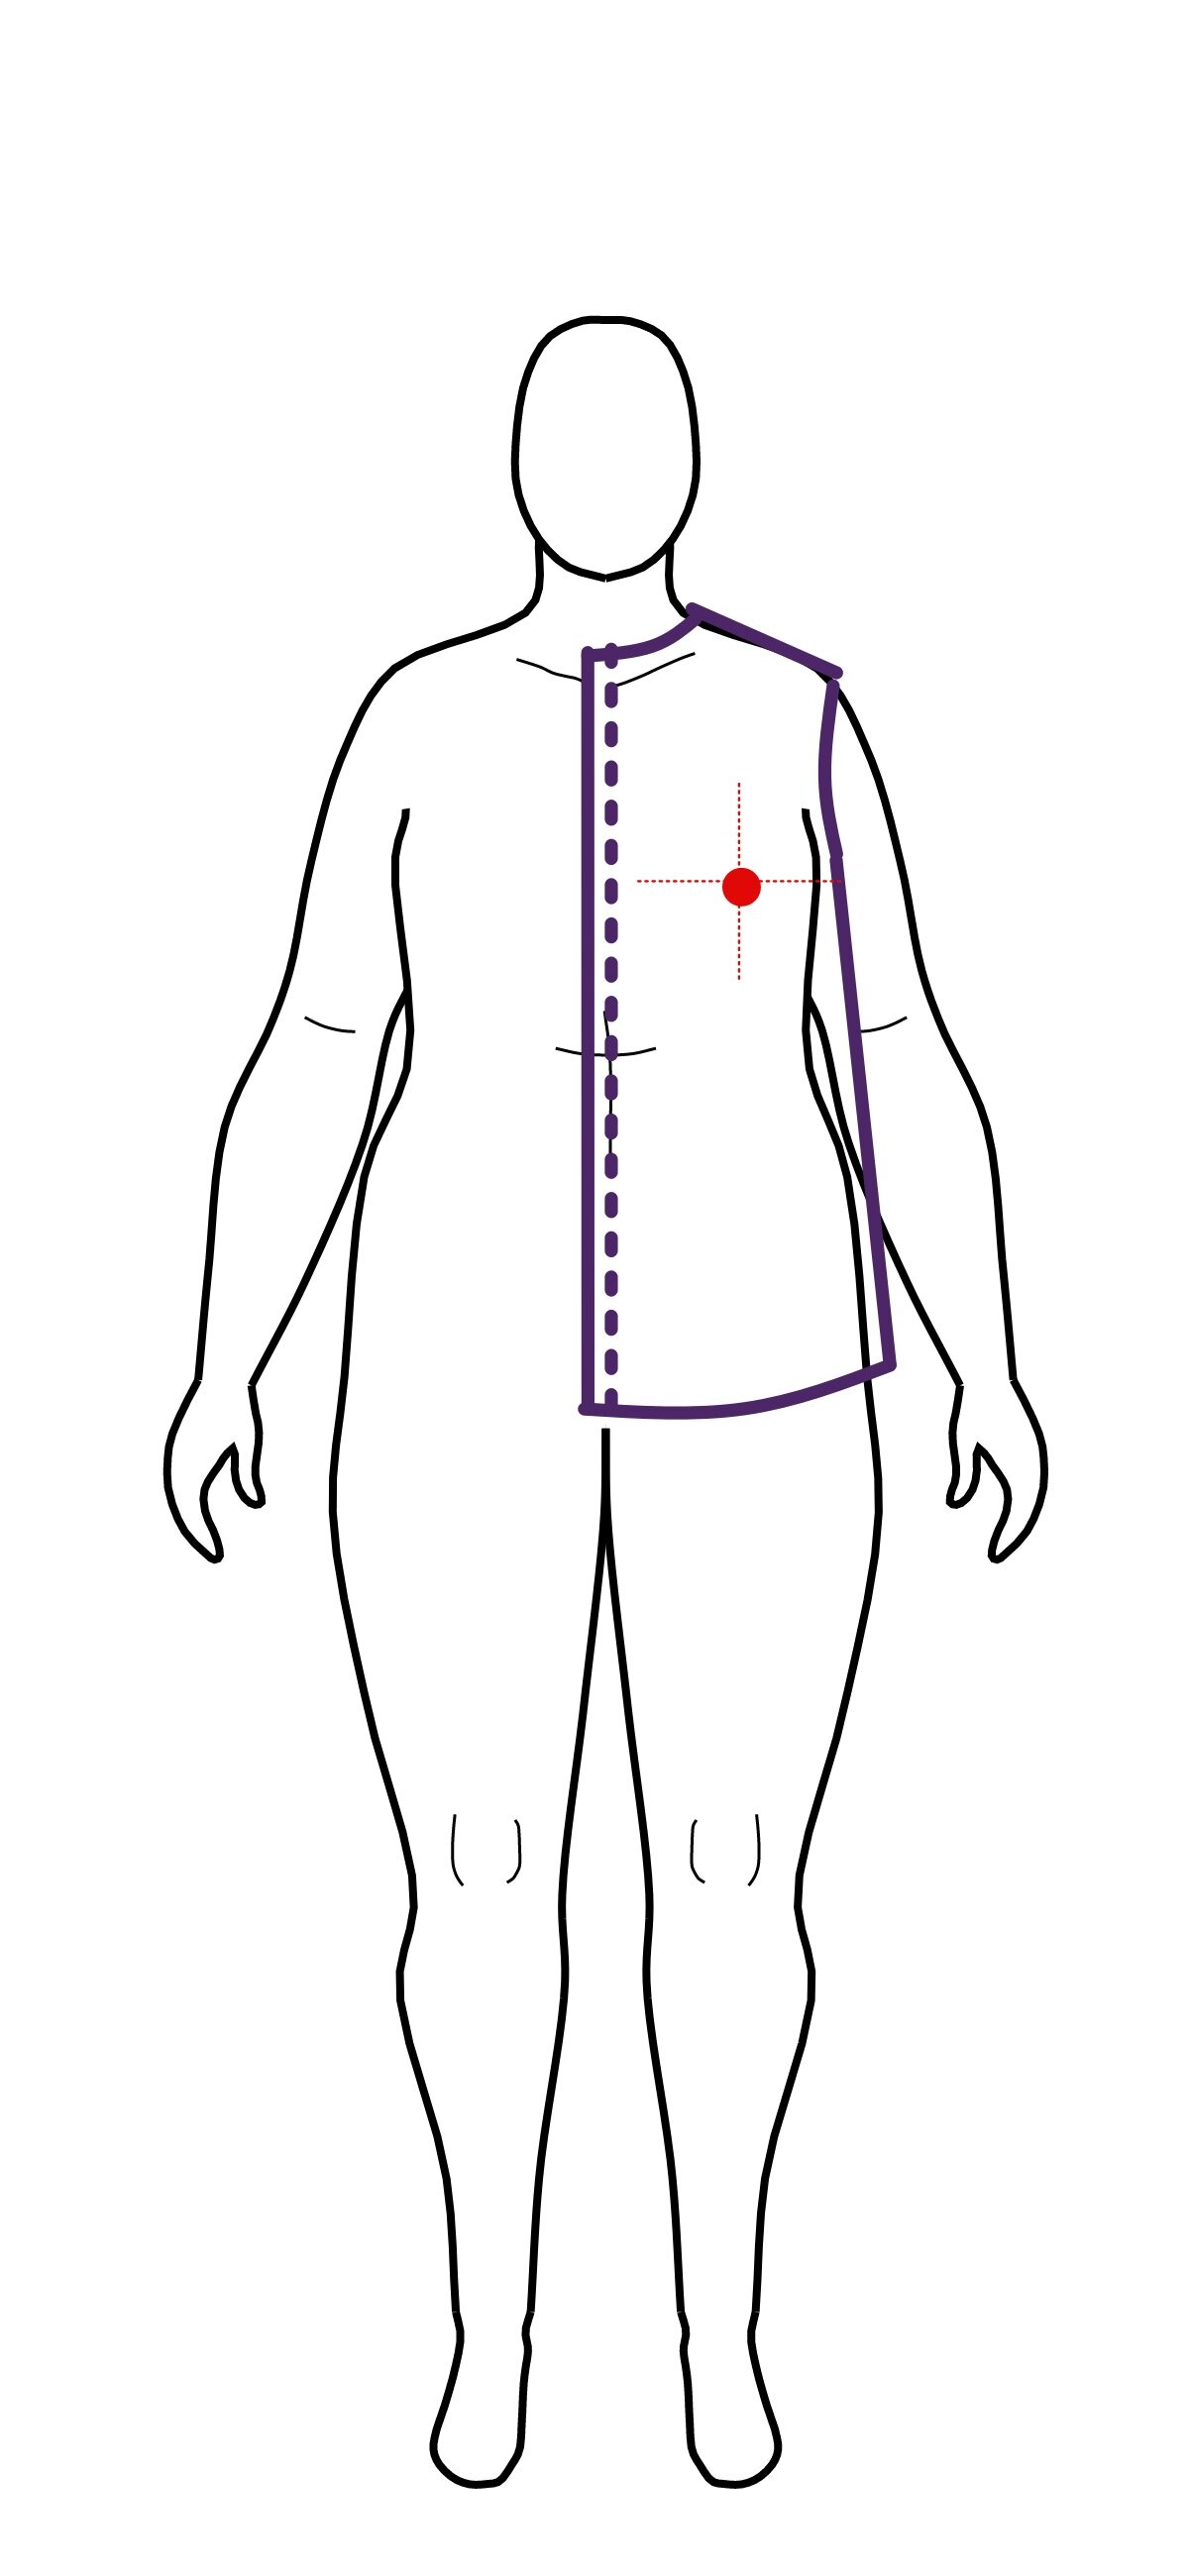
If you’re wearing a binder or something that flattens and minimizes the chest tissue, imagine your apex as the cross point where two lines meet: a horizontal line marking the widest part of your chest (where your measuring tape was in step one) and a vertical line going straight up and down from your nipple when you’re not wearing anything. So, wherever your nipple sits when you haven’t redistributed chest tissue under your binder. Draw a little dot where those two lines meet.
If you’d like to wear this shirt with a bra or a binder, use the “apex” point that sits higher – usually the bra version.
Step Five: Full Chest Adjustment
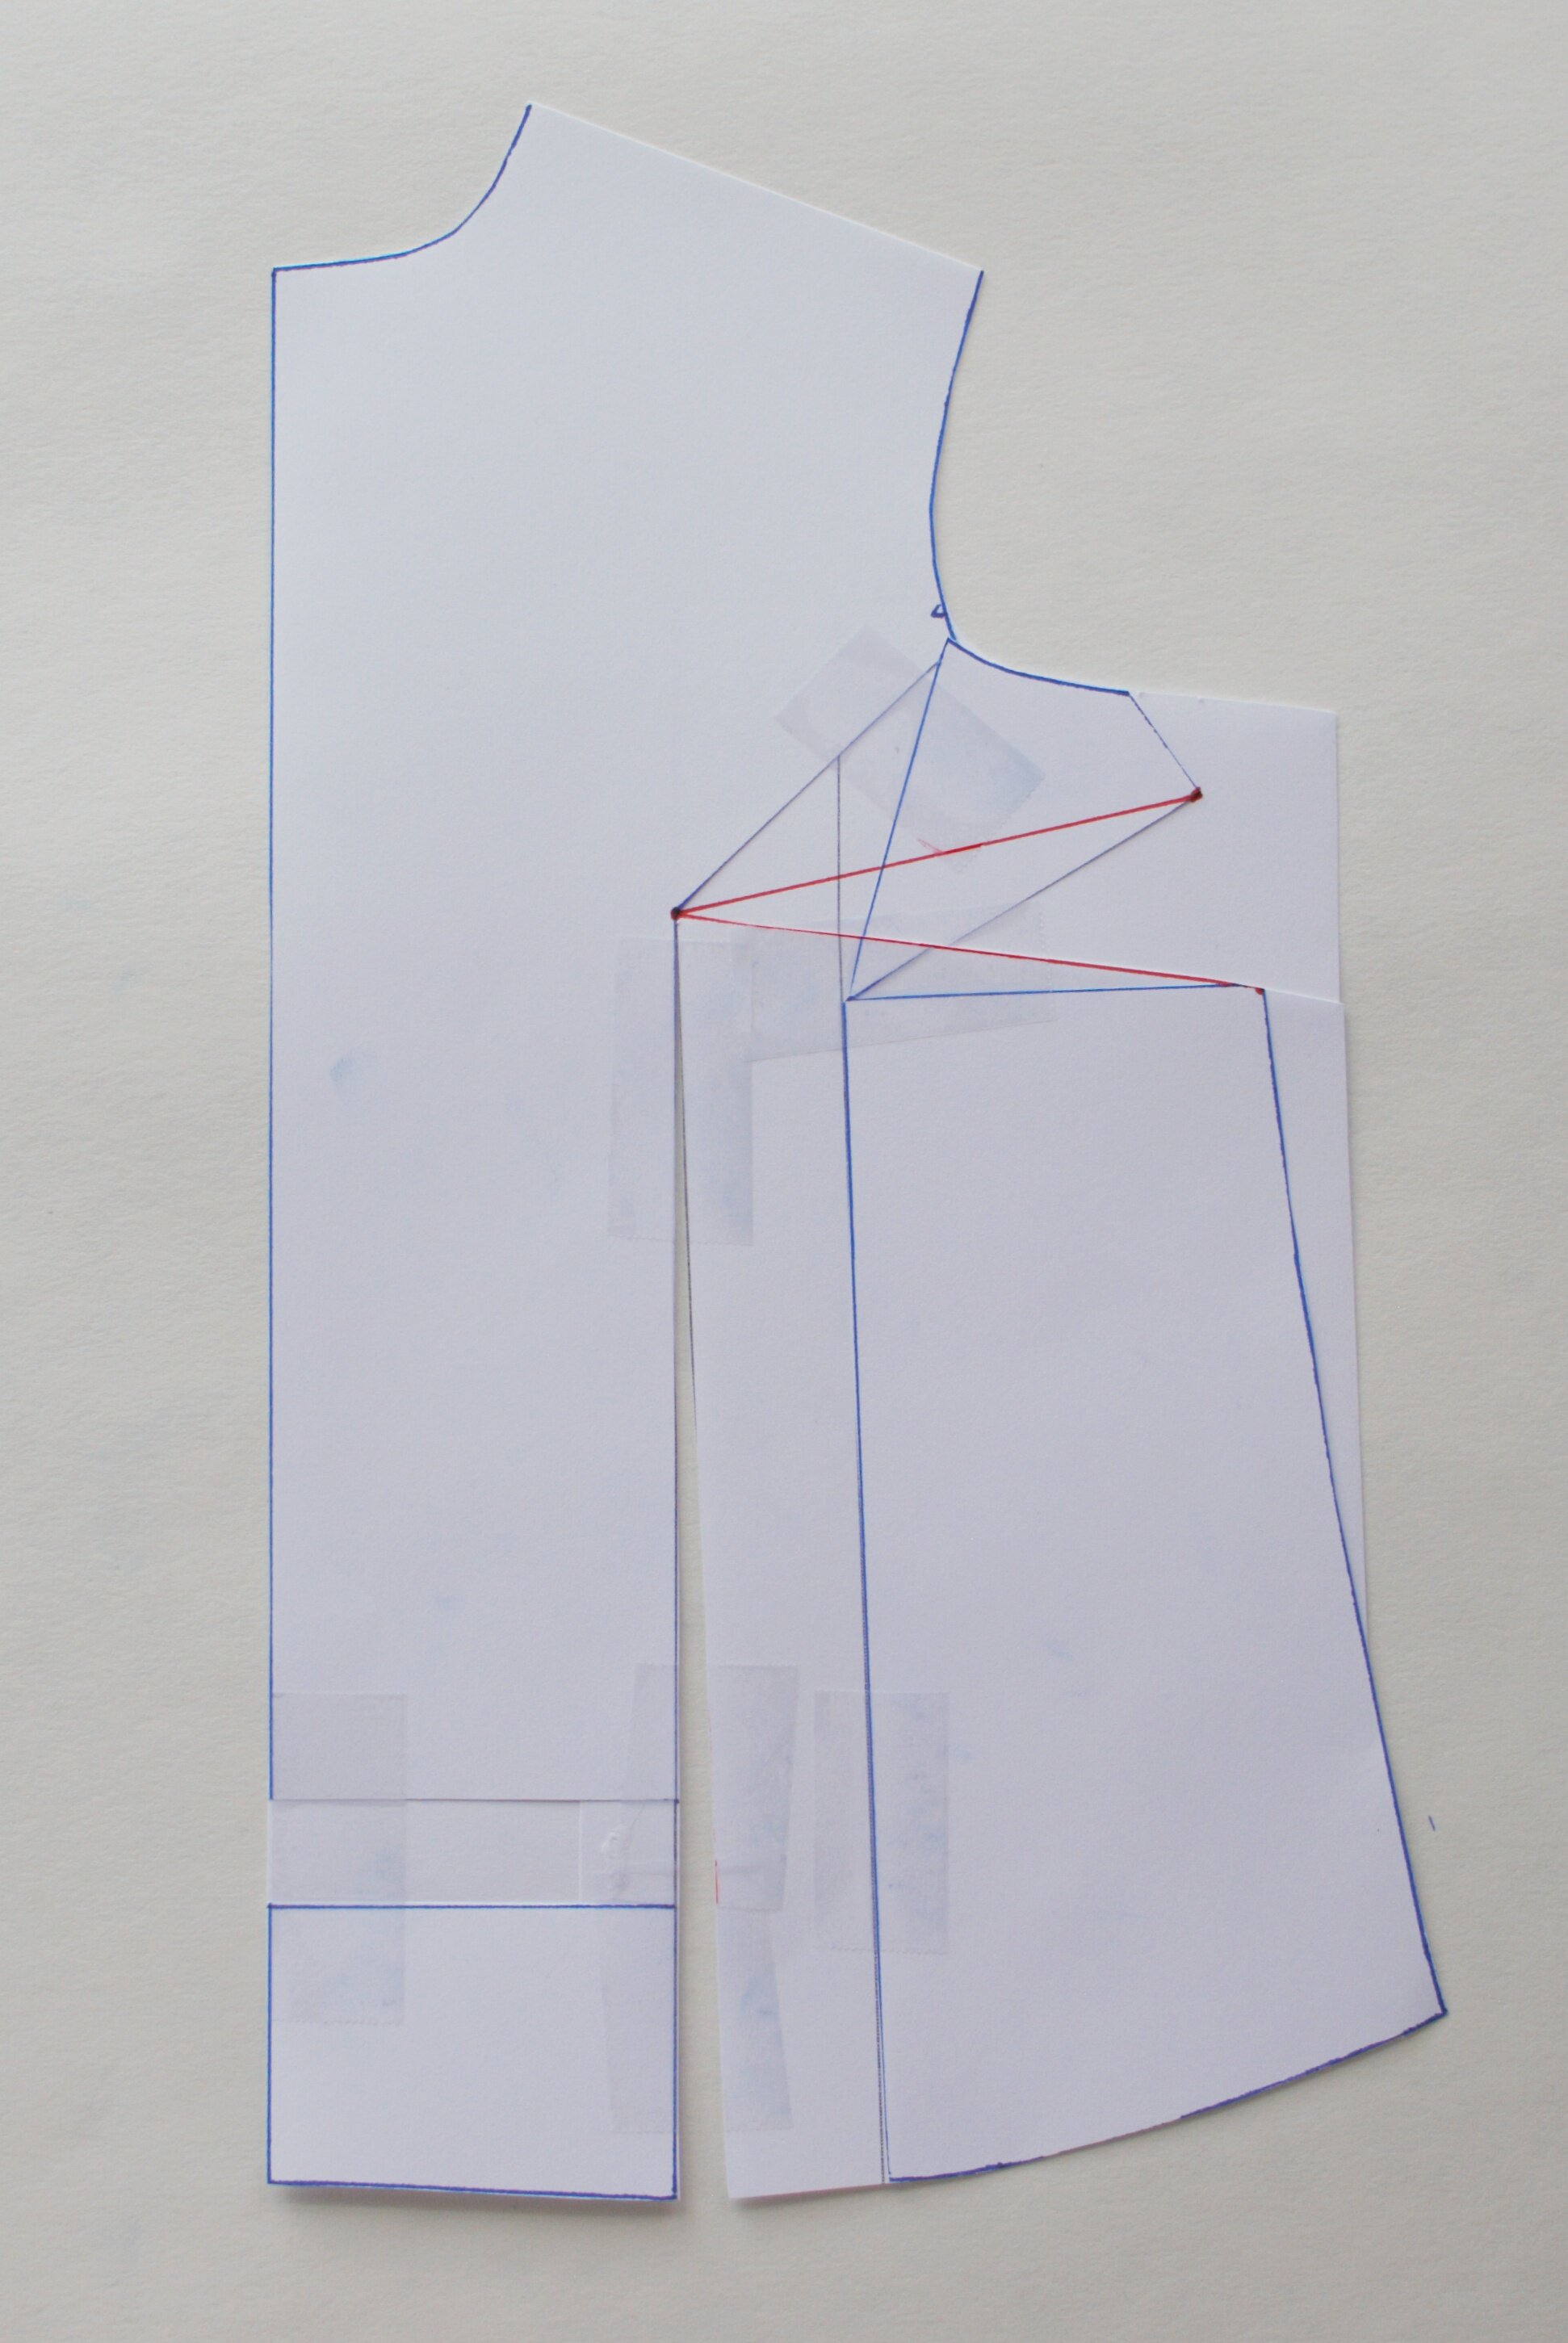
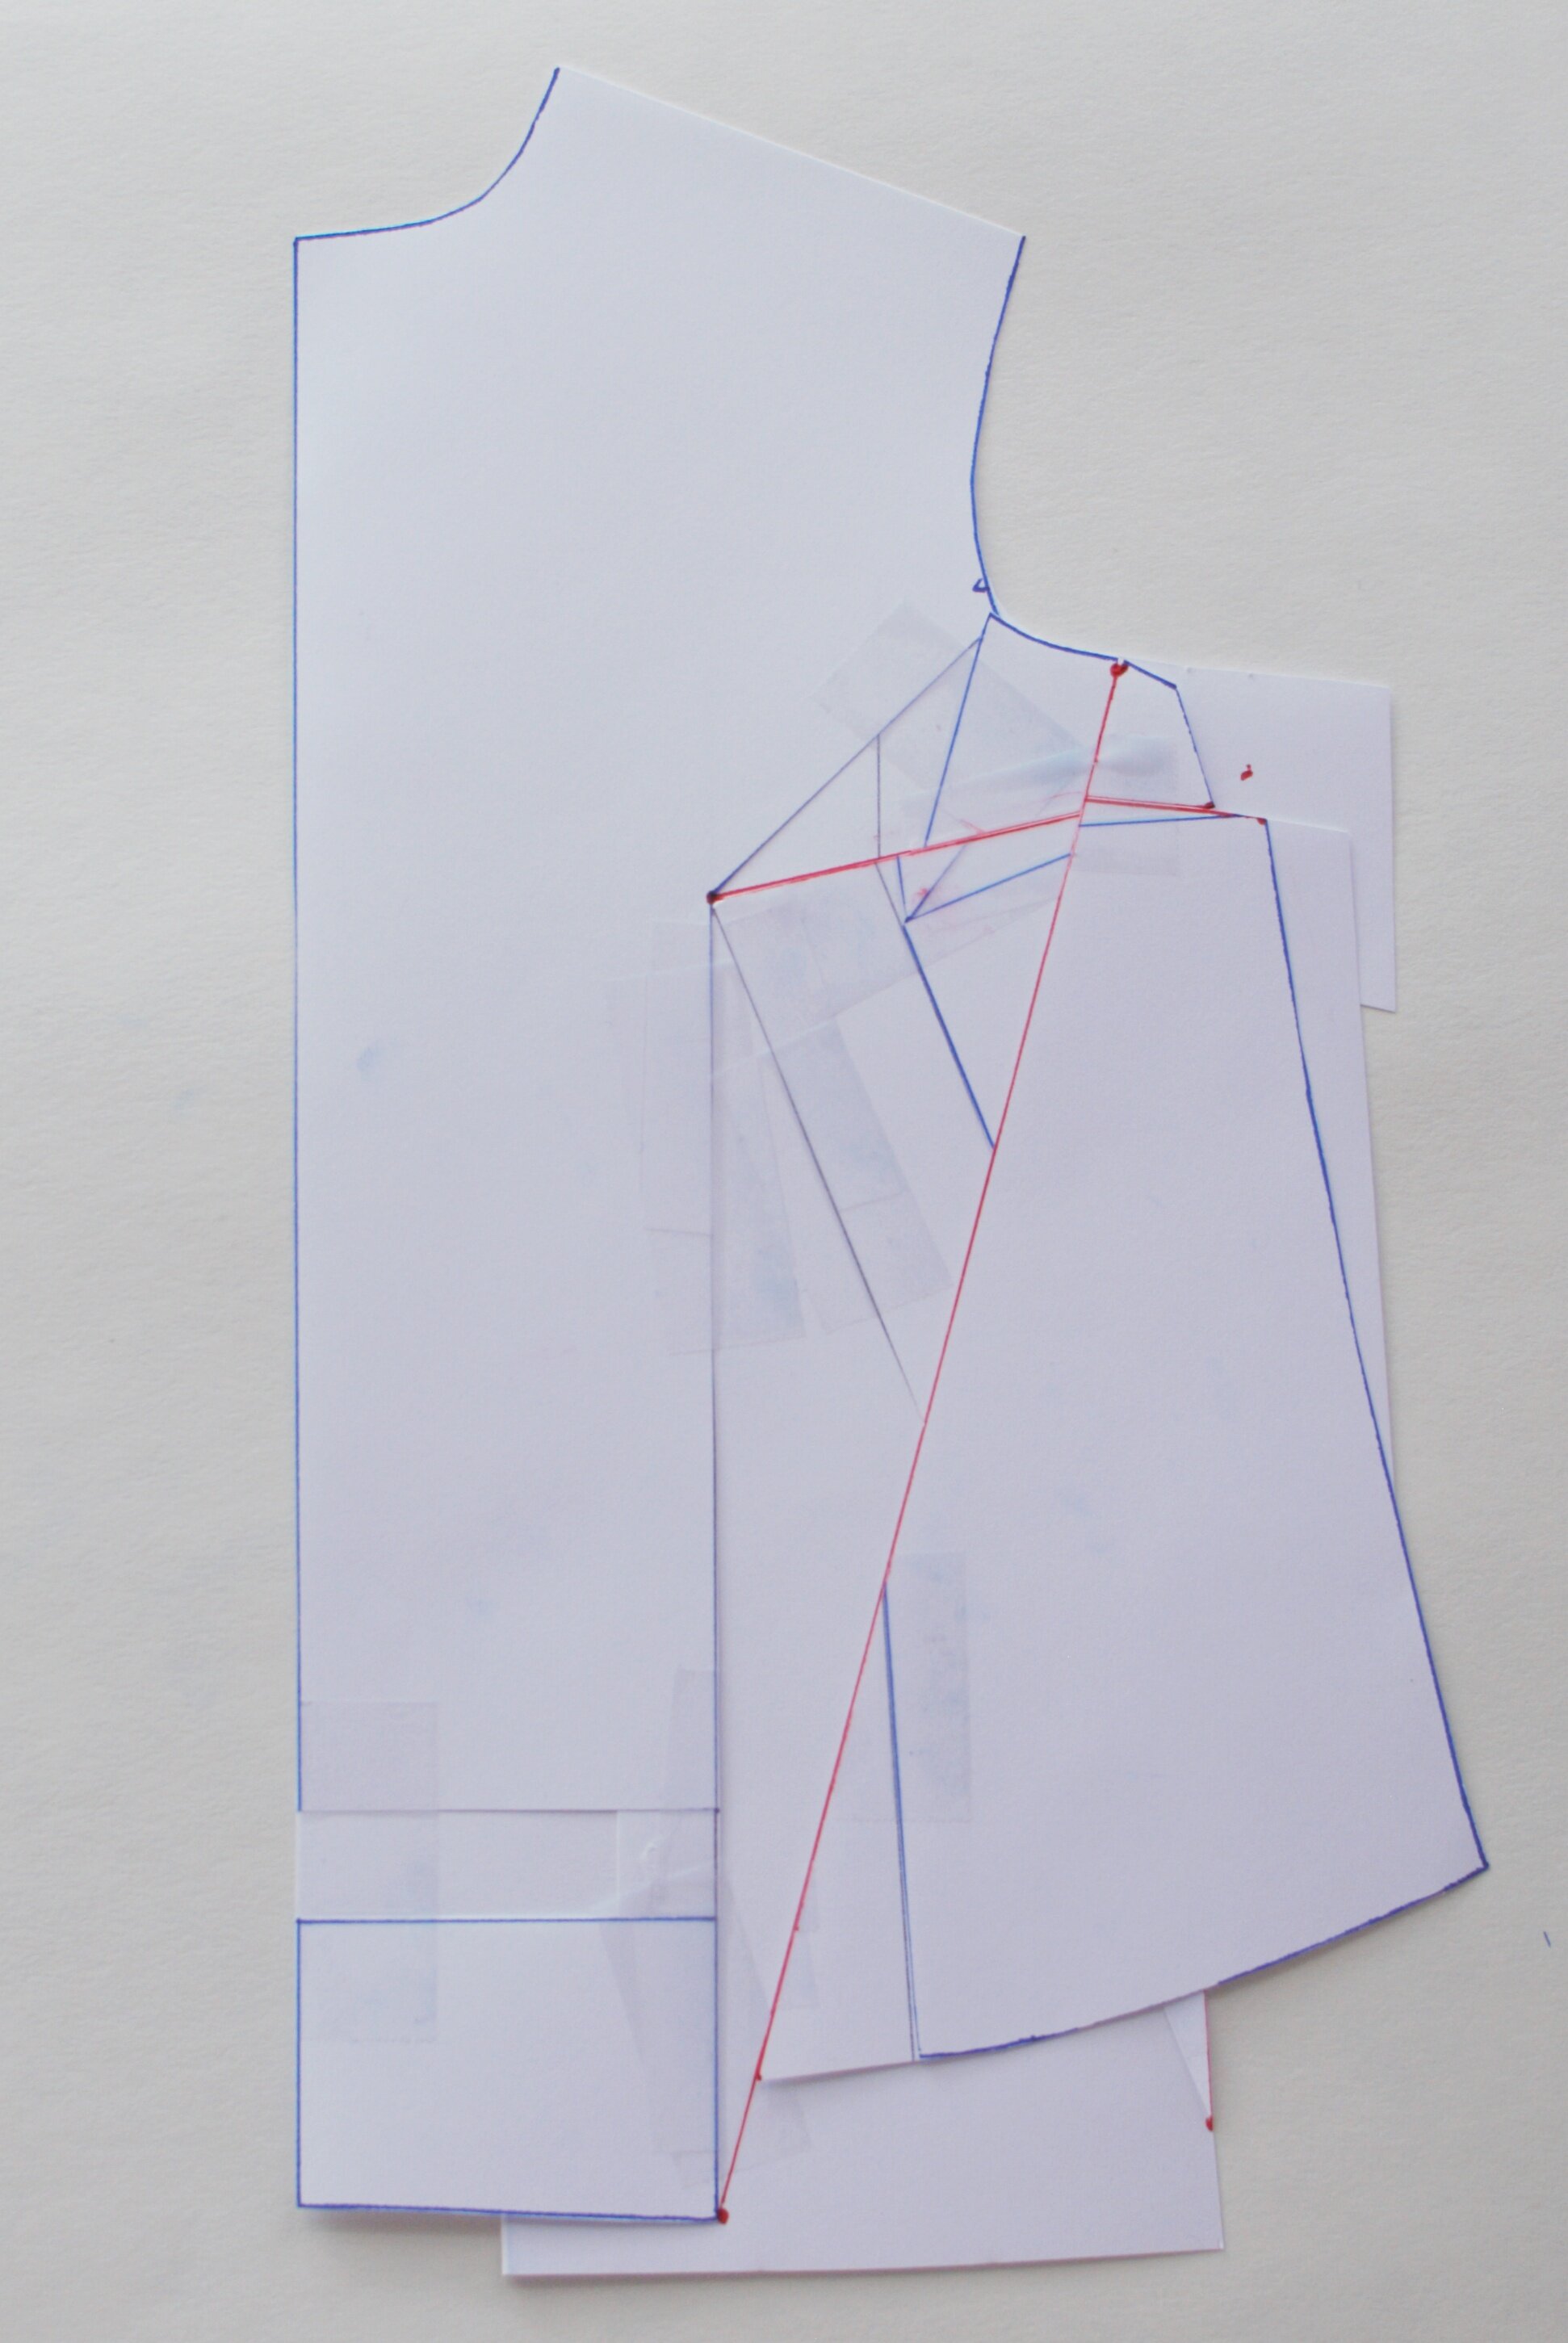
With your shirt front piece on your table, draw three lines:
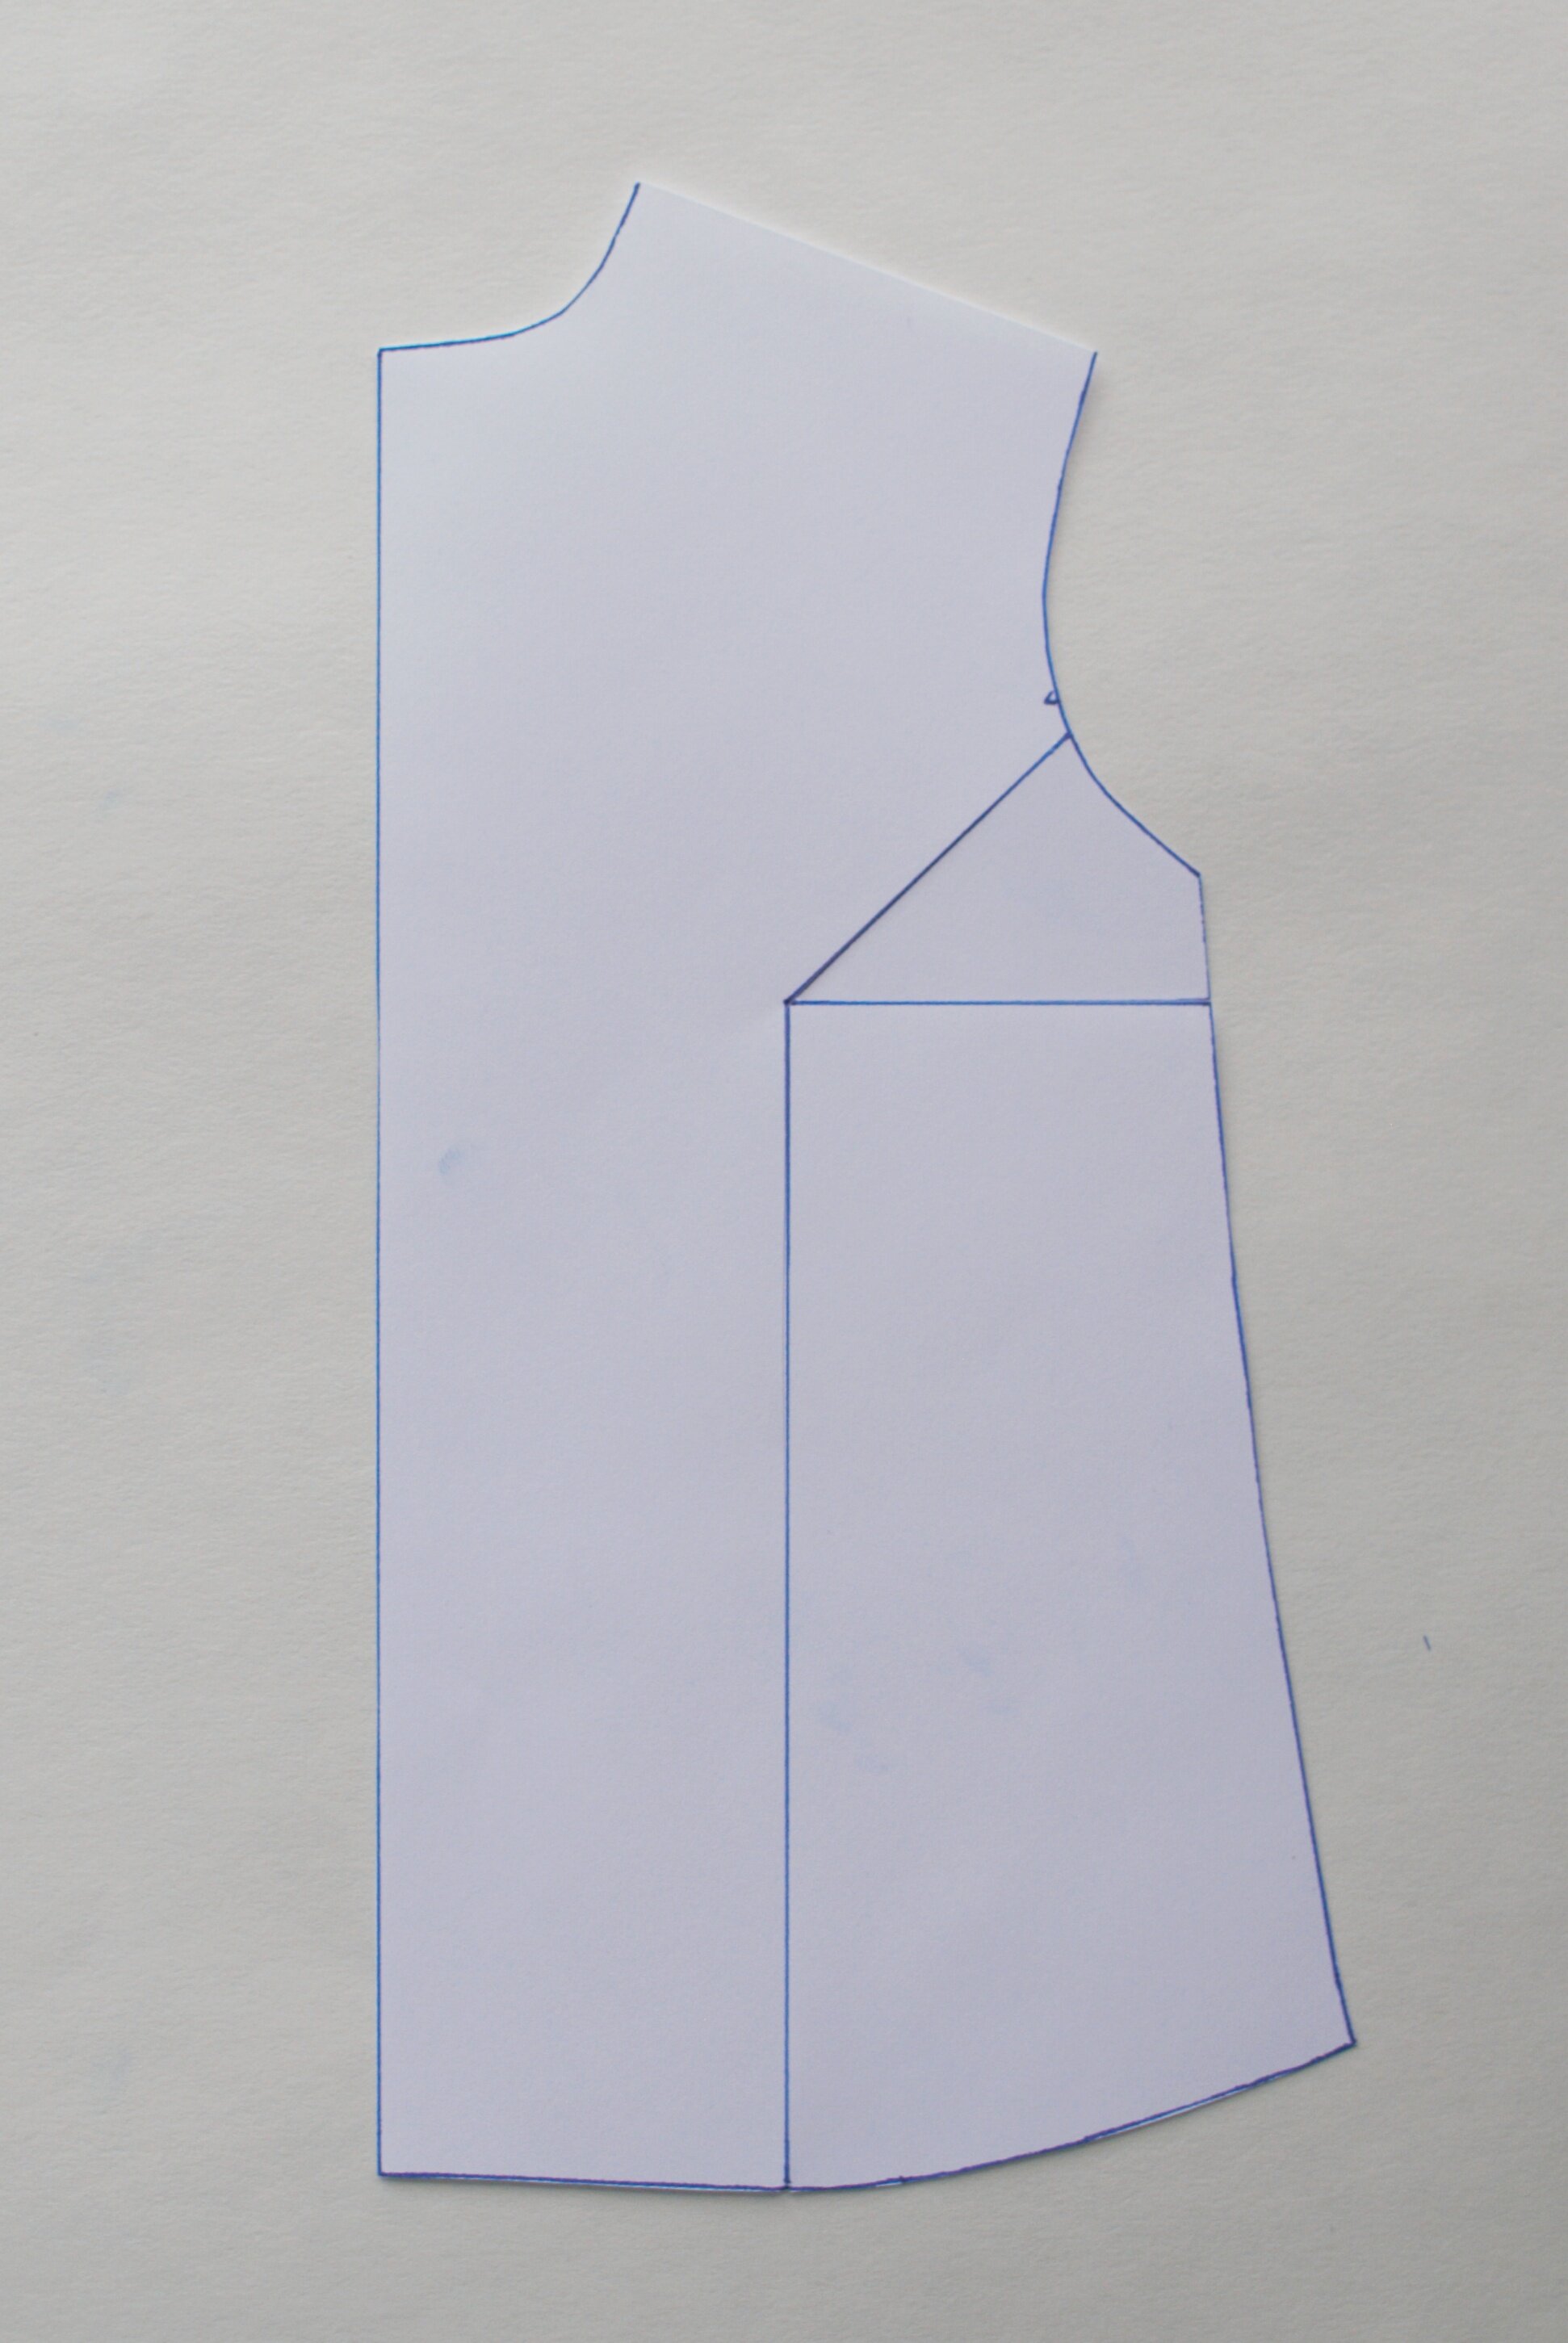
Draw three lines to the apex
One parallel to the center front that begins at the hem and ends at the apex point
One perpendicular to that line that begins at the apex and ends at the side seam
One at an angle beginning at the apex and ending about 1/3 of the way up the armscye, on the seamline you drew in
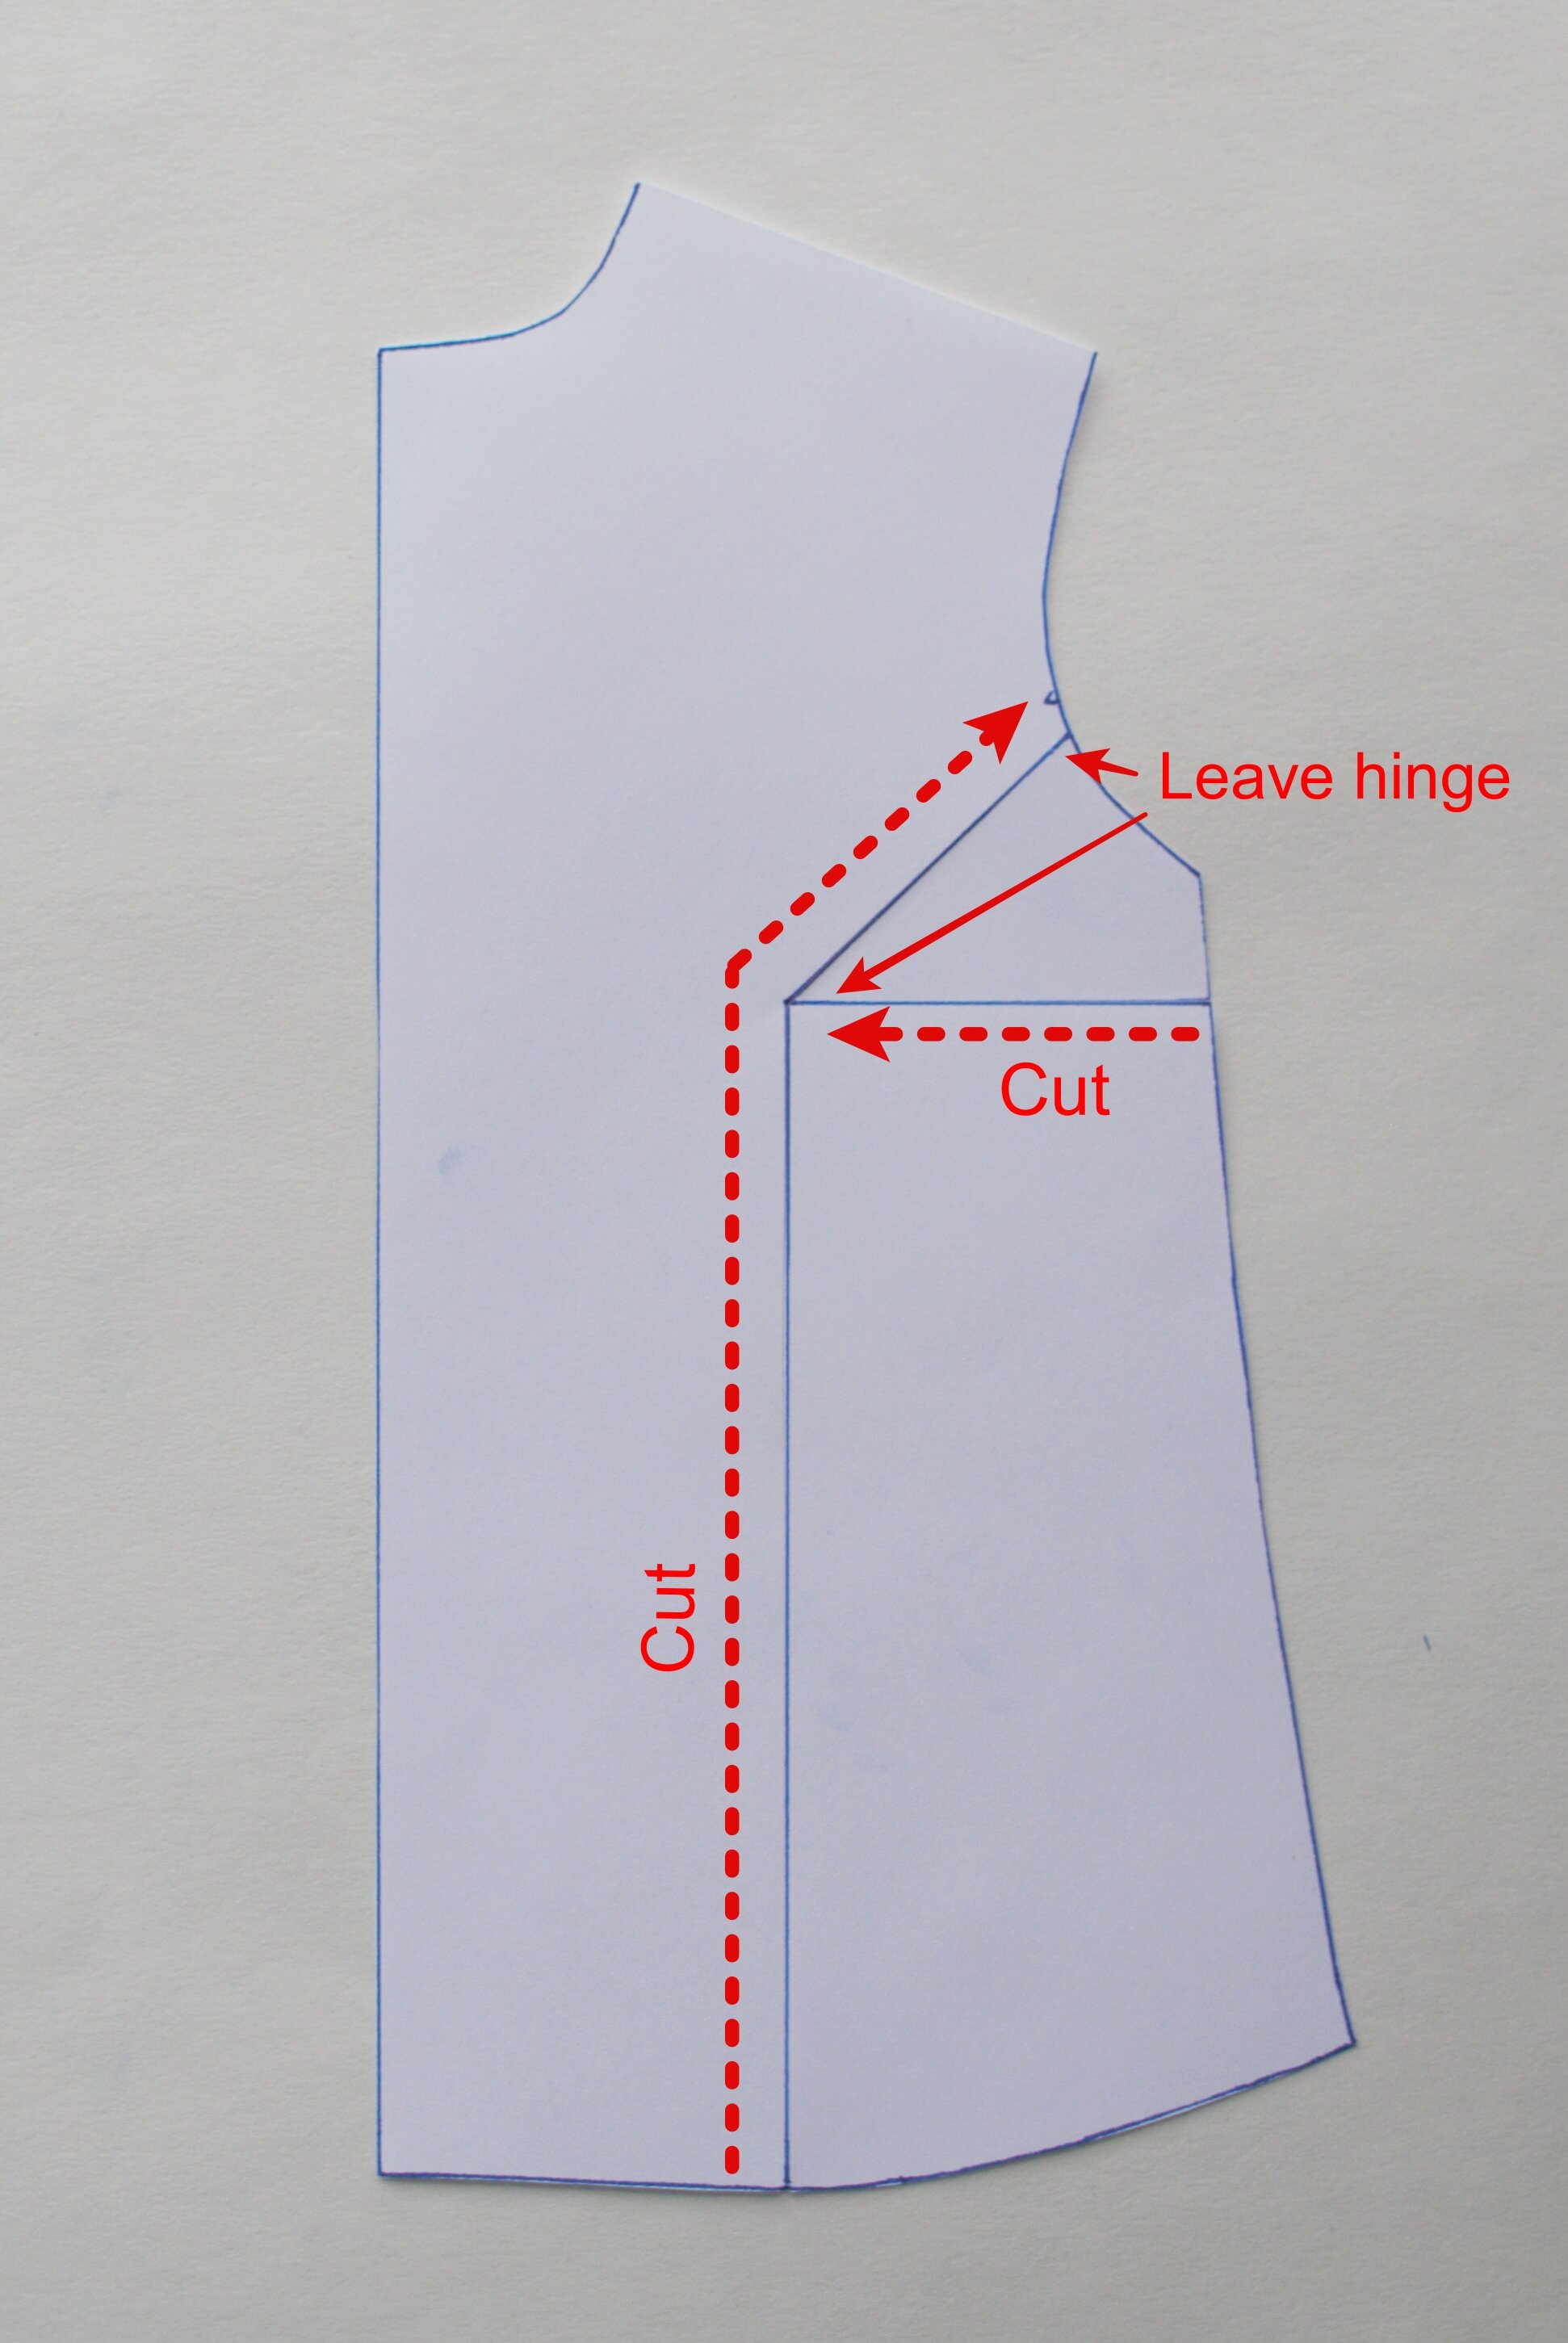
Cut along the lines
Carefully cut up the vertical line, through the apex and up the angled line to the armscye, stopping just a millimeter or so before the seamline. Snip from the opposite side into the seam allowance, leaving a small hinge on the seamline.
Then, cut along the horizontal line beginning at the side seam and ending about 1/8” before the apex, leaving a small hinge.
Draw your gap onto a large piece of scrap paper
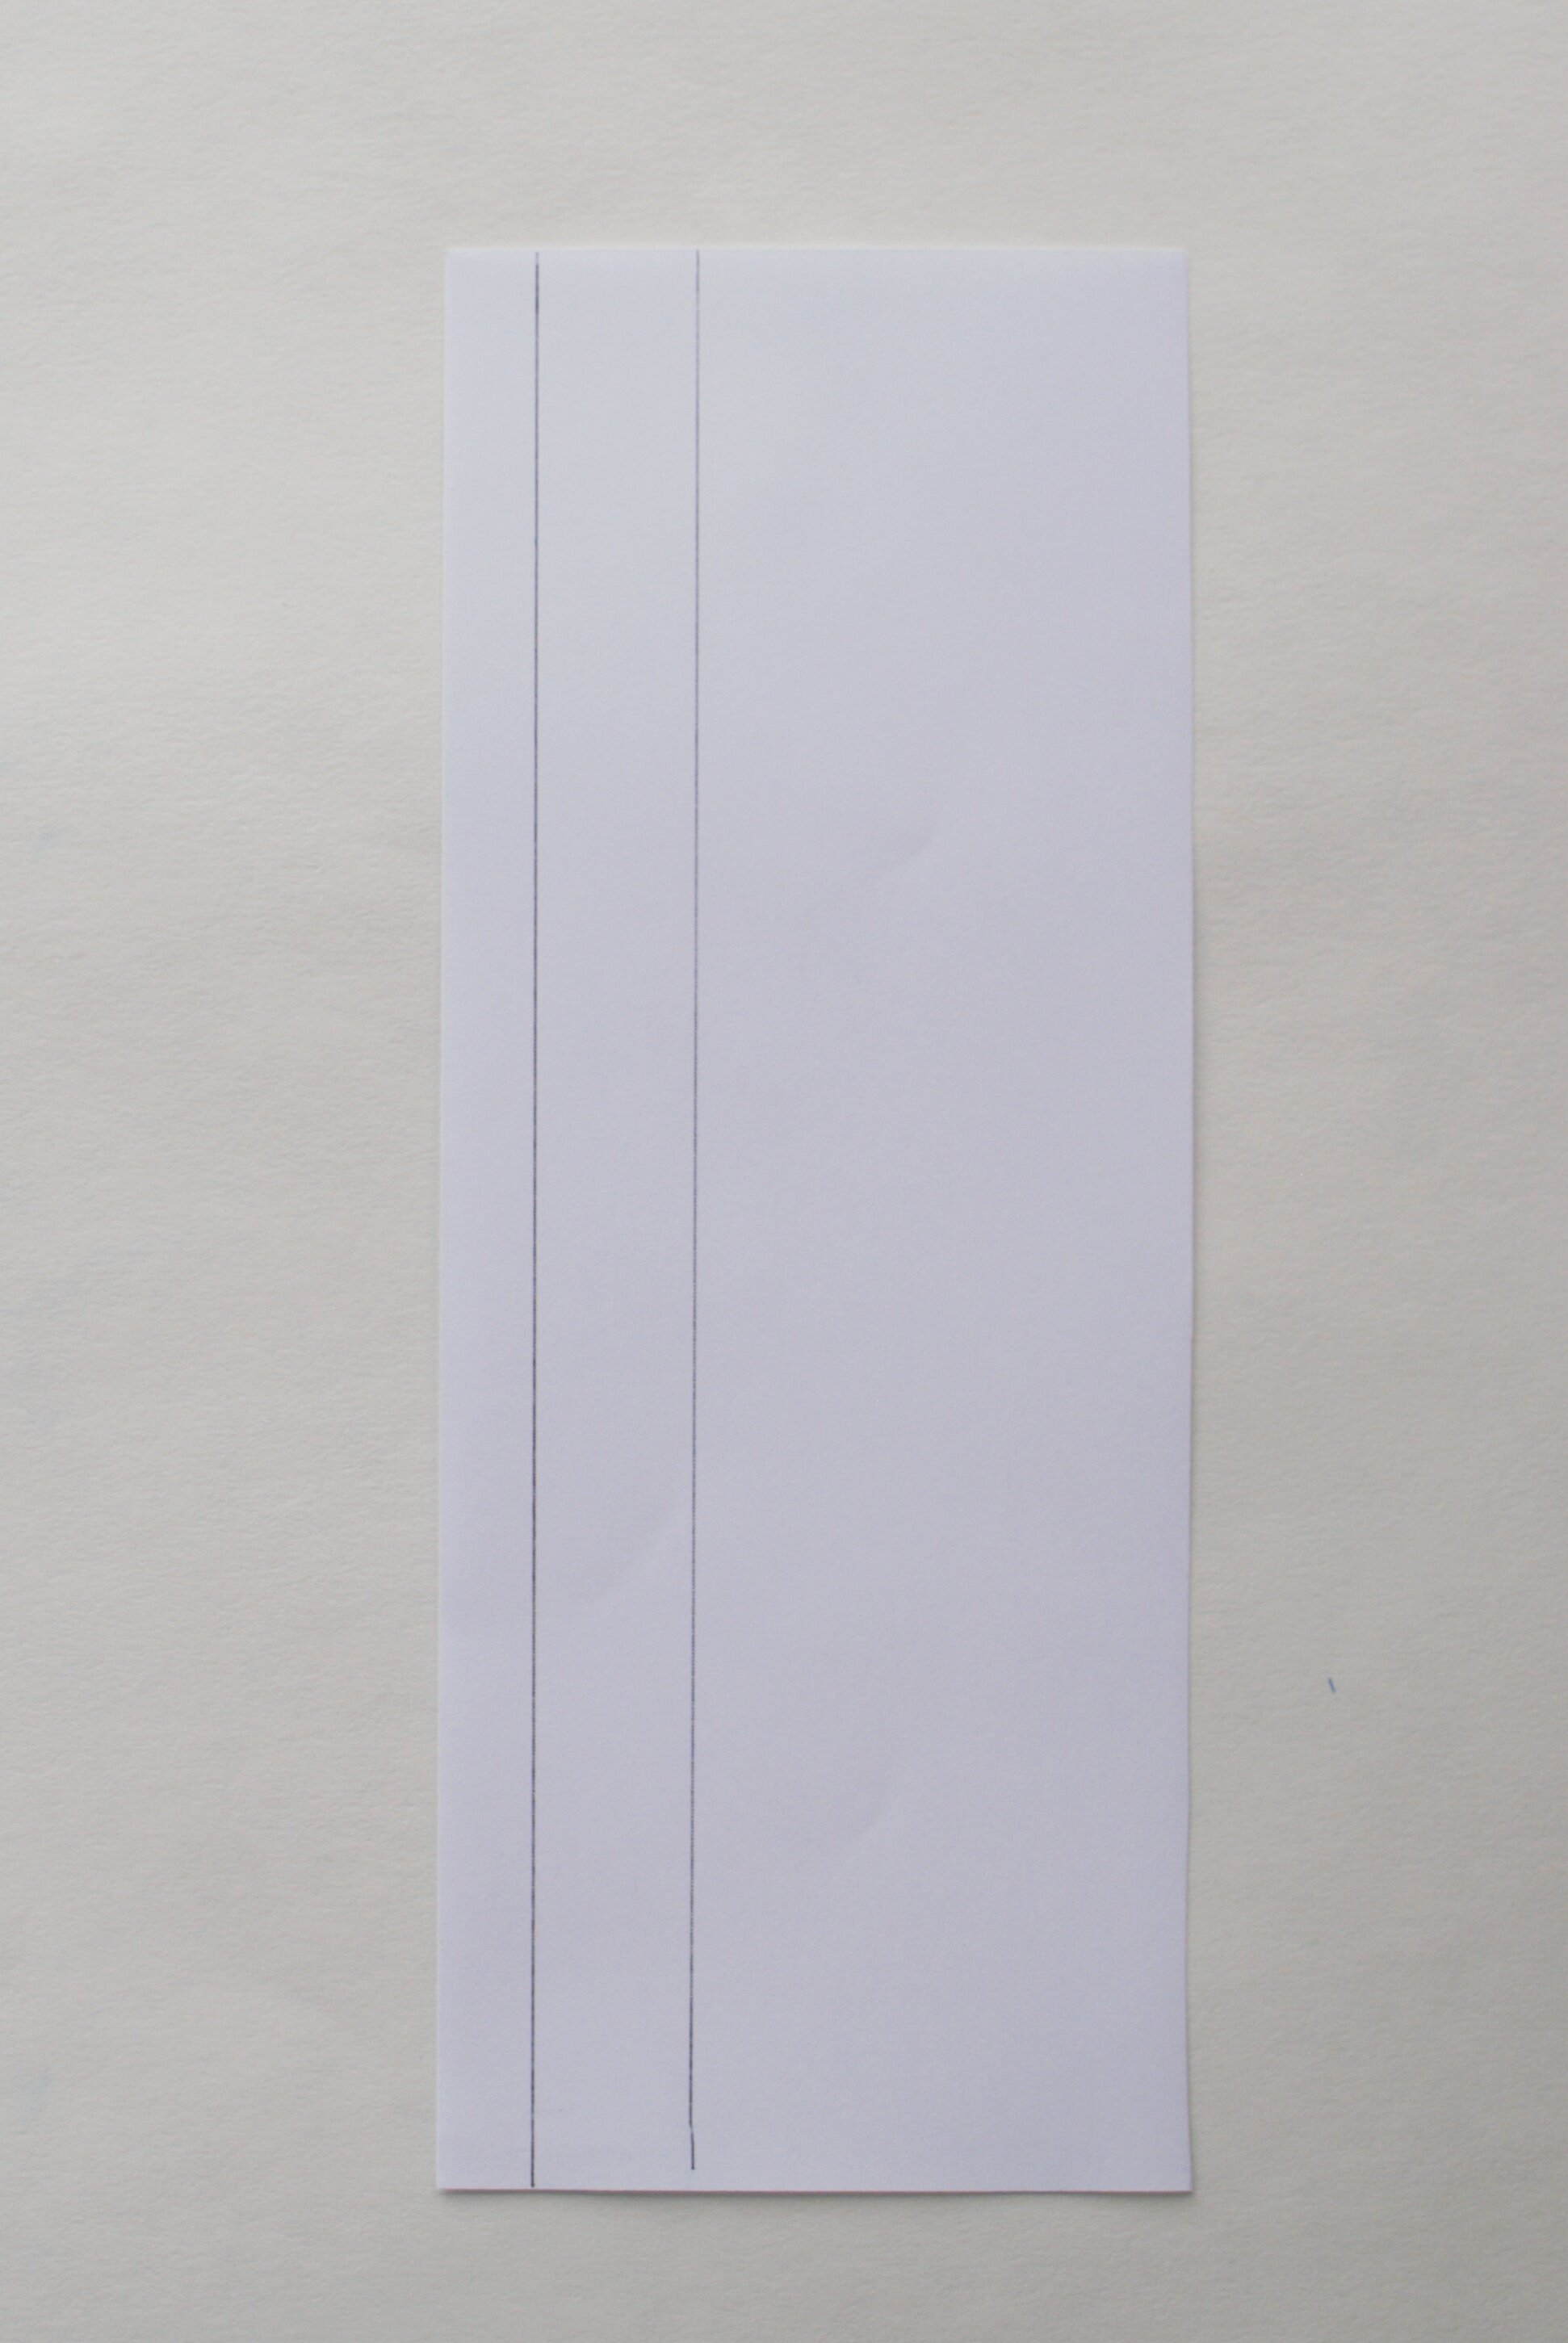
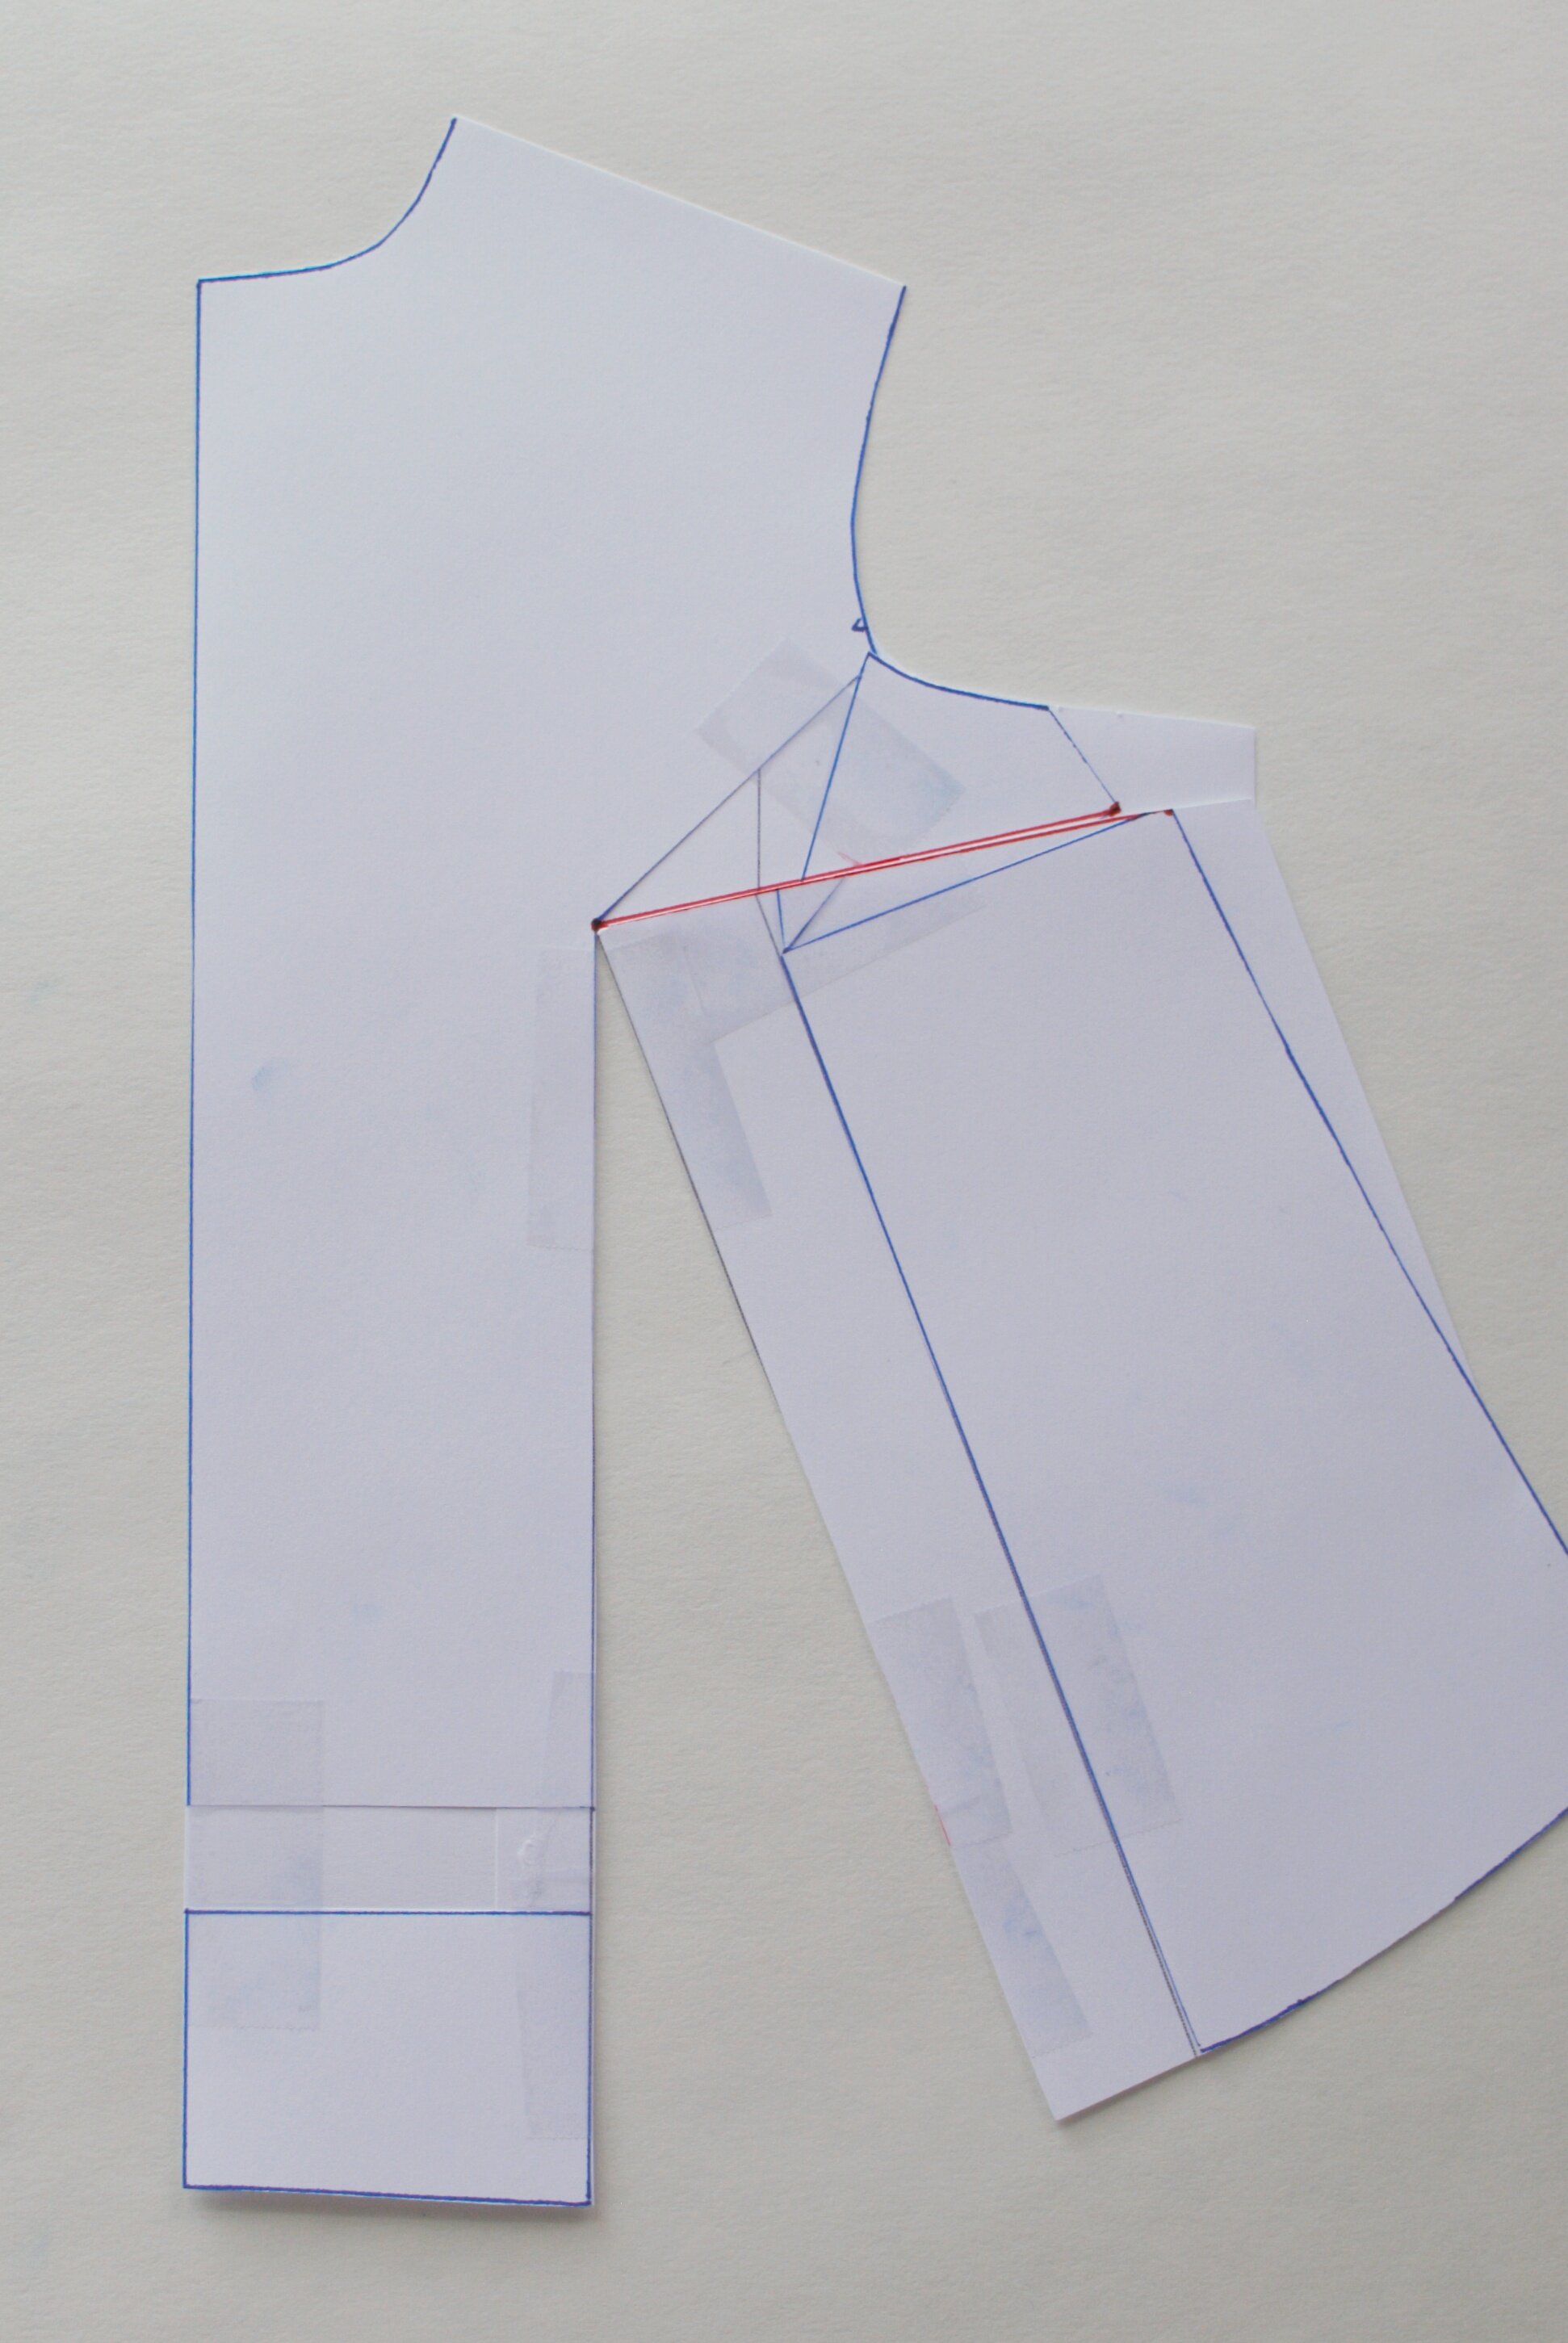
Cut a large piece of scrap tissue and mark two long parallel lines the width of your adjustment (3” for my calculations, though this is not to scale!), then slide it under your pattern piece before doing the adjustment. You can then use those lines as a guide and tape directly onto that piece of scrap.

Slide side piece down and sideways
Keeping the center front in place, slide the side down and out, ensuring that the paper stays flat on the table, until you have a gap running vertically from the hem to the original apex. Stop when this gap meets the edges of the parallel lines you measured. Tape pieces in place, except for the lower center front section. You will have a wide strip that should be all the same width going down the front, that then angles and tapers off into the armscye, and a large wedge opened up at the side seam. Your hem will be lower on one side than the other.
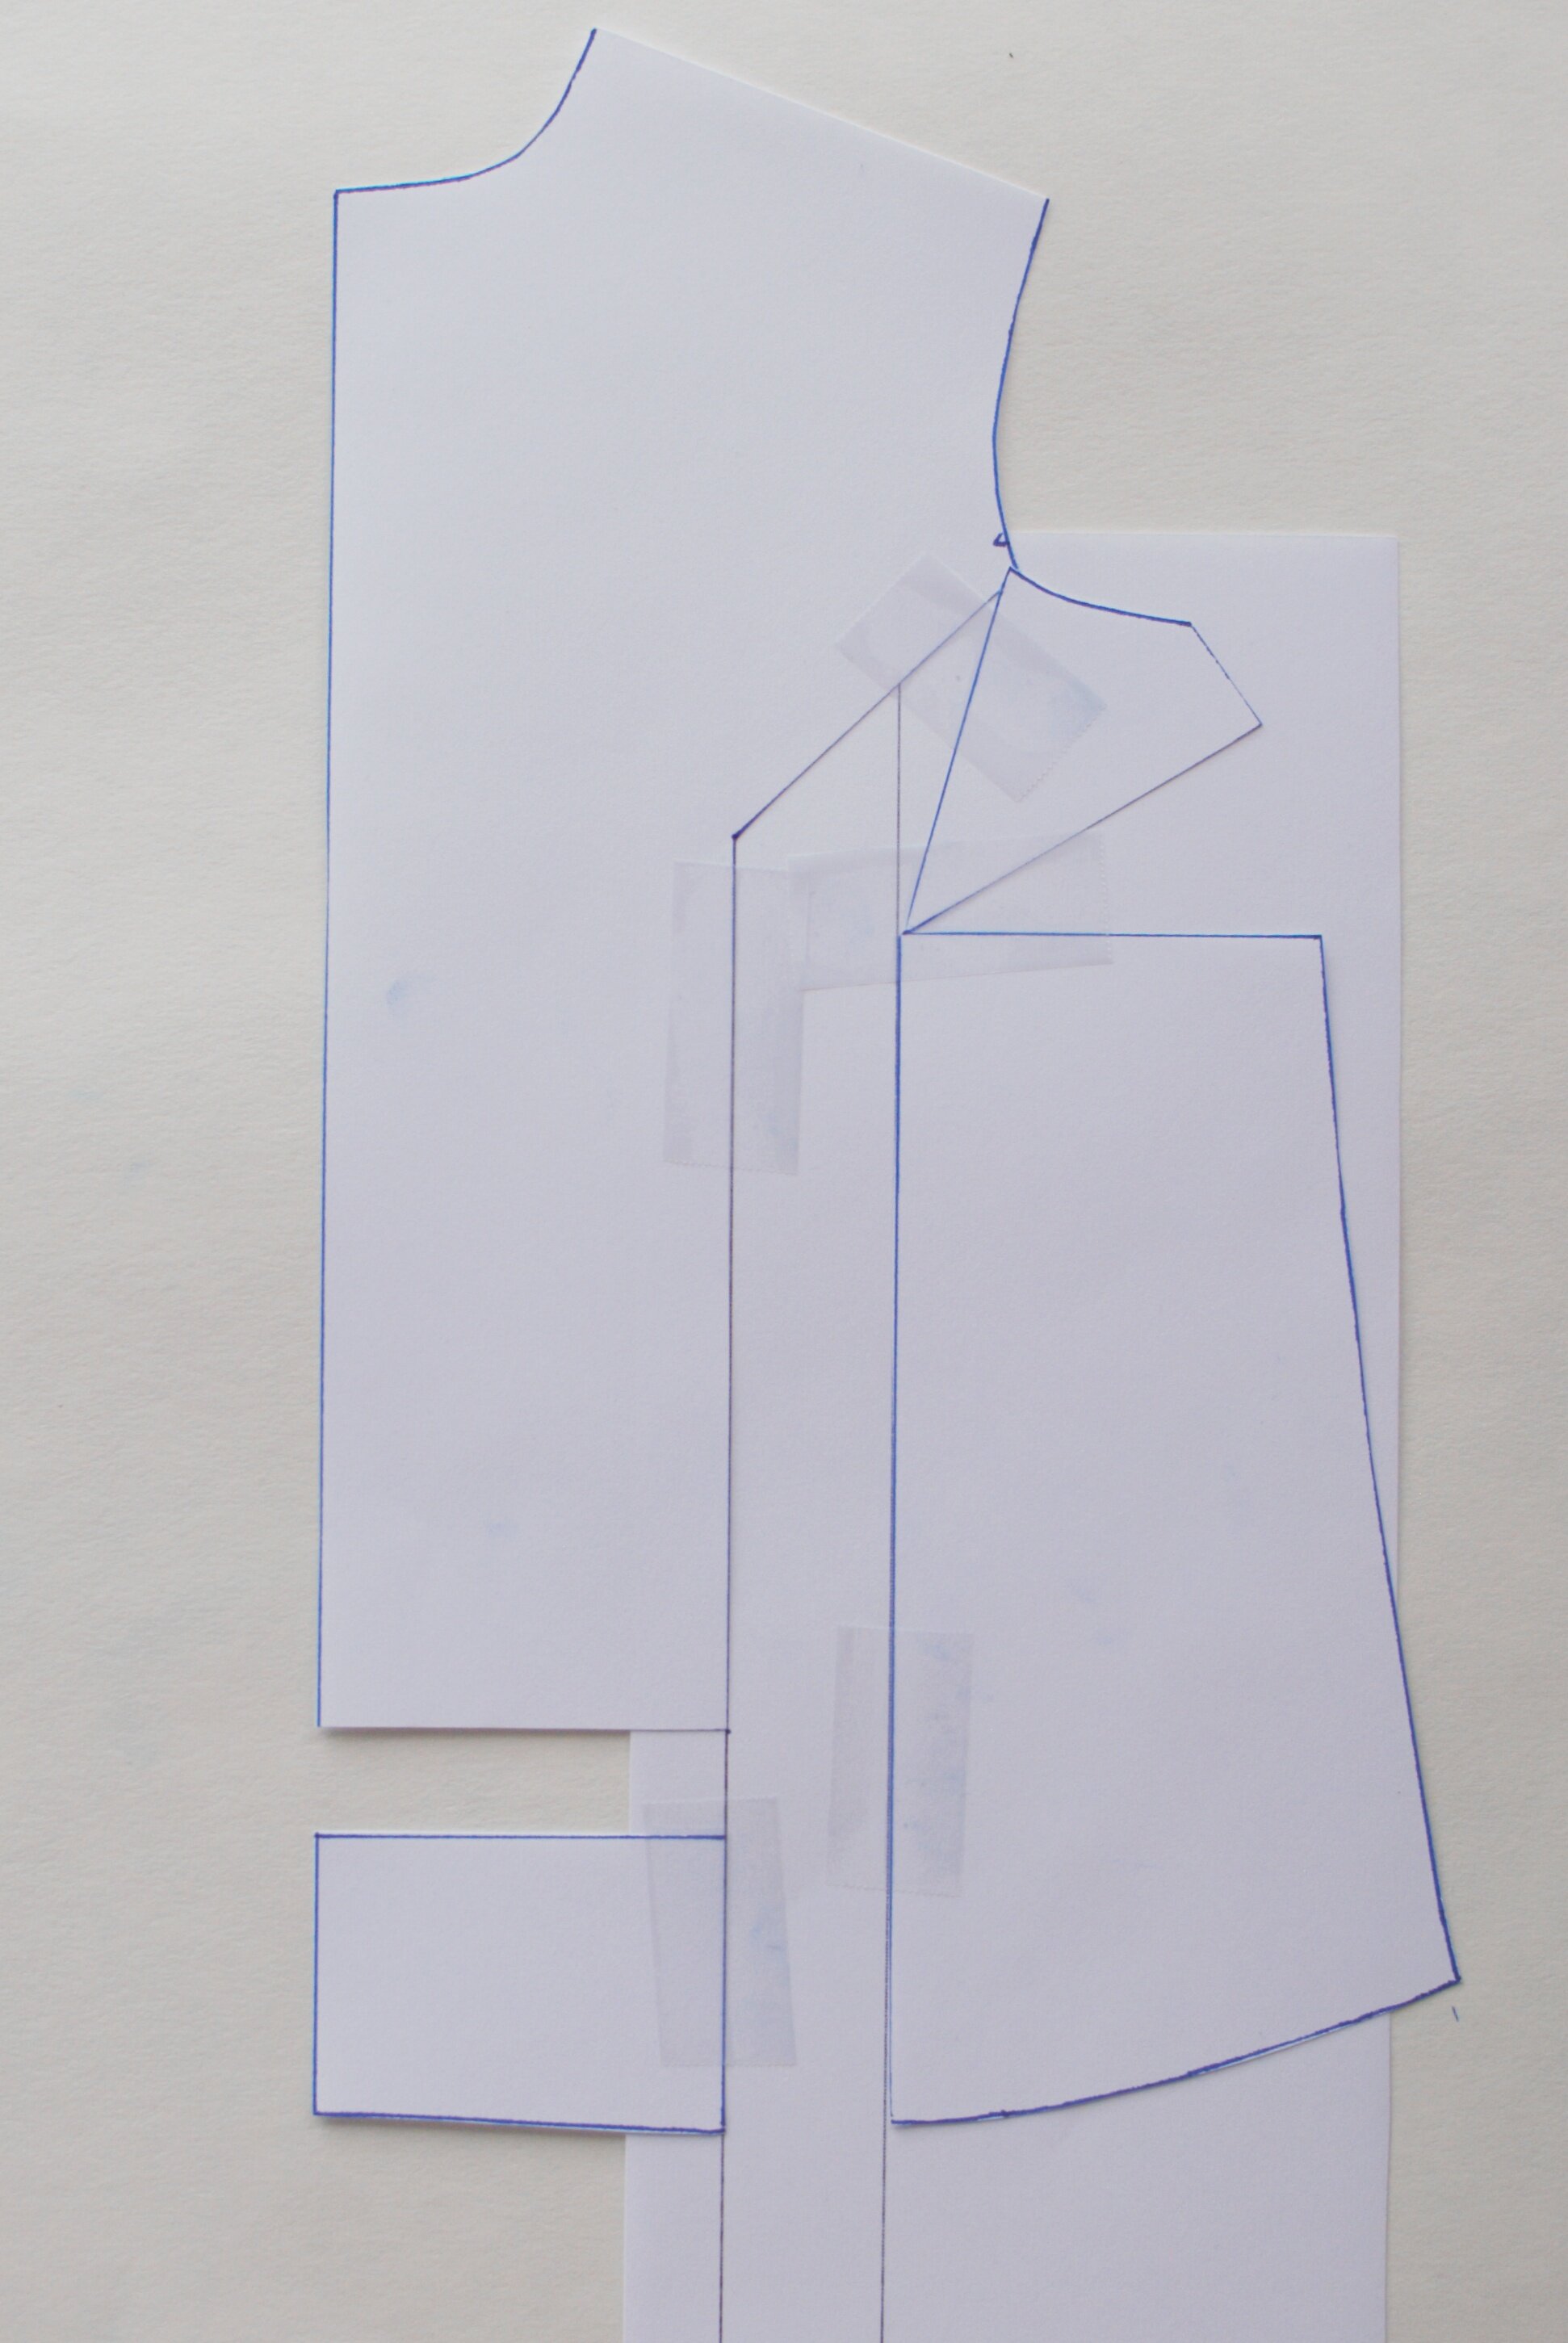
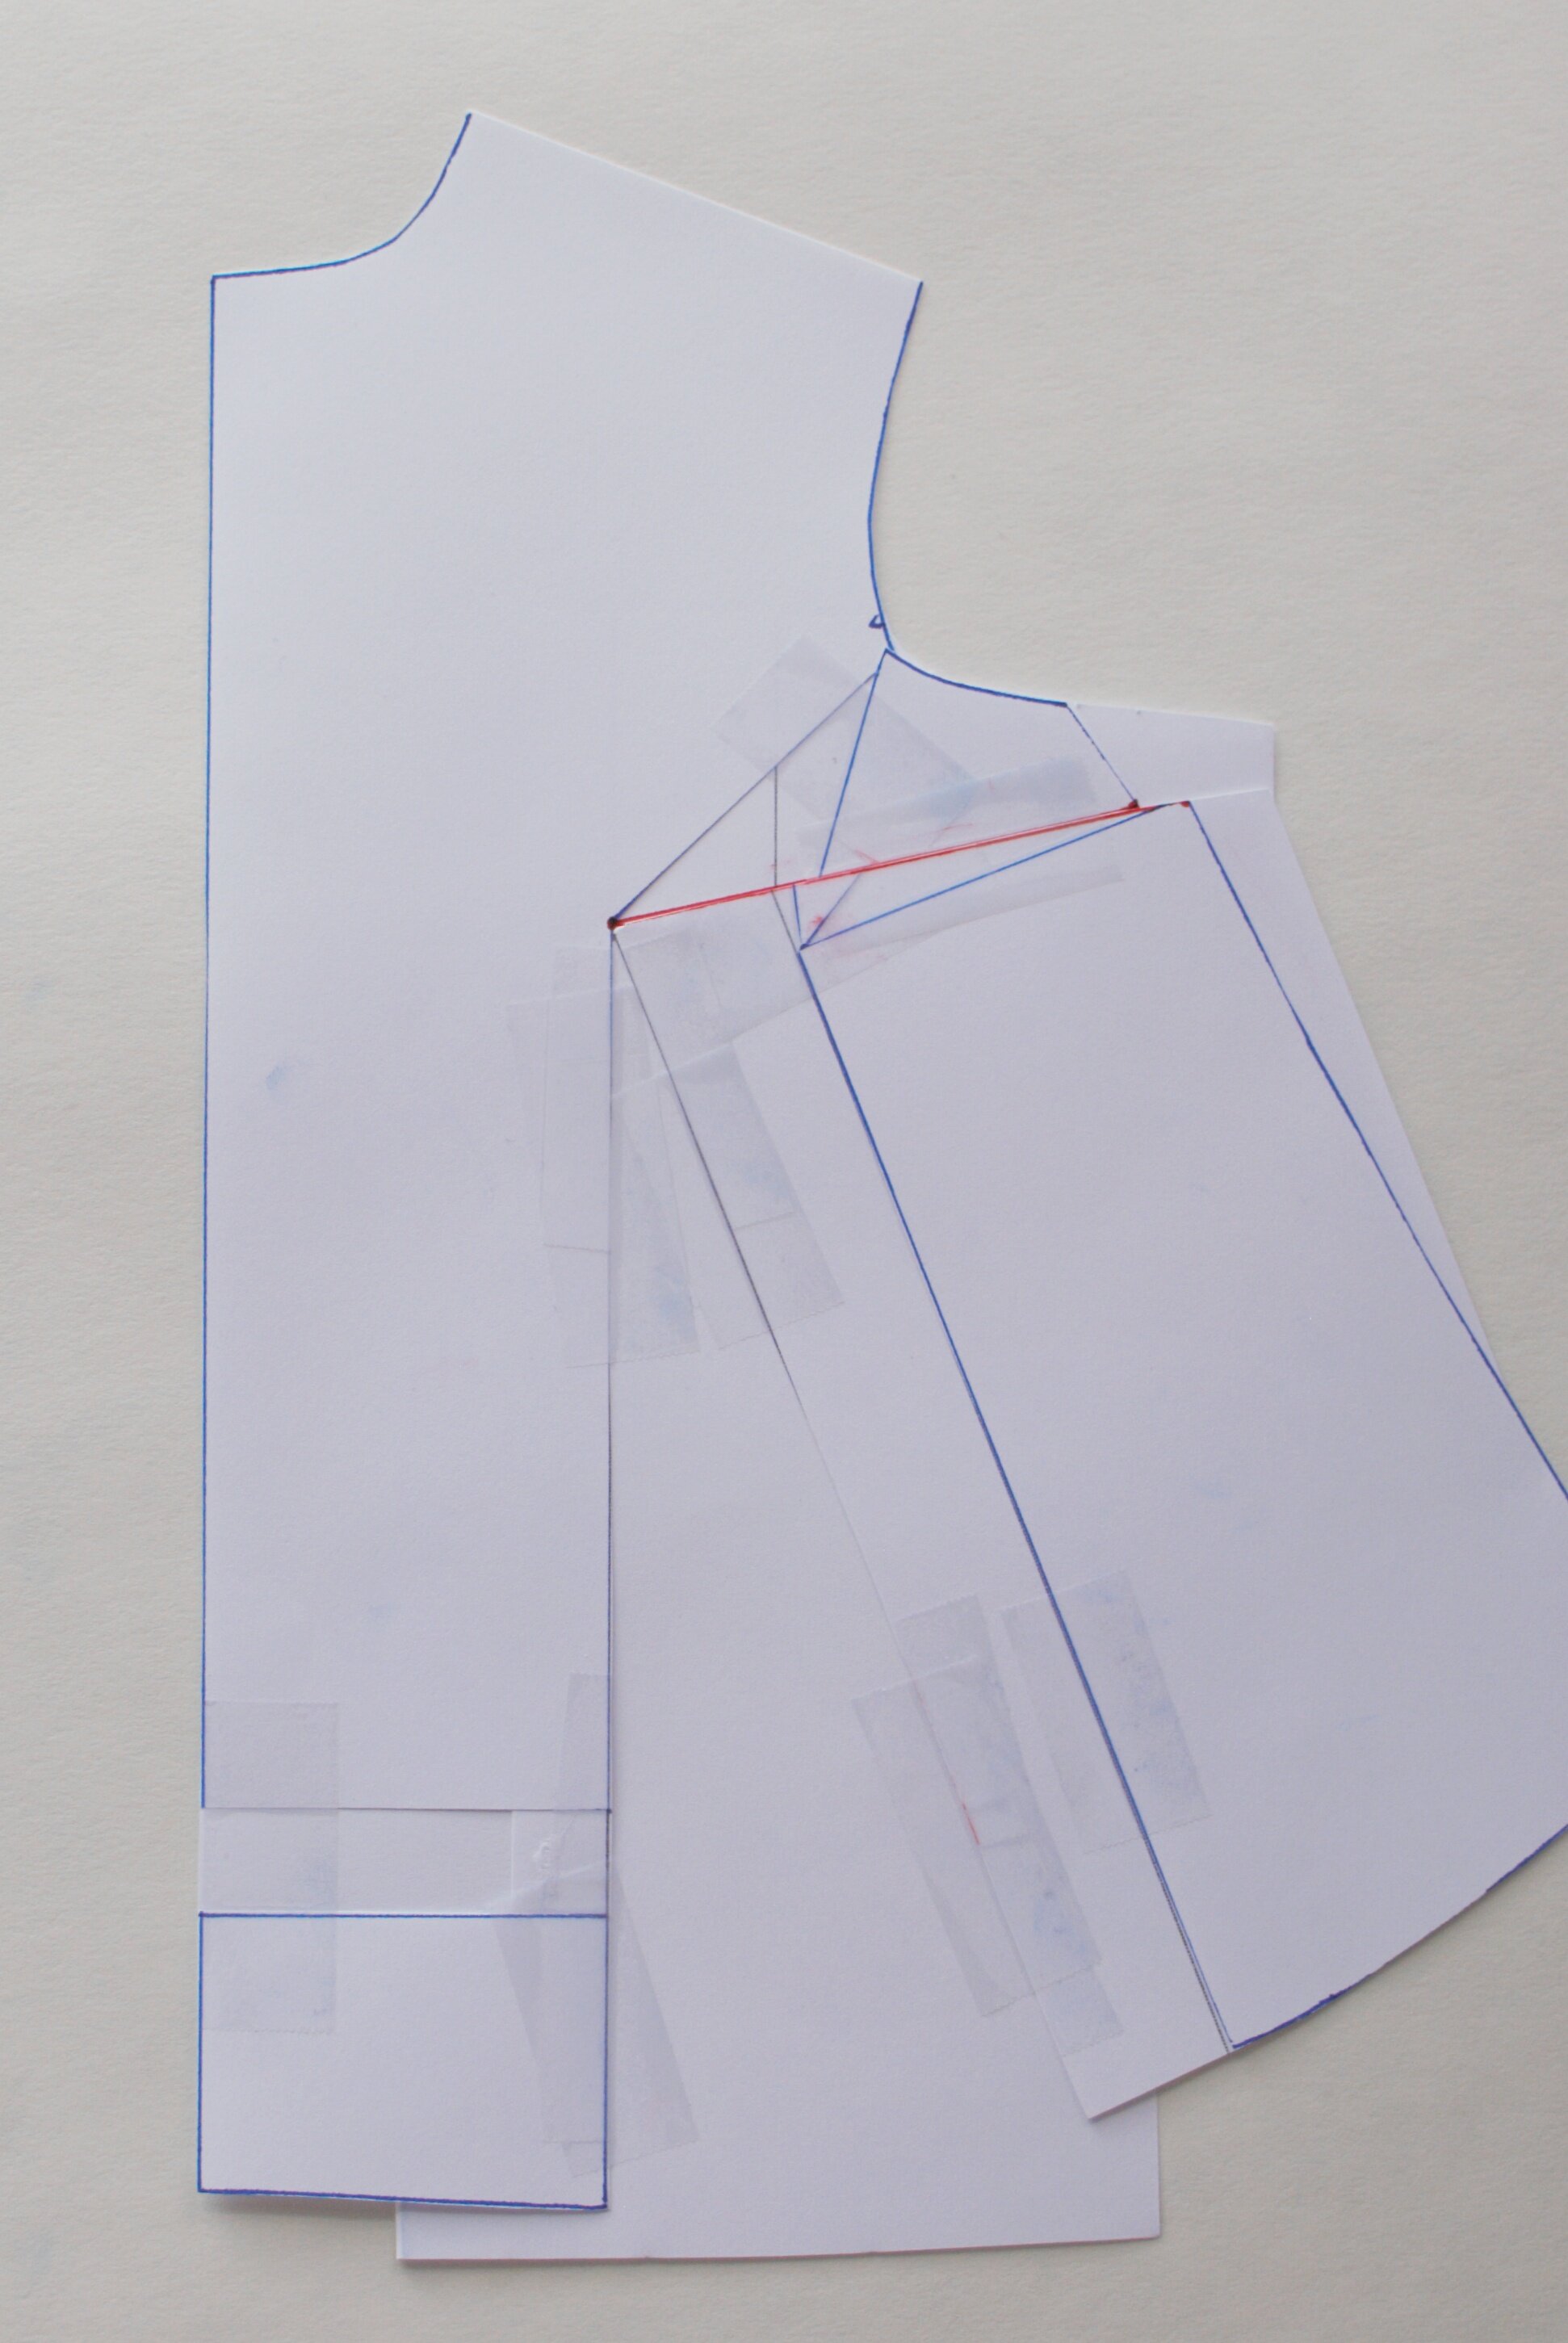
Cut and slide bottom center front down
To fix that, make a horizontal cut from the center front up to the vertical gap a few inches above the hem. Slide that piece down until you can make a continuous hem curve across the gap and meeting up with the hem on the other side of the gap.
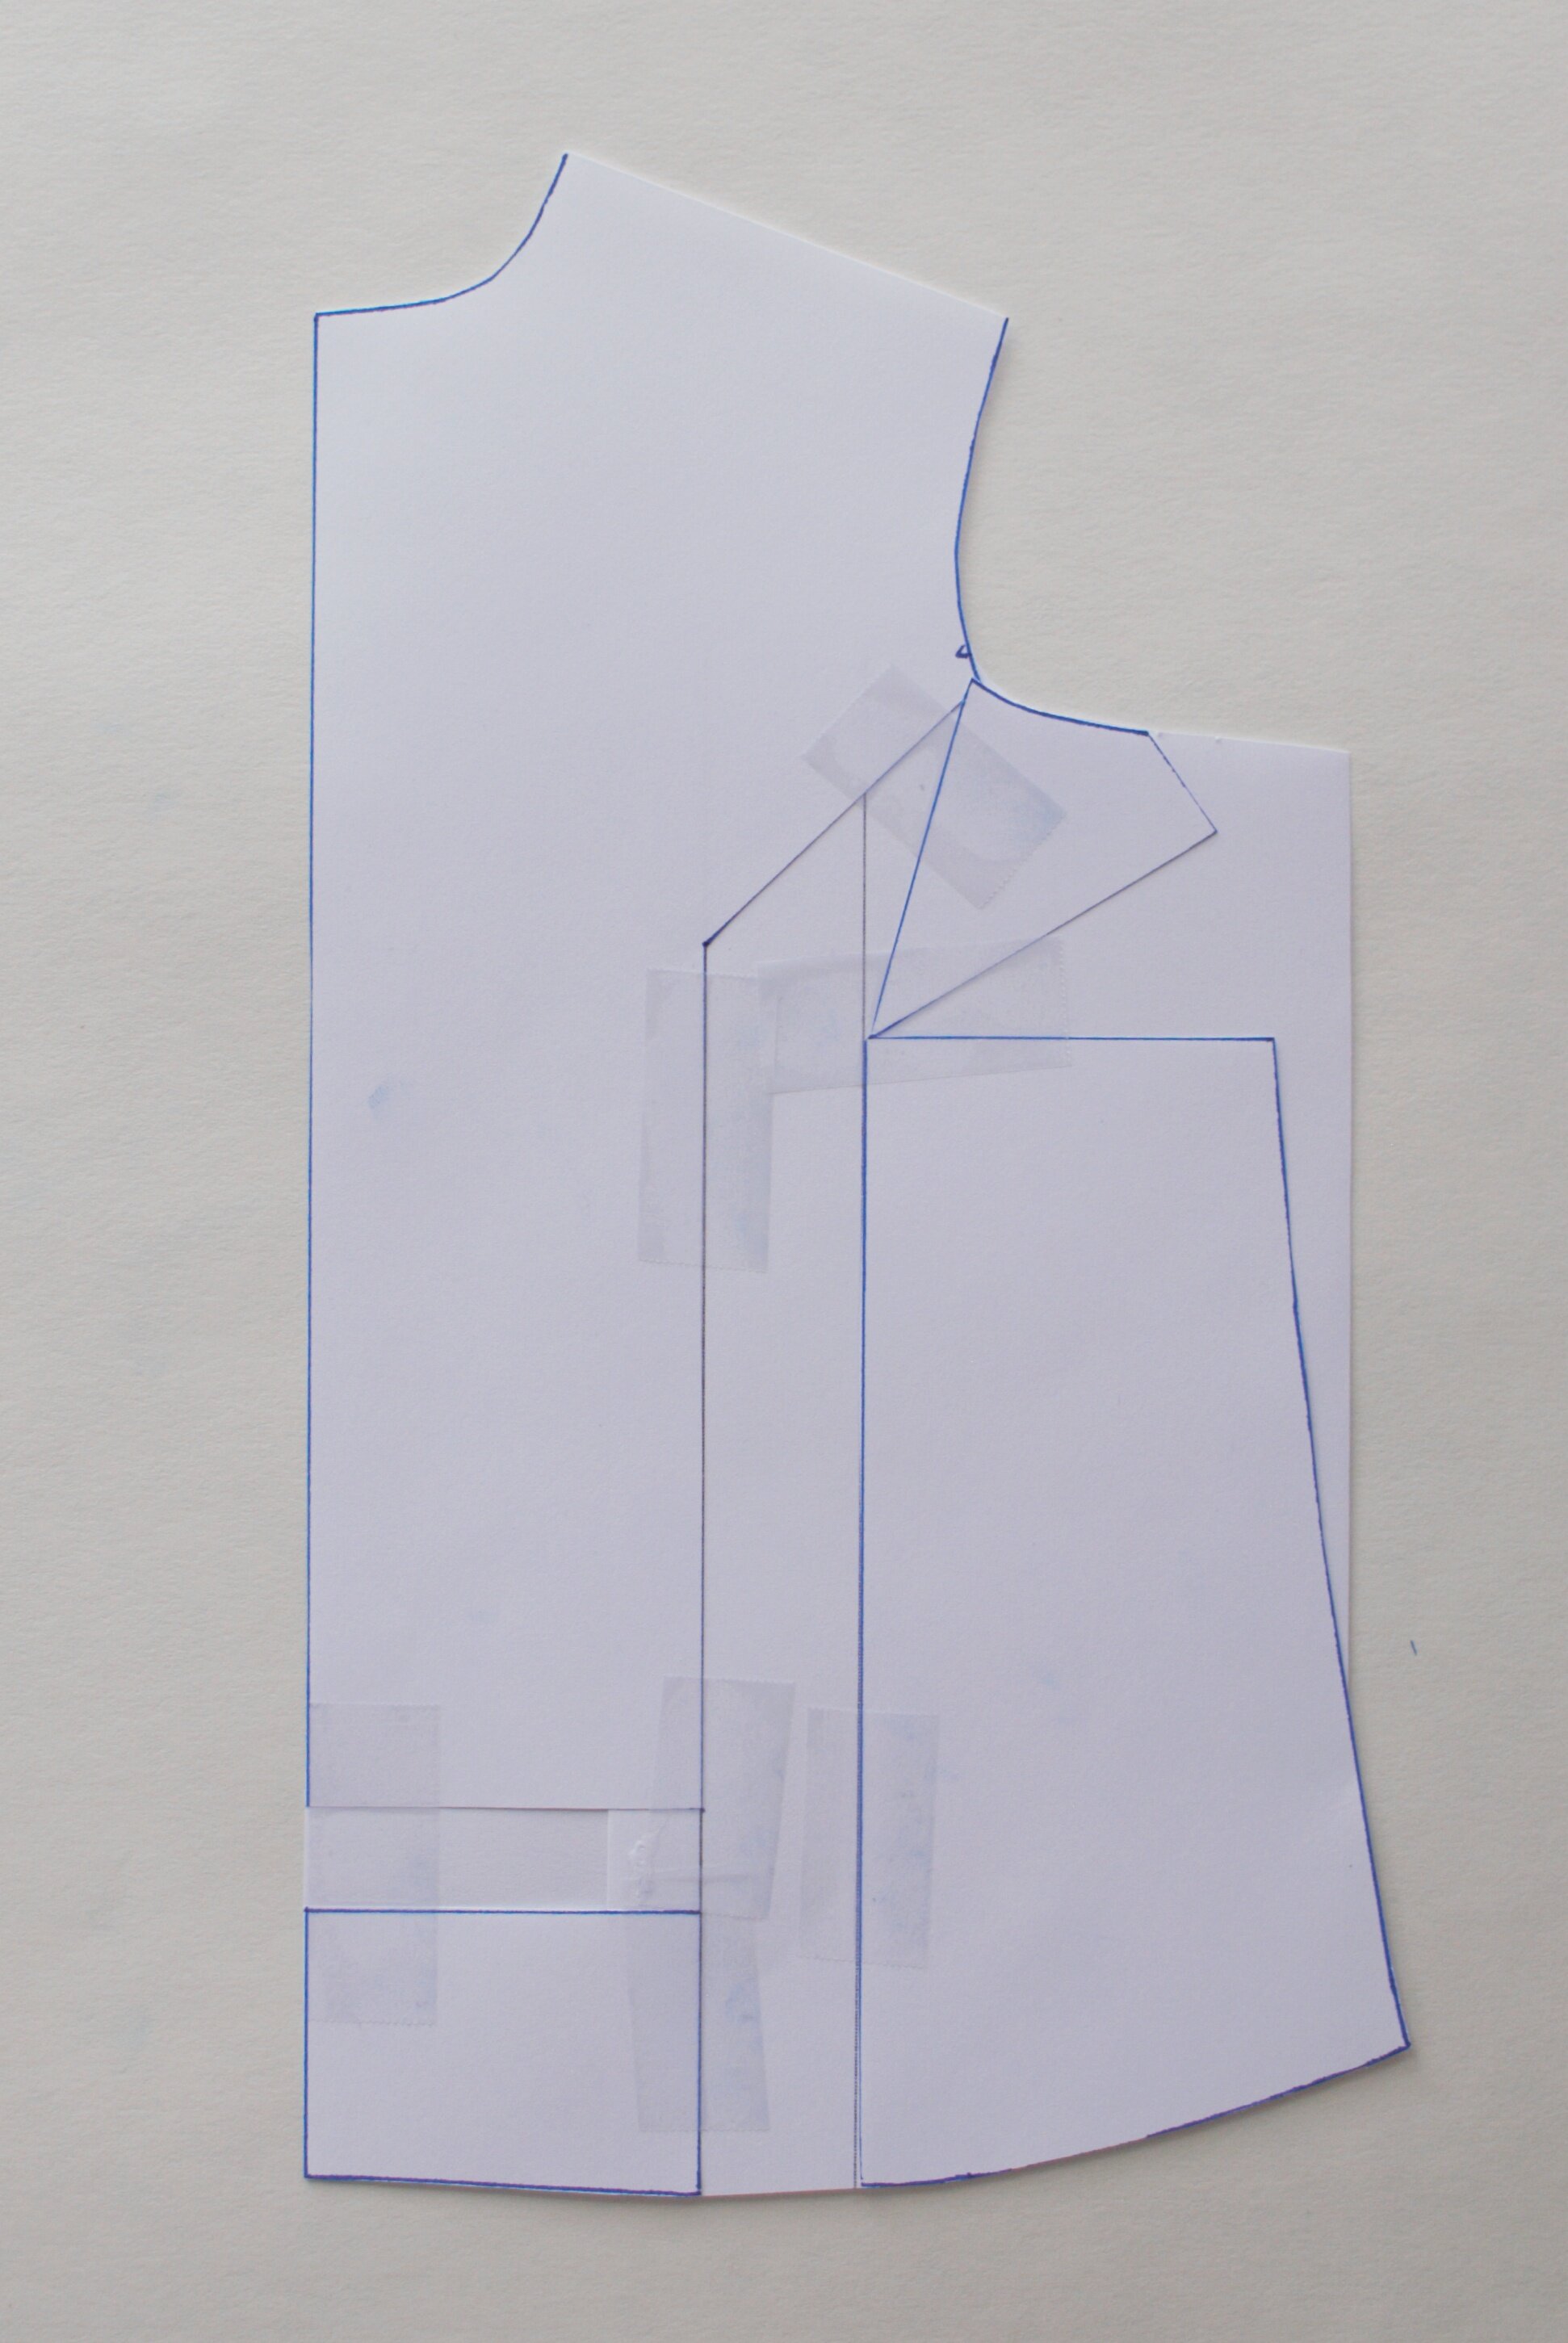
Fill in with scrap paper
Fill in all open areas with scrap paper. Trim away excess scrap everywhere except next to your “dart.”
Step Six: Remove the Dart
In a traditional “womenswear” garment, darts – like the one we just made – or seams are used to add shape that contours fabric to the chest. In traditional “menswear” shirt, the shirt front is more often one flat piece, without shaping. So, we’re going to remove the wedge of fabric created in the last step to return our shirt front to a flat pattern piece without a dart.
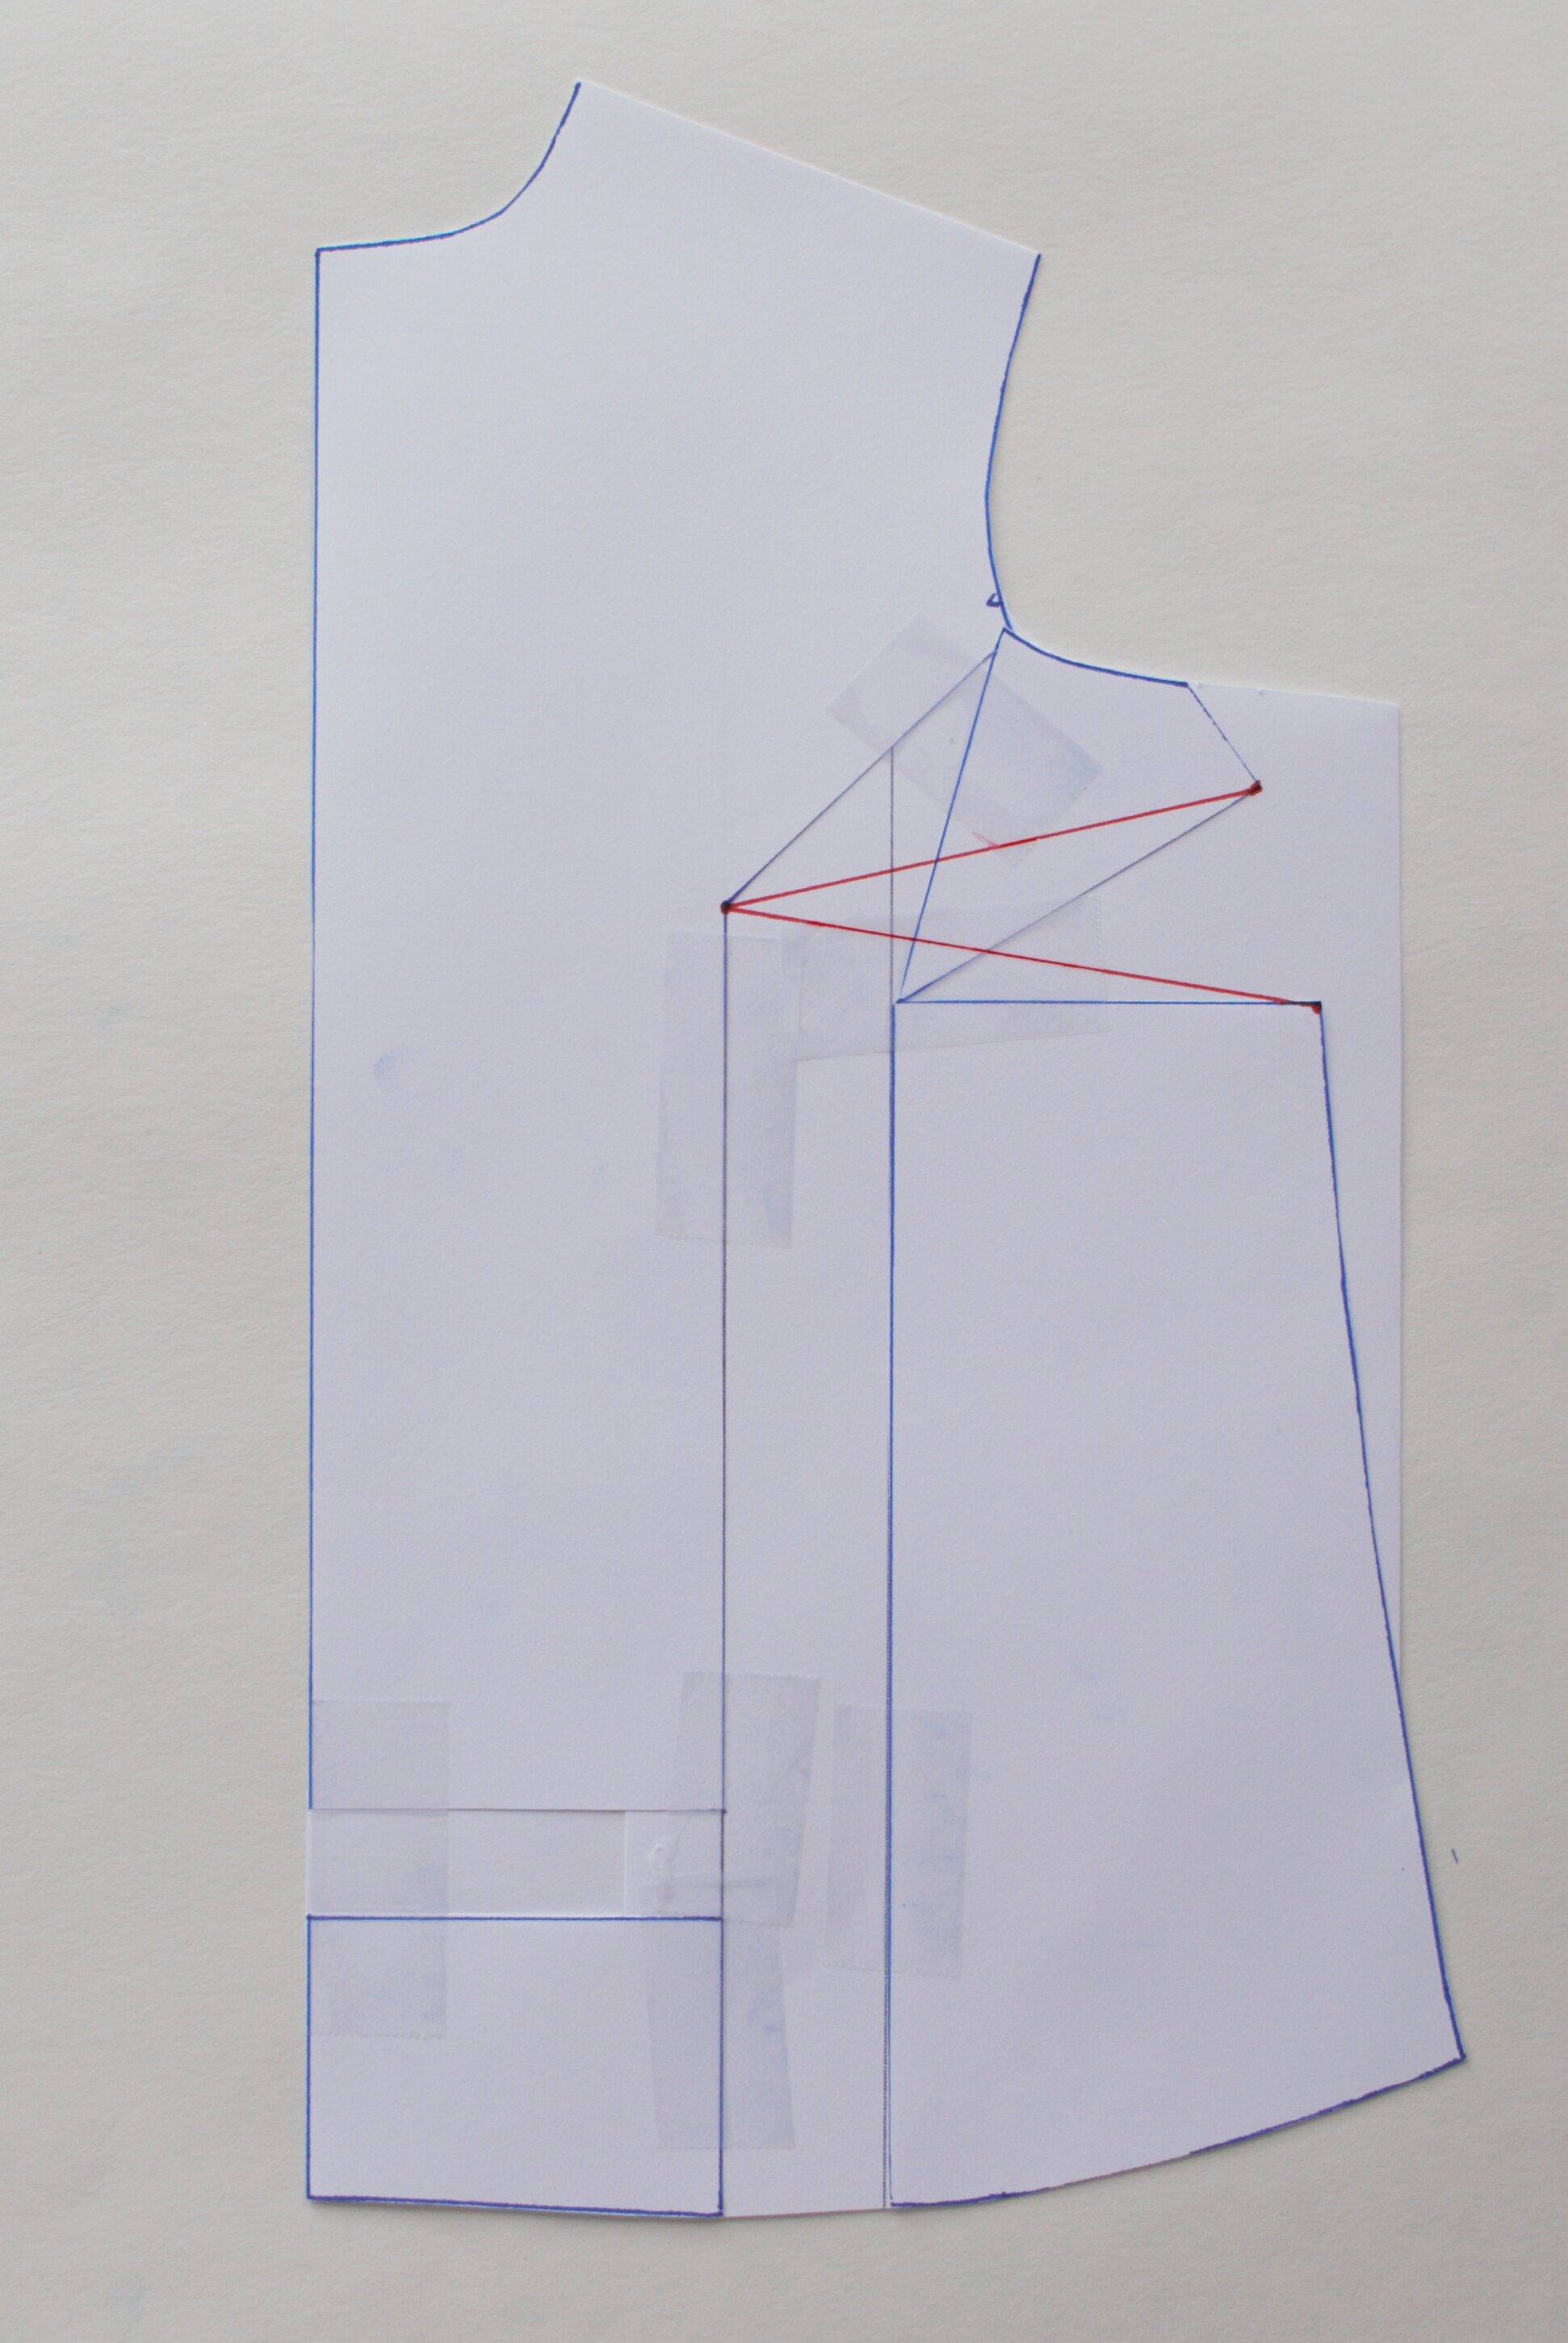
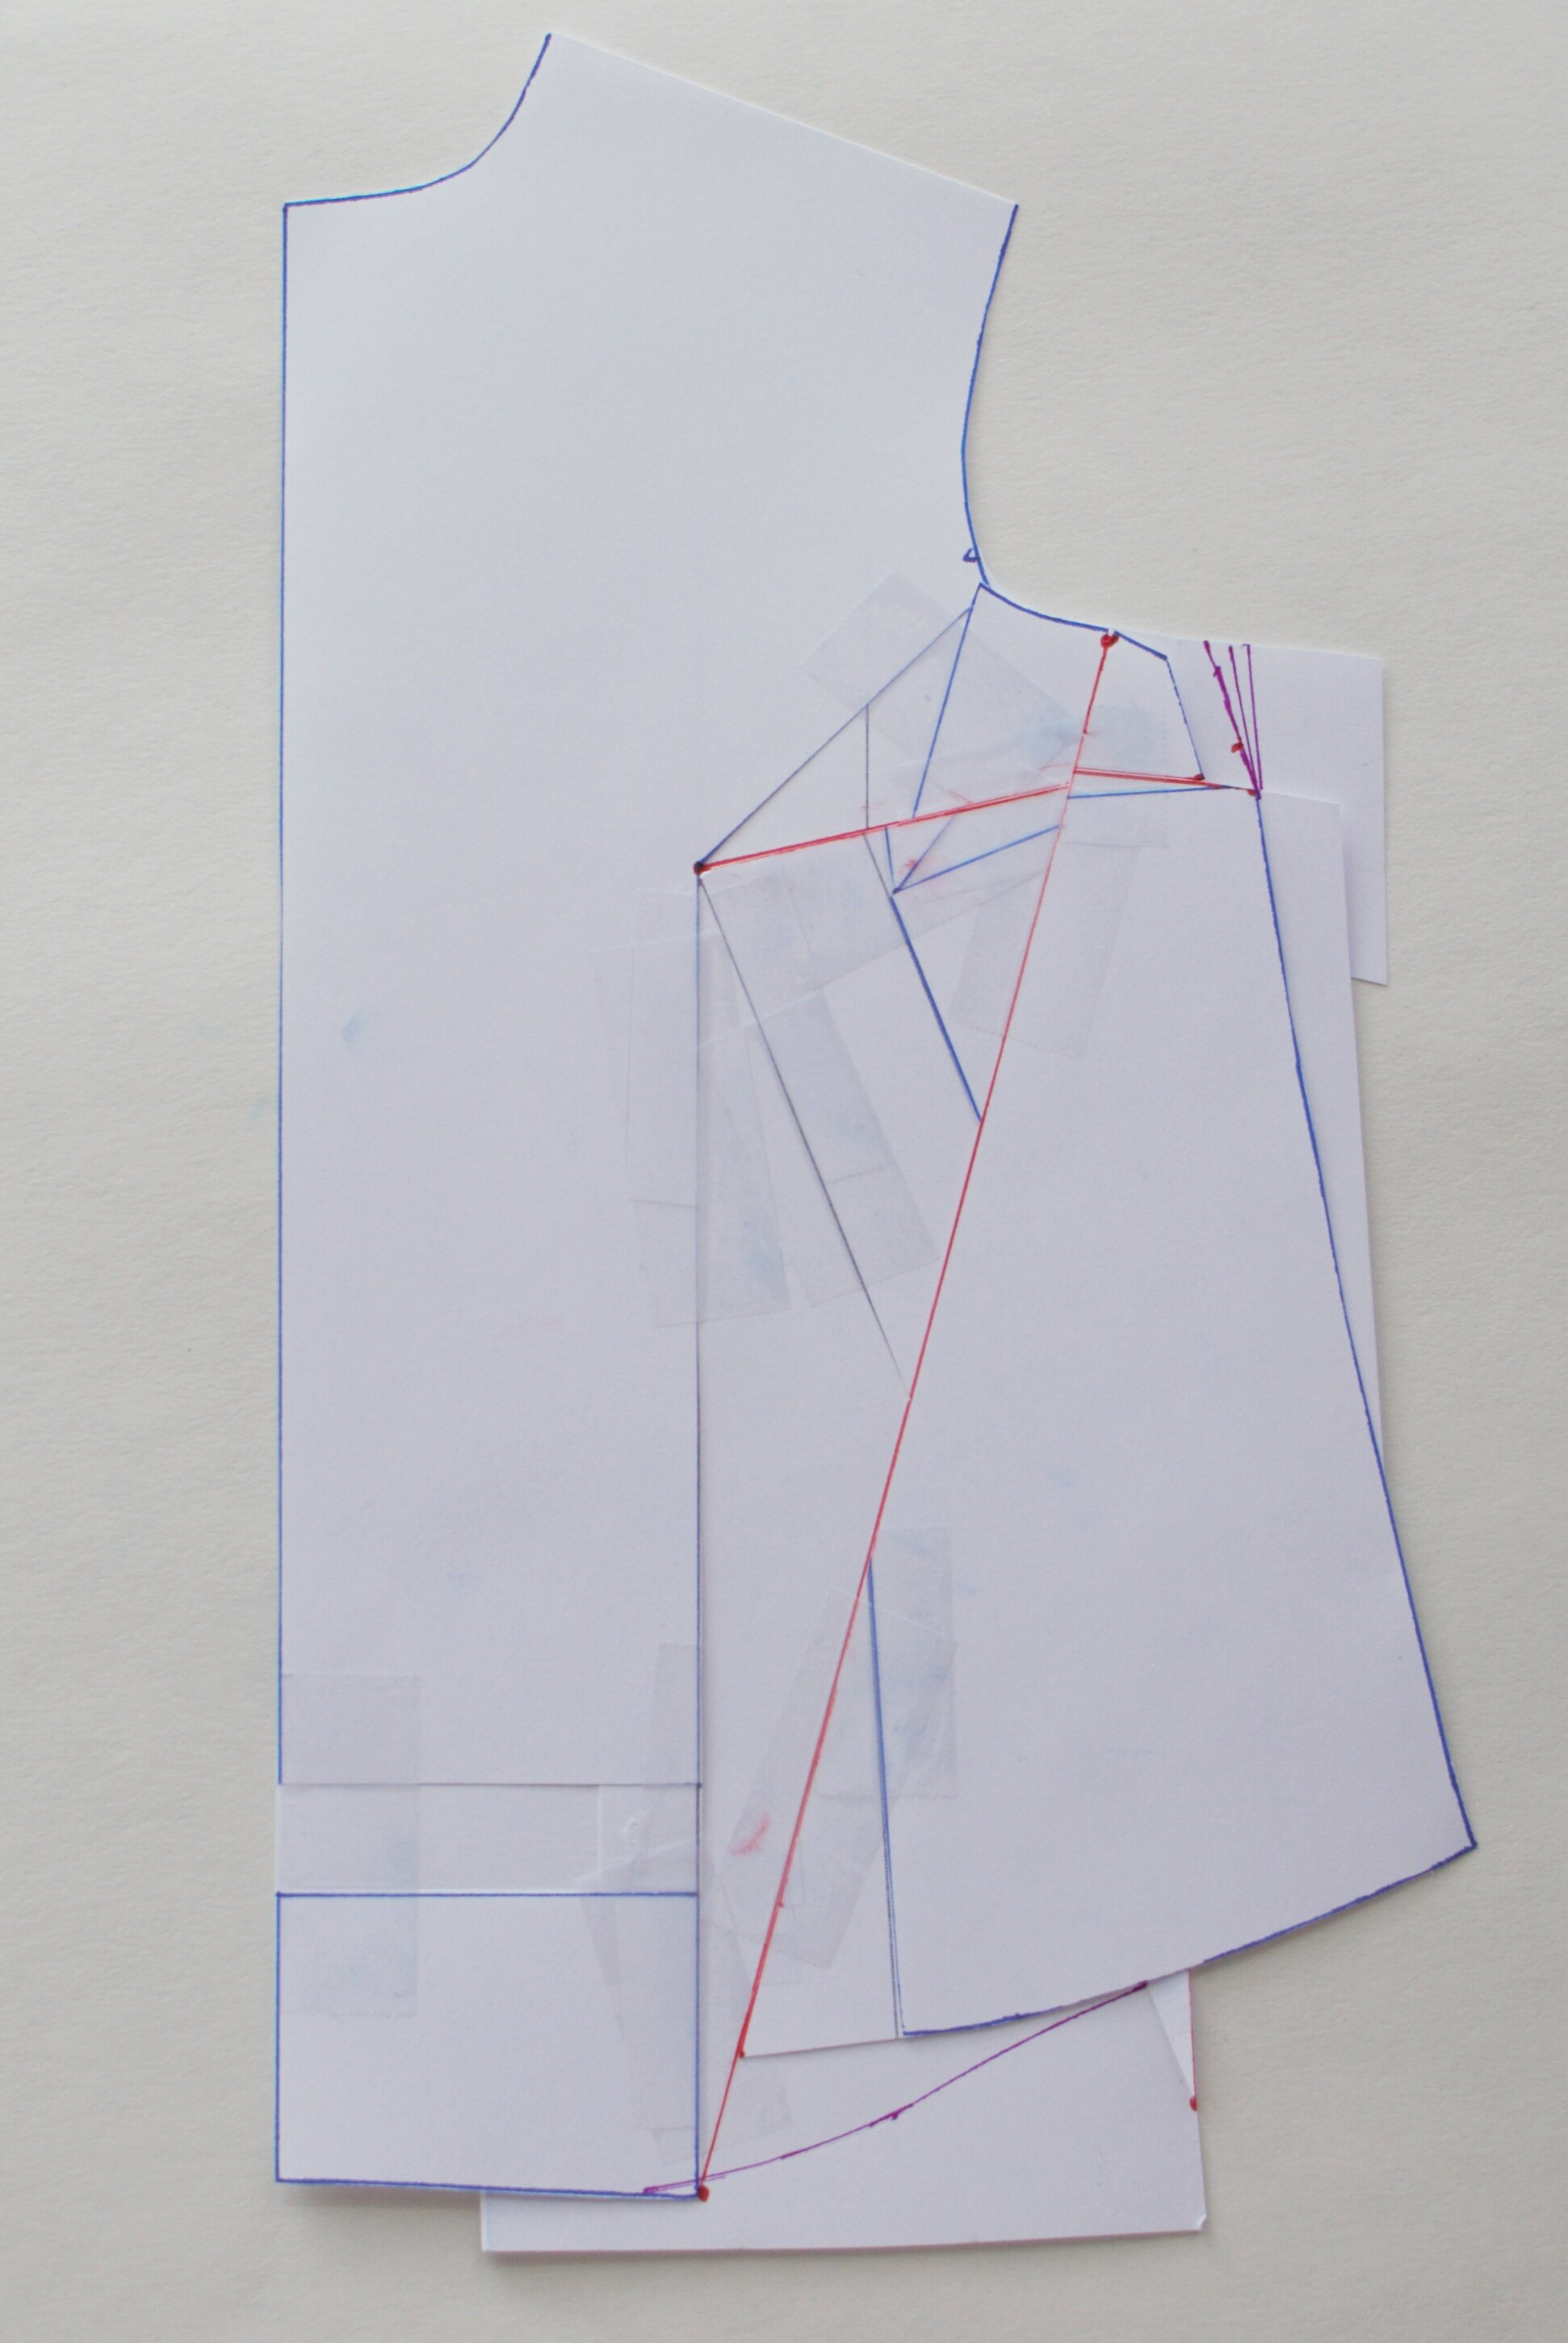
Draw in new dart legs
First, we’ll draw in a new dart that will allow us to remove the excess space created. Draw two lines: from the original apex point out to the end points of the wedge opened in the last step. This will make a “dart” that lies on top of but isn’t exactly the same as that first wedge.
Cut along lower leg of dart
Cut along the lower line of your new dart only, ending about 1/8” before the original apex point. Cut along your original vertical line from the hem to the original apex. You’ll be cutting through the scrap paper you just taped on. End about 1/8” before the original apex point. This will leave the lower side connected to the rest of the body by a small hinge at the original apex.
Swing the lower side piece until the lower line of the dart meets the upper line. Fill in the gap with paper and tape in place. The ends of your dart legs will likely not line up - that’s okay!
Now our side seam is back to its original length, but we’ve added a bunch of width to the hem. So we’re going to take that out with another dart rotation!

Draw lines from the bottom of the gap to the armpit
Draw two lines from the ends of the gap to a point on the seamline near the underarm. This should be around 1-2” from the side seam. (I haven’t drawn in the seamlines in this version, but your triangle should end on the seamline rather than the cut edge!)

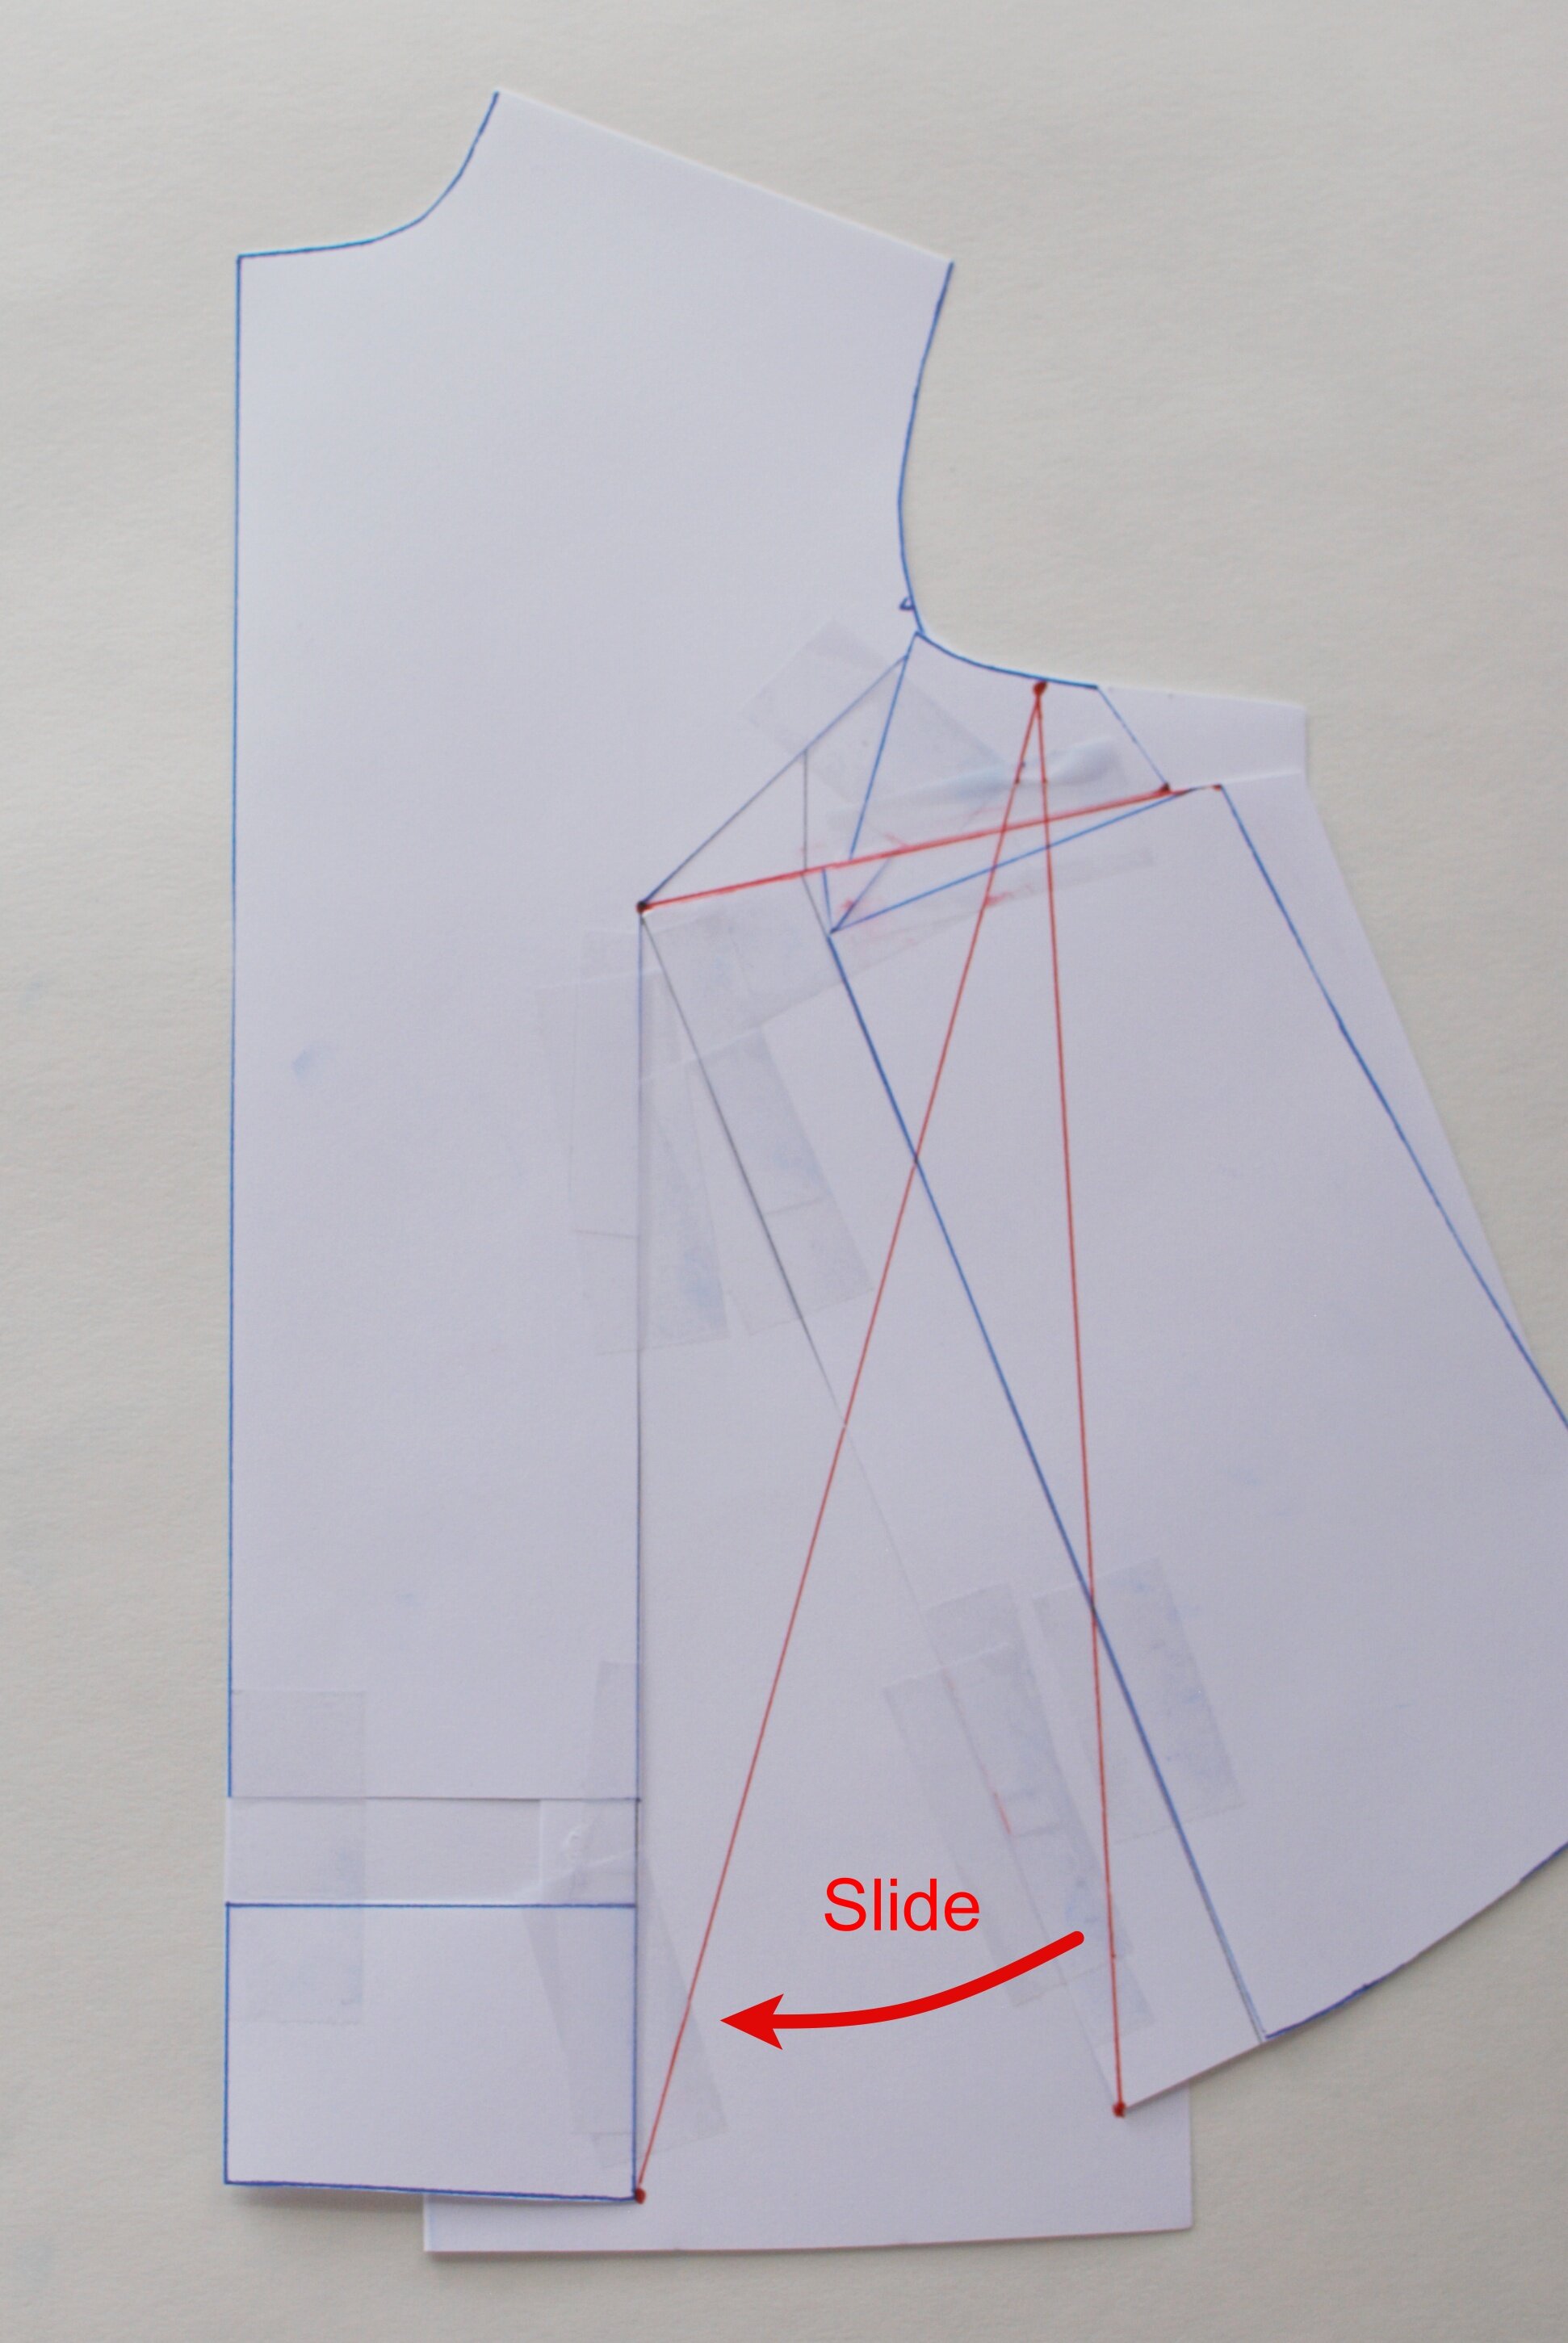
Cut up the line closest to the side seam, until just before the seamline. Snip into the seam allowance to create a tiny hinge. Slide the side section toward the center front until the two lines meet and tape in place. Your hem will not line up — that’s okay!
Draw in new hemline and upper side seam
Now, draw in a new hemline, roughly meeting up the center front section to the bottom of the side seam. Using a curved ruler can be helpful here, or you can trace off the hemline from a larger size on the pattern.
We’ll also want to true up the side seam. To keep all of the width we just added, we’ll start from the lower dart leg and sketch in a line upwards to the armscye. Play with the angle a little - this is not an exact science! Note that in this step, you’re adding to the circumference of the armscye, so you’ll need to either reduce the armscye elsewhere or add to the sleeve pattern piece where it meets the upper front side seam.
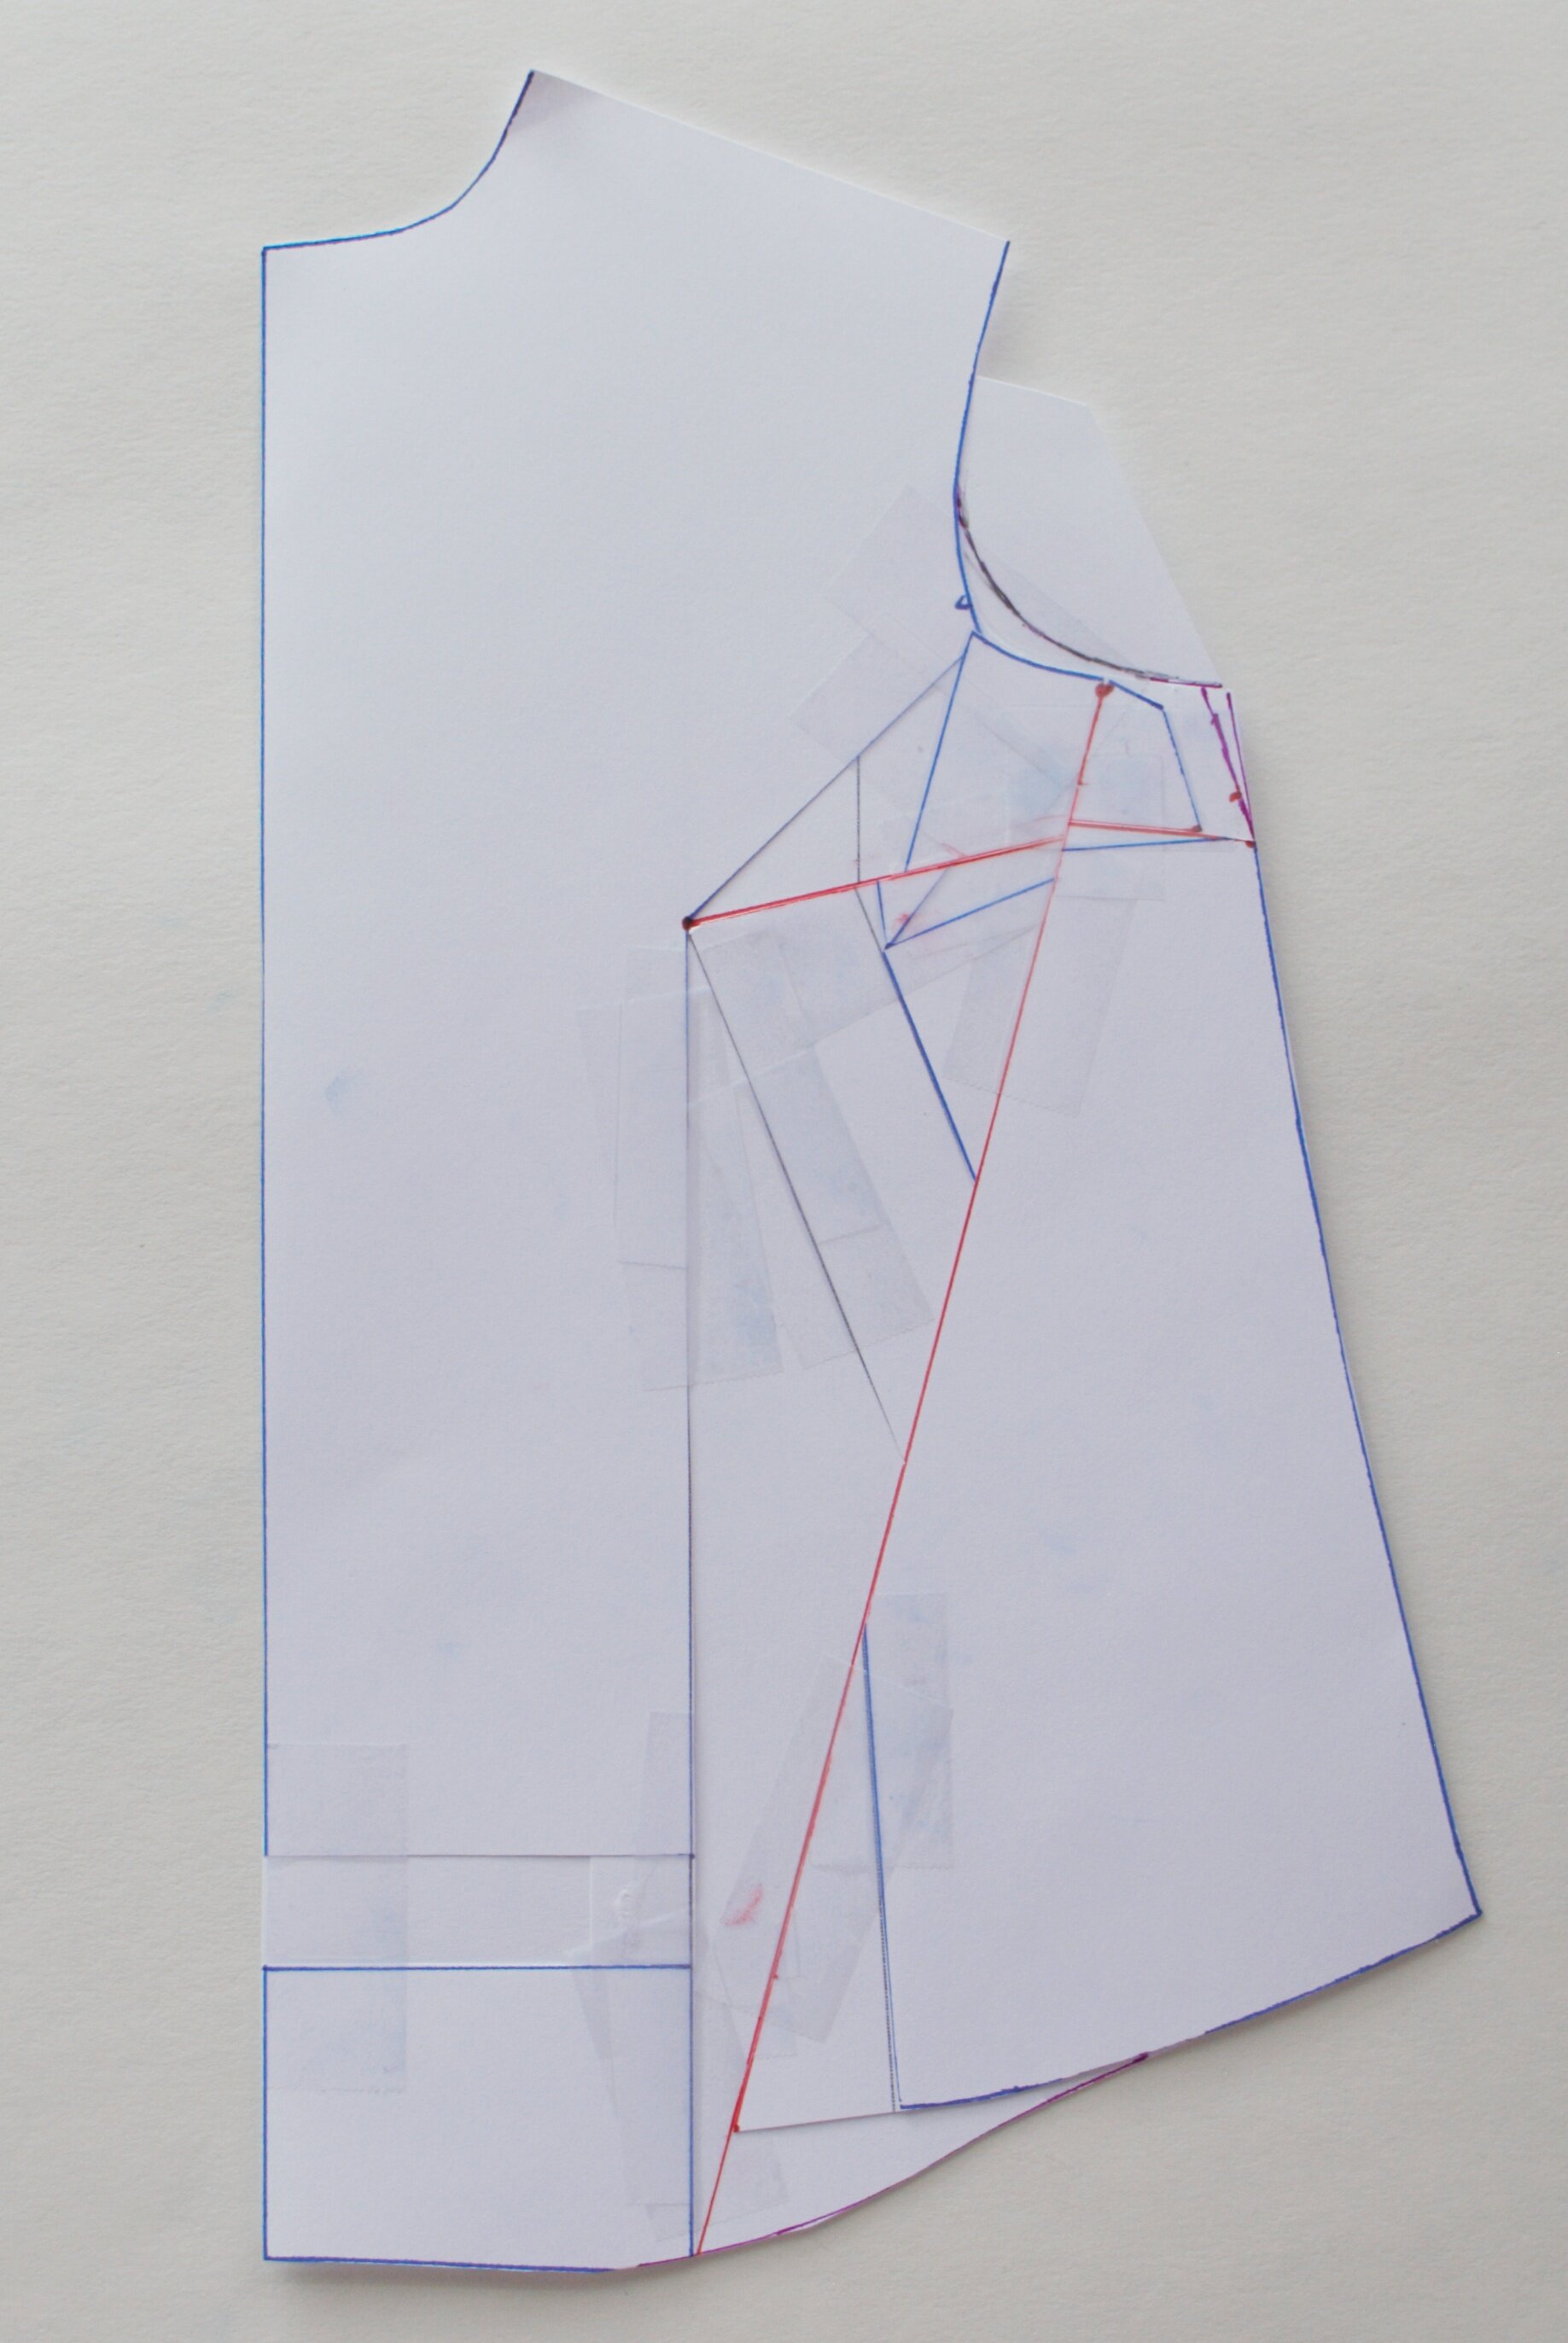
True the armscye curve
To complete your final pattern piece, true up the curve of the armscye. This takes a bit of futzing – essentially you want the armscye to have a nice even curve. This will also have the added benefit of reducing the armscye seamline a bit, which is needed since we just added to it.
Transfer any remaining markings from the original pattern piece, such as pocket or button placement.
As you can see, we’ve created a pattern piece that is wider across the chest and hips, longer in the front while maintaining the same side seam length, and has a more steeply curved armscye. These are all the things needed to accommodate a full chest without a dart!
Step Seven: True Up Pattern Pieces
Compare the length of your shirt front to any front facing or button band pieces and add length where necessary.
Measure the seamlines of the armscye and sleeve head and compare. These should be close to the same, with the sleeve cap seamline up to 1” longer (which will get eased in). Add the the front underarm of the sleeve if necessary. Compare the position of the notchs on the sleeve and armscye and adjust if needed.
At this point, lengthen or shorten the body or sleeves if you know you need to. Otherwise, make a muslin/toile and decide if any further adjustments are needed before you make the shirt of your dreams!
Shannon (she/her) is a queer sewist and art historian, living and teaching in the midwest. She shares her own sewing, mushroom farming, and dollhouse making on Instagram at @rare.device and is the founder of SewQueer.
Sew Queer is a community, and we welcome comments and discussion. In order to create a welcoming and multivocal space working towards a more just and equitable future, we review every comment before approval. Comments promoting racism, classism, fatphobia, ableism, or right wing political ideology are not allowed and will not be approved. For more details on commenting, visit our commenting guidelines.