Liam: Shirt Placket Tips and Tricks (Mistakes I've Made So You Don't Have To)
I would like to start off this post by clarifying that I am absolutely not an expert sewist. I’m just a guy who started sewing his own shirts because he couldn’t find any in stores in styles that he liked which would actually fit (since he has wider hips and narrower shoulders than most cis men), but had access to a sewing machine. The biggest challenge I’ve had with making my own button up shirts is that when I started, I didn’t know anyone else who did and so had no one to tell me about some of the things that sewing patterns just assume you already know. I figured that there were probably other people out there who are in the same boat as me, wanting to make garments which suit their style and bodies but falling into the “ambitious beginner” category.
In my opinion the most challenging part of sewing a button up shirt which also has the least amount of useful help online are the sleeve plackets and cuffs. I have made a lot of mistakes in the process of learning how to sew them neatly so this is going to be a “this is what I have learned from trial and error so you don’t have to” sort of blog post. I hope that it will be both useful and entertaining!

The sleeves and cuffs of a green and blue plaid long-sleeved button up shirt on a fake wood floor with one sleeve turned inside out. It’s a bit wrinkly but relatively neatly sewn.
My first tip is in my opinion the most important one. Sew your sleeve plackets while they are still flat! Even if the pattern tells you to insert the sleeve and sew it most of the way closed first, don't do it! It is so much harder to sew a sleeve placket on a tube than flat (especially one with a lot of additional fabric attached like the body of the shirt) and there’s really no reason to do this to yourself if you’ve checked that the length of the sleeve is ok for your body and made any required adjustments to the pattern already. The pattern for the first long sleeve button up shirt that I made told you to do it this way and, because I didn’t know any better, I just followed the instructions. There was a lot of swearing going on at this point – and I never did it again. Now the sleeve plackets (or body placket, if I’m making an Elbe Textiles Cornell Shirt) are the first thing that I sew and it’s way easier (and less stressful) to get a nice result. As an added bonus, it means I don’t have to interrupt my flow of garment construction to do it later.
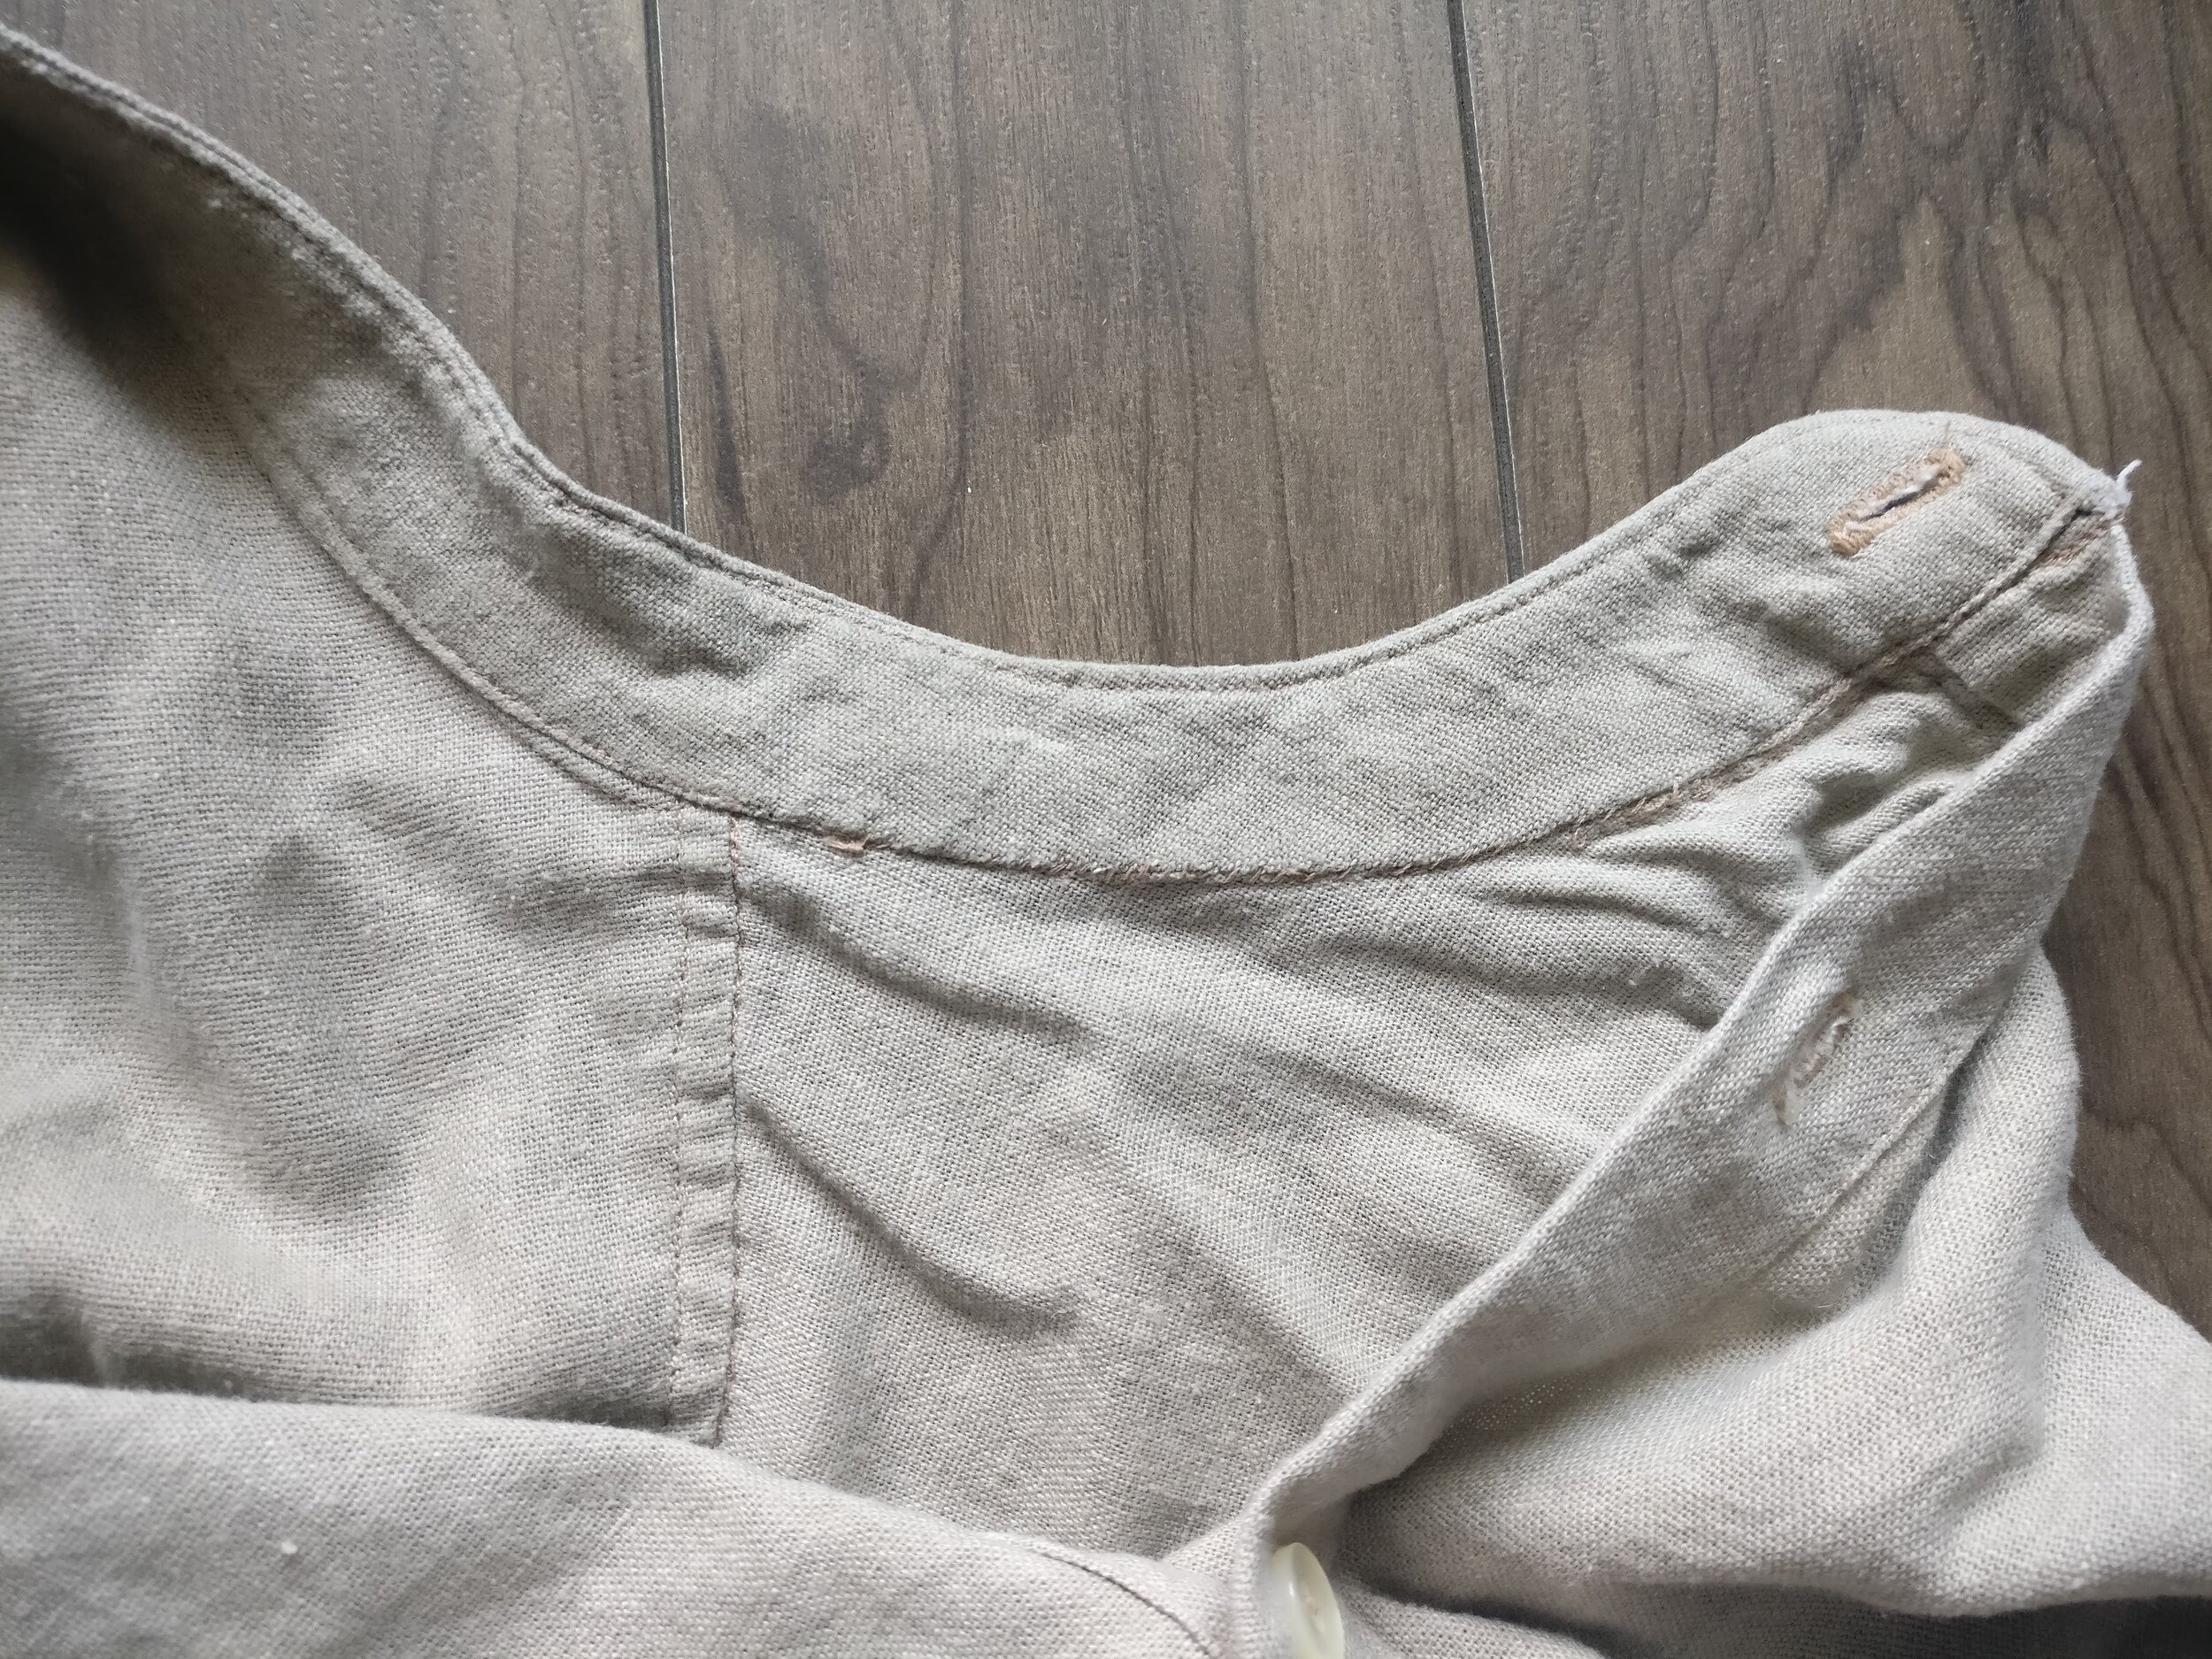
Let's talk a bit about the design of the sleeve plackets, particularly about the shape of the end of the placket. A lot of commercial shirts you will see have triangular ends, which does look nice but, personally, I find a lot harder to sew this style neatly and don’t find it worth the trouble. Honestly, no one is going to come up to you on the street and say “your shirt looks strange/terrible because it has square placket ends.” In fact no one is likely to notice that at all, even if they pick up on the fact that you made your own shirt (which is also fairly unlikely). If you’re just starting out sewing button up shirts with plackets, I highly recommend trying it with a square end first to get the hang of it and then you can experiment with different shapes later on once you are comfortable. I’ve included a photo below of an early triangular sleeve placket of mine from before I figured this out. As you can see, it doesn’t look all that nice, and doesn’t cover the raw edges well, which can be a problem for the wear lifetime of the garment.

A sleeve of a green shirt with tan stripes in a rectangular grid pattern on a fake wood floor. The sleeve placket is a very messy attempt at a triangular placket that is not very triangular and does not completely enclose the raw edges.
Next, I’d like to talk a bit about the shape and size of other parts of the pattern piece. I’ve included a picture below of one that I drafted for myself that I am currently using. I’ve shaded the seam allowances in blue, and the placing of the interfacing with dots and the cut line is dashed. Some patterns don’t come with seam allowance included so it can be helpful to see where it’s actually supposed to be instead of guessing. (I’m sure you can guess why I say this!)

A placket pattern piece with symbols, shading, and non-specific dimensions on a fake wood floor.
The big thing to note here is that the underside (the side that is shorter) should be a bit narrower than the overside, in the picture above I’ve marked this distance as x (which is 1/2” in case anyone was curious, while y is 3/4”). It doesn’t need to be a huge difference though; even a millimeter or two or 1/8” should be more than enough, but the reason why you want to do this is that when you are sewing the last seam on the placket to sew the edge of the overside down, you don’t want to accidentally catch the underside in the seam and sew the entire placket closed. I used to try to do this by just manipulating the sleeve to pull the underside out of the way but it’s quite awkward to do and just drafting a slightly altered placket pattern is much easier. Below is a photo which shows how this works out with the different width sides.

The inside view of a placket on a shirt made of blue and green plaid fabric. The edge of the under-placket is not too close to the over-placket seam so that the fabric does not need to be manipulated while sewn.
One of the other things that goes along with getting the width of the plackets correct is an instruction that I initially ignored because I didn’t think it was important. The pattern will tell you to line the folded-over edge of the plackets with the stitching line that you made when initially attaching the two pattern pieces together. You should definitely do this, even if your interfacing placement isn’t quite spot on and it would cause it to be folded over a bit. The photo below shows the location where I pin down the placket before sewing.
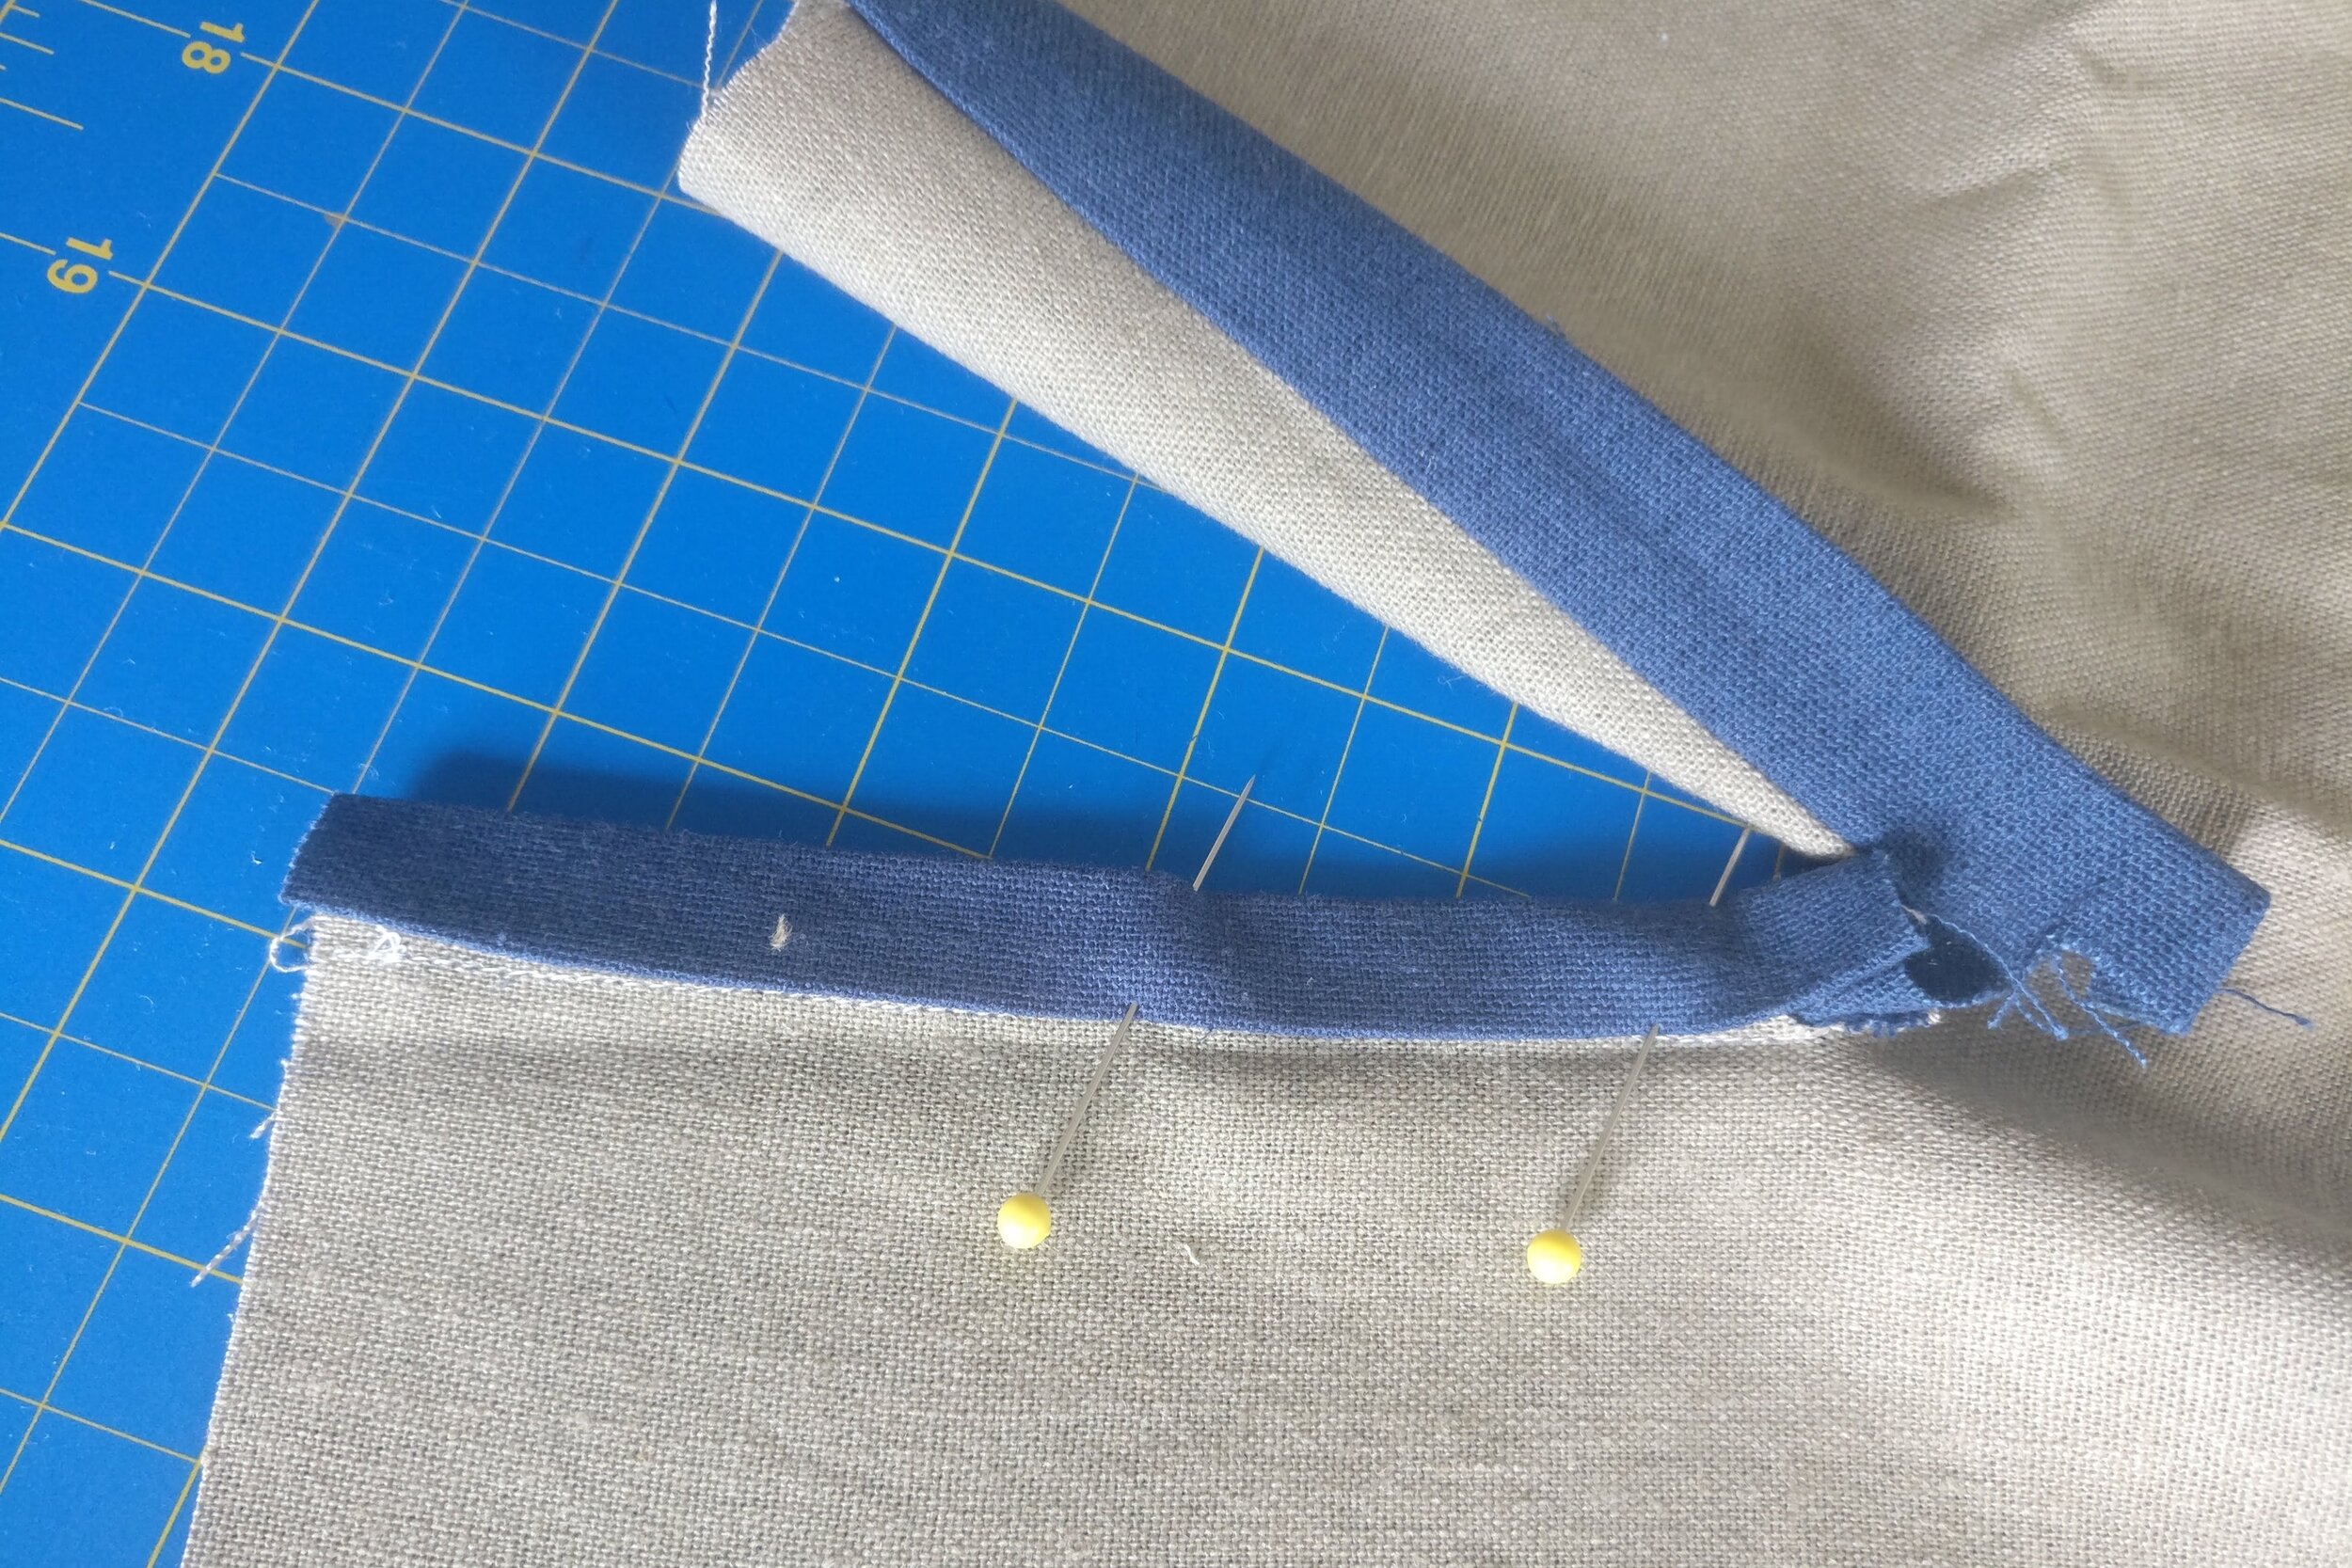
A beige piece of fabric on a blue cutting mat with a blue placket attached. The under-placket is partially pinned down, and the folded edge is lined up just over the white stitches securing it underneath.
If you don’t line these two edges up before sewing, especially for the underside, it will cause the placket opening to be too big, and you will not be able to get the overside to cover the underside properly later and it will visibly stick out or you will end up having to distort the fabric or make a little tuck to try and get it flat. This took me a somewhat embarrassing amount of time to figure out, so I have quite a lot of shirts with this minor issue. I’ve included a picture below of a shirt of mine that shows both problems.
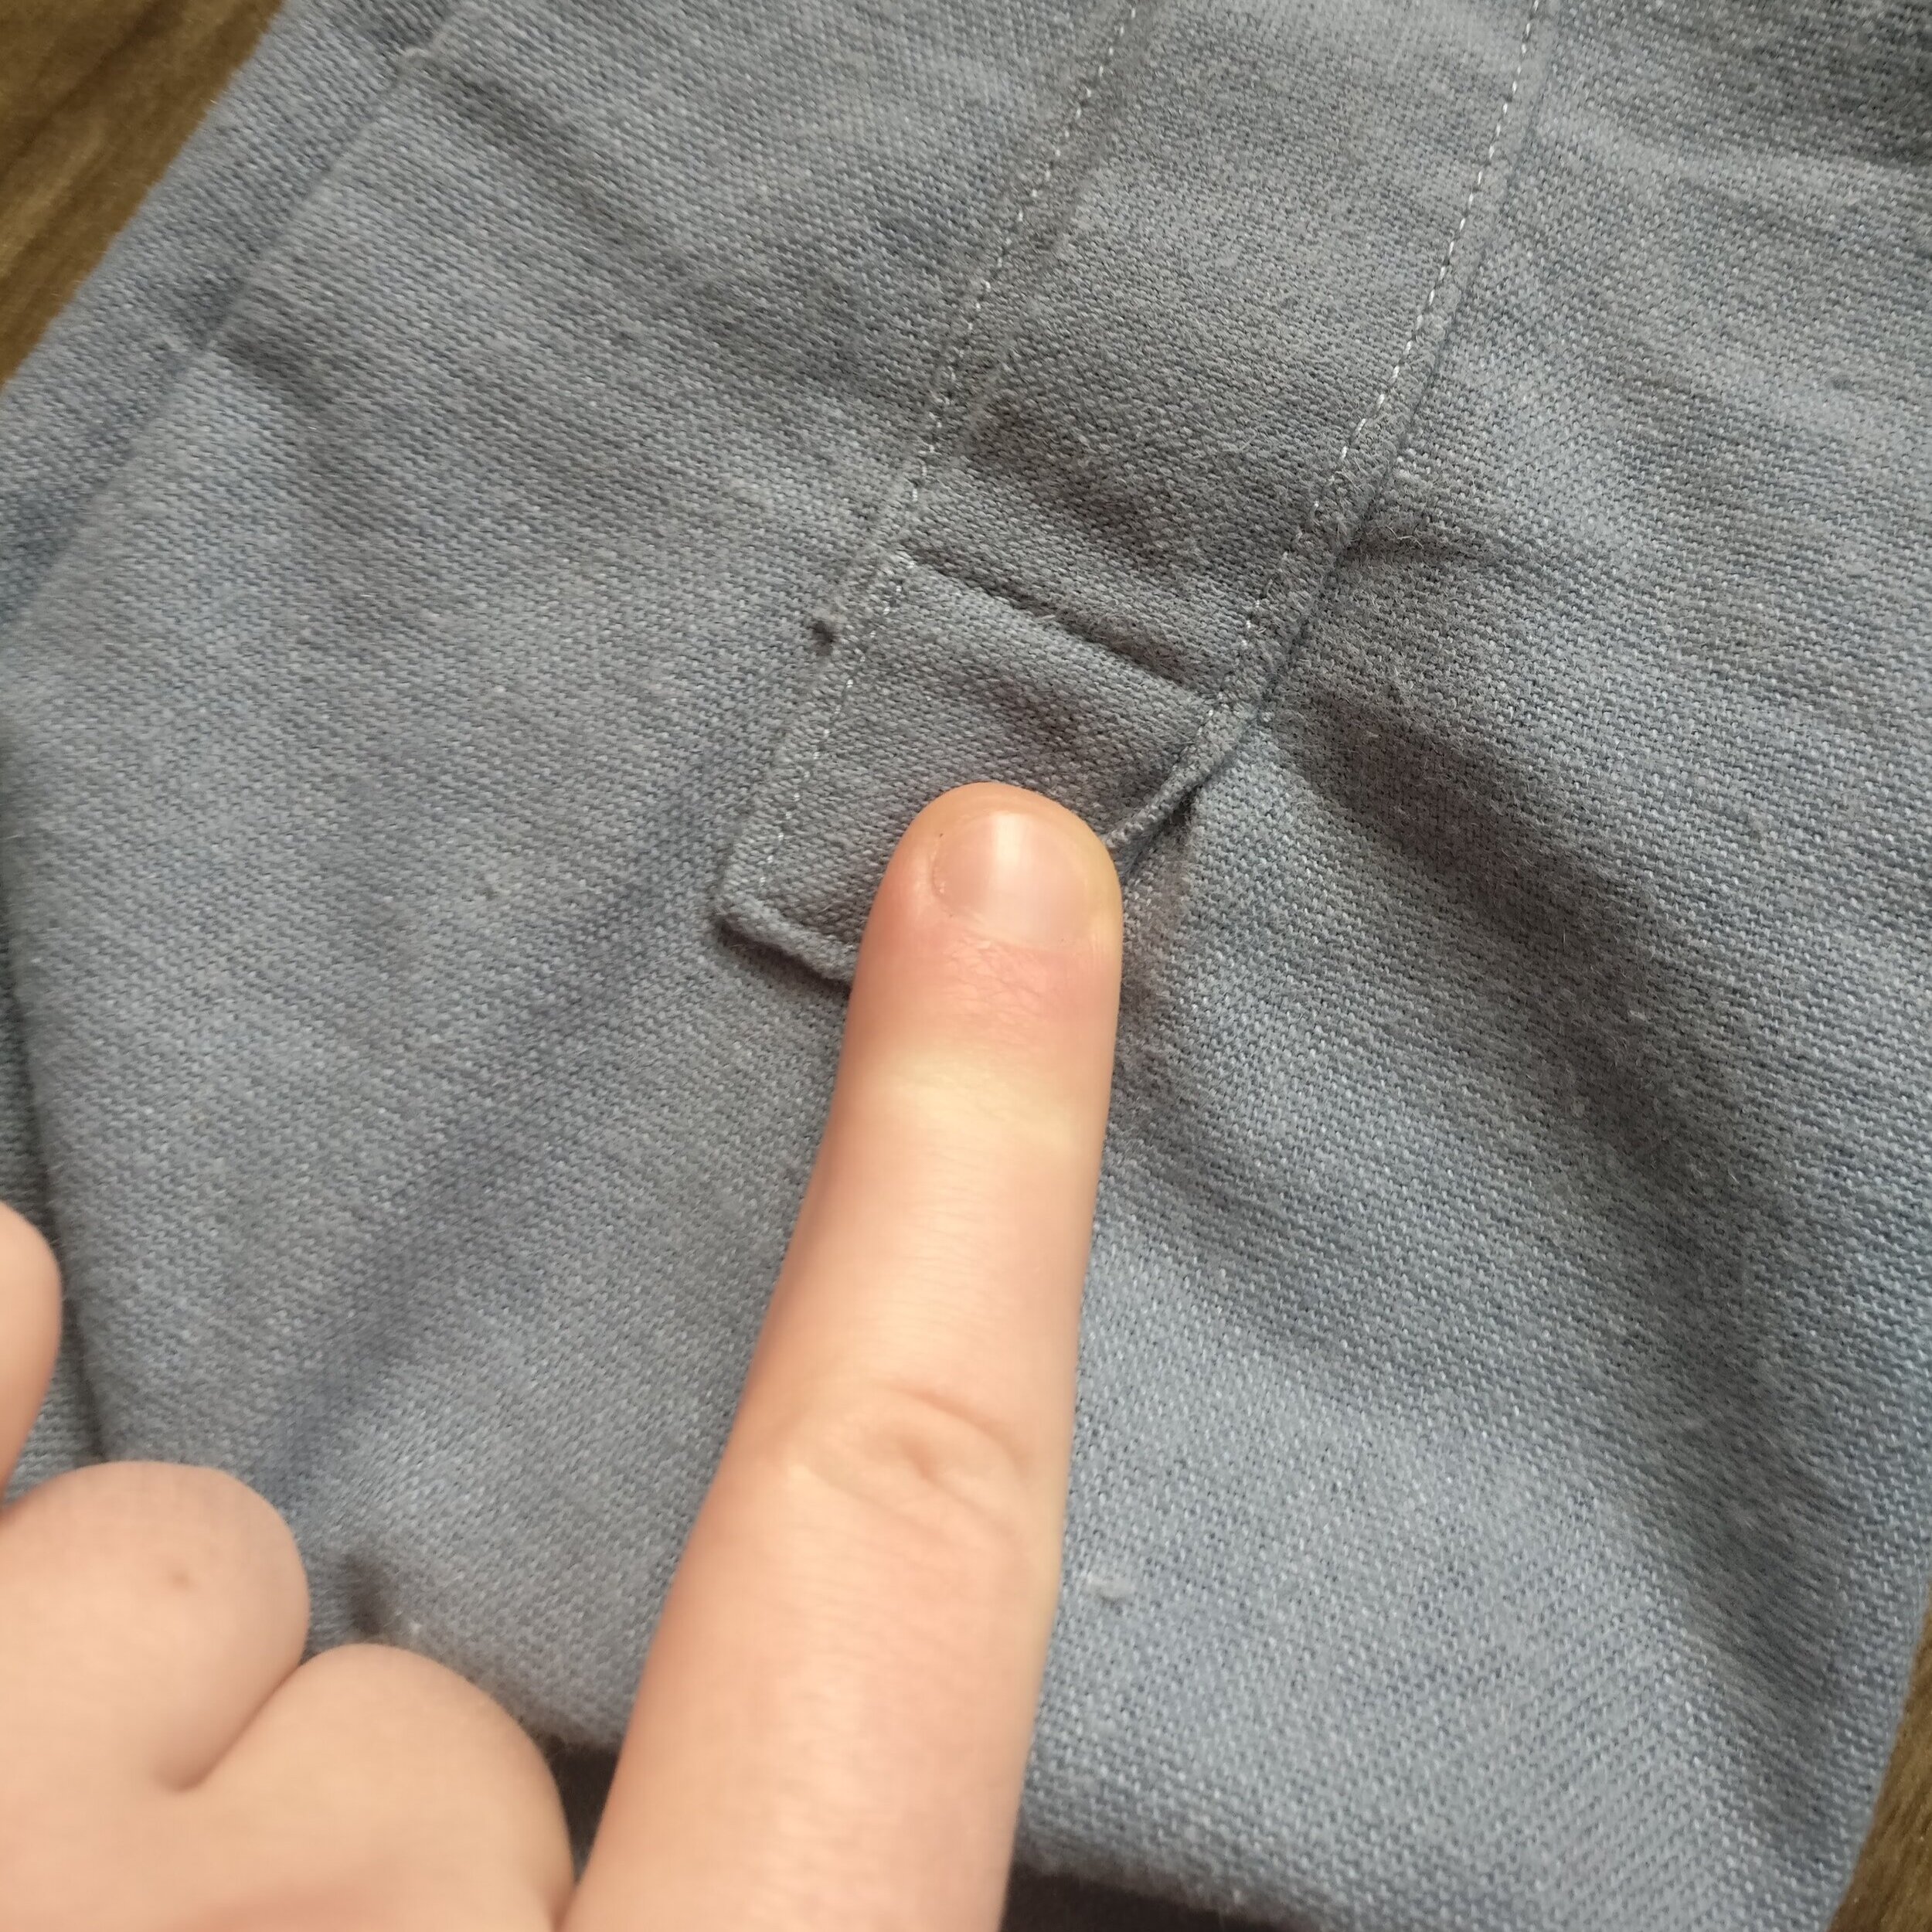
A grey-blue placket with the bottom corner of the under-placket sticking out the side. Liam’s finger is pulling the edge of the opposite edge of the placket over to show where the fabric has been tucked while sewing since it was not possible to sew it flat all the way around.
The other thing that I’ve found which helps with this is not to sew quite all the way to the end of the underside. If you stop about 1–1.5cm from the end then you will have a bit more flexibility to tuck it under even if you haven’t quite lined it up perfectly. Since that part will be completely encapsulated by other fabric and seams anyway, it won’t compromise the function or wear life of the shirt either.

A beige piece of fabric with a partially-sewn blue placket on a blue cutting mat. The under-placket has been sewn down but with a bit at the end left loose to facilitate easier manipulation/covering by the over-placket in the next step.
The bottom seam line for the placket is also important: it needs to catch both layers, or you will end up with a raw edge which has a tendency to flip out. The photo below is of my first ever sleeve plackets: I figured out this flipping problem on the first wearing. You may also notice that these plackets are extremely short and the cuffs are very bulky. At the time I thought that you had to get the fabric of the sleeve all the way down to the fold of the cuff instead of just the edge. I don’t recommend it – it’s extremely fiddly and frustrating, and doesn’t give the result that you are likely looking for.

A pair of shirt sleeves sewn in white fabric with a green and red leaves and berries pattern on a fake wood floor. One sleeve is inside out to show how the bottom of the under-placket was not caught while sewing and remains unprotected.
When I am sewing the over-placket seam I usually mark the line that I am going to sew to catch the under-placket with a pin so I can check that all looks good on the top and bottom before starting. In the picture below this is shown by the pin going in the opposite direction as the rest.

A blue placket pinned over beige fabric. The center pin is pointing in the opposite direction from the rest, indicating the location of the first stitching line for the over-placket.
A few more small tips and tricks in case you need to hear them. You can (and should) feel free to use different stitch lengths if you’re getting close to the corners of the plackets but not quite close enough to keep it a (more or less) uniform distance from the edge.

A blue placket on a beige fabric with seams in white, showing stitches of variable length on the tab.
Moving on to a few tips about cuffs since in my mind they are closely related to plackets and have caused me a fair bit of frustration as well.
Firstly, it’s a very good idea to measure both sides of your placket once finished to make sure they are actually the same length before sewing on the cuff. If you don’t and they’re a bit different (or if you sew the cuff on with an uneven seam allowance) you might end up with a problem like this, where you can’t get the edges even without causing the placket not to lie completely flat. Sometimes I’ve disguised it a bit more by putting in mid-placket sleeve buttons, or by shifting where the excess fabric lies on the body placket, but you won’t be able to get rid of it without removing the cuff and redoing it. It’s much easier to snip off the extra before you sew the next step. The photo I’ve included below is the most obvious instance of this on my shirts, its actually from a body placket of a Cornell Shirt by Elbe Textiles. I’ll add that I do wear it like this and no one has commented on it yet, but it does annoy me.

The bottom of a placket in white fabric. The over-placket is buckled below the button because it is longer than the under-placket.
I used to have a lot of problems with keeping the line of the edge of the cuff straight with the line of the edge of the placket. The photo below is of one of the many examples of this on my shirts, if you look at the edges of the over-plackets you can see extra little wedges of fabric which cause the cuff to tilt.

The ends of a yellow shirt’s sleeves on a fake wood floor. One cuff is unbuttoned. The cuffs have been sewn somewhat haphazardly and are at varying degrees of straightness relative to the sleeve and placket edges.
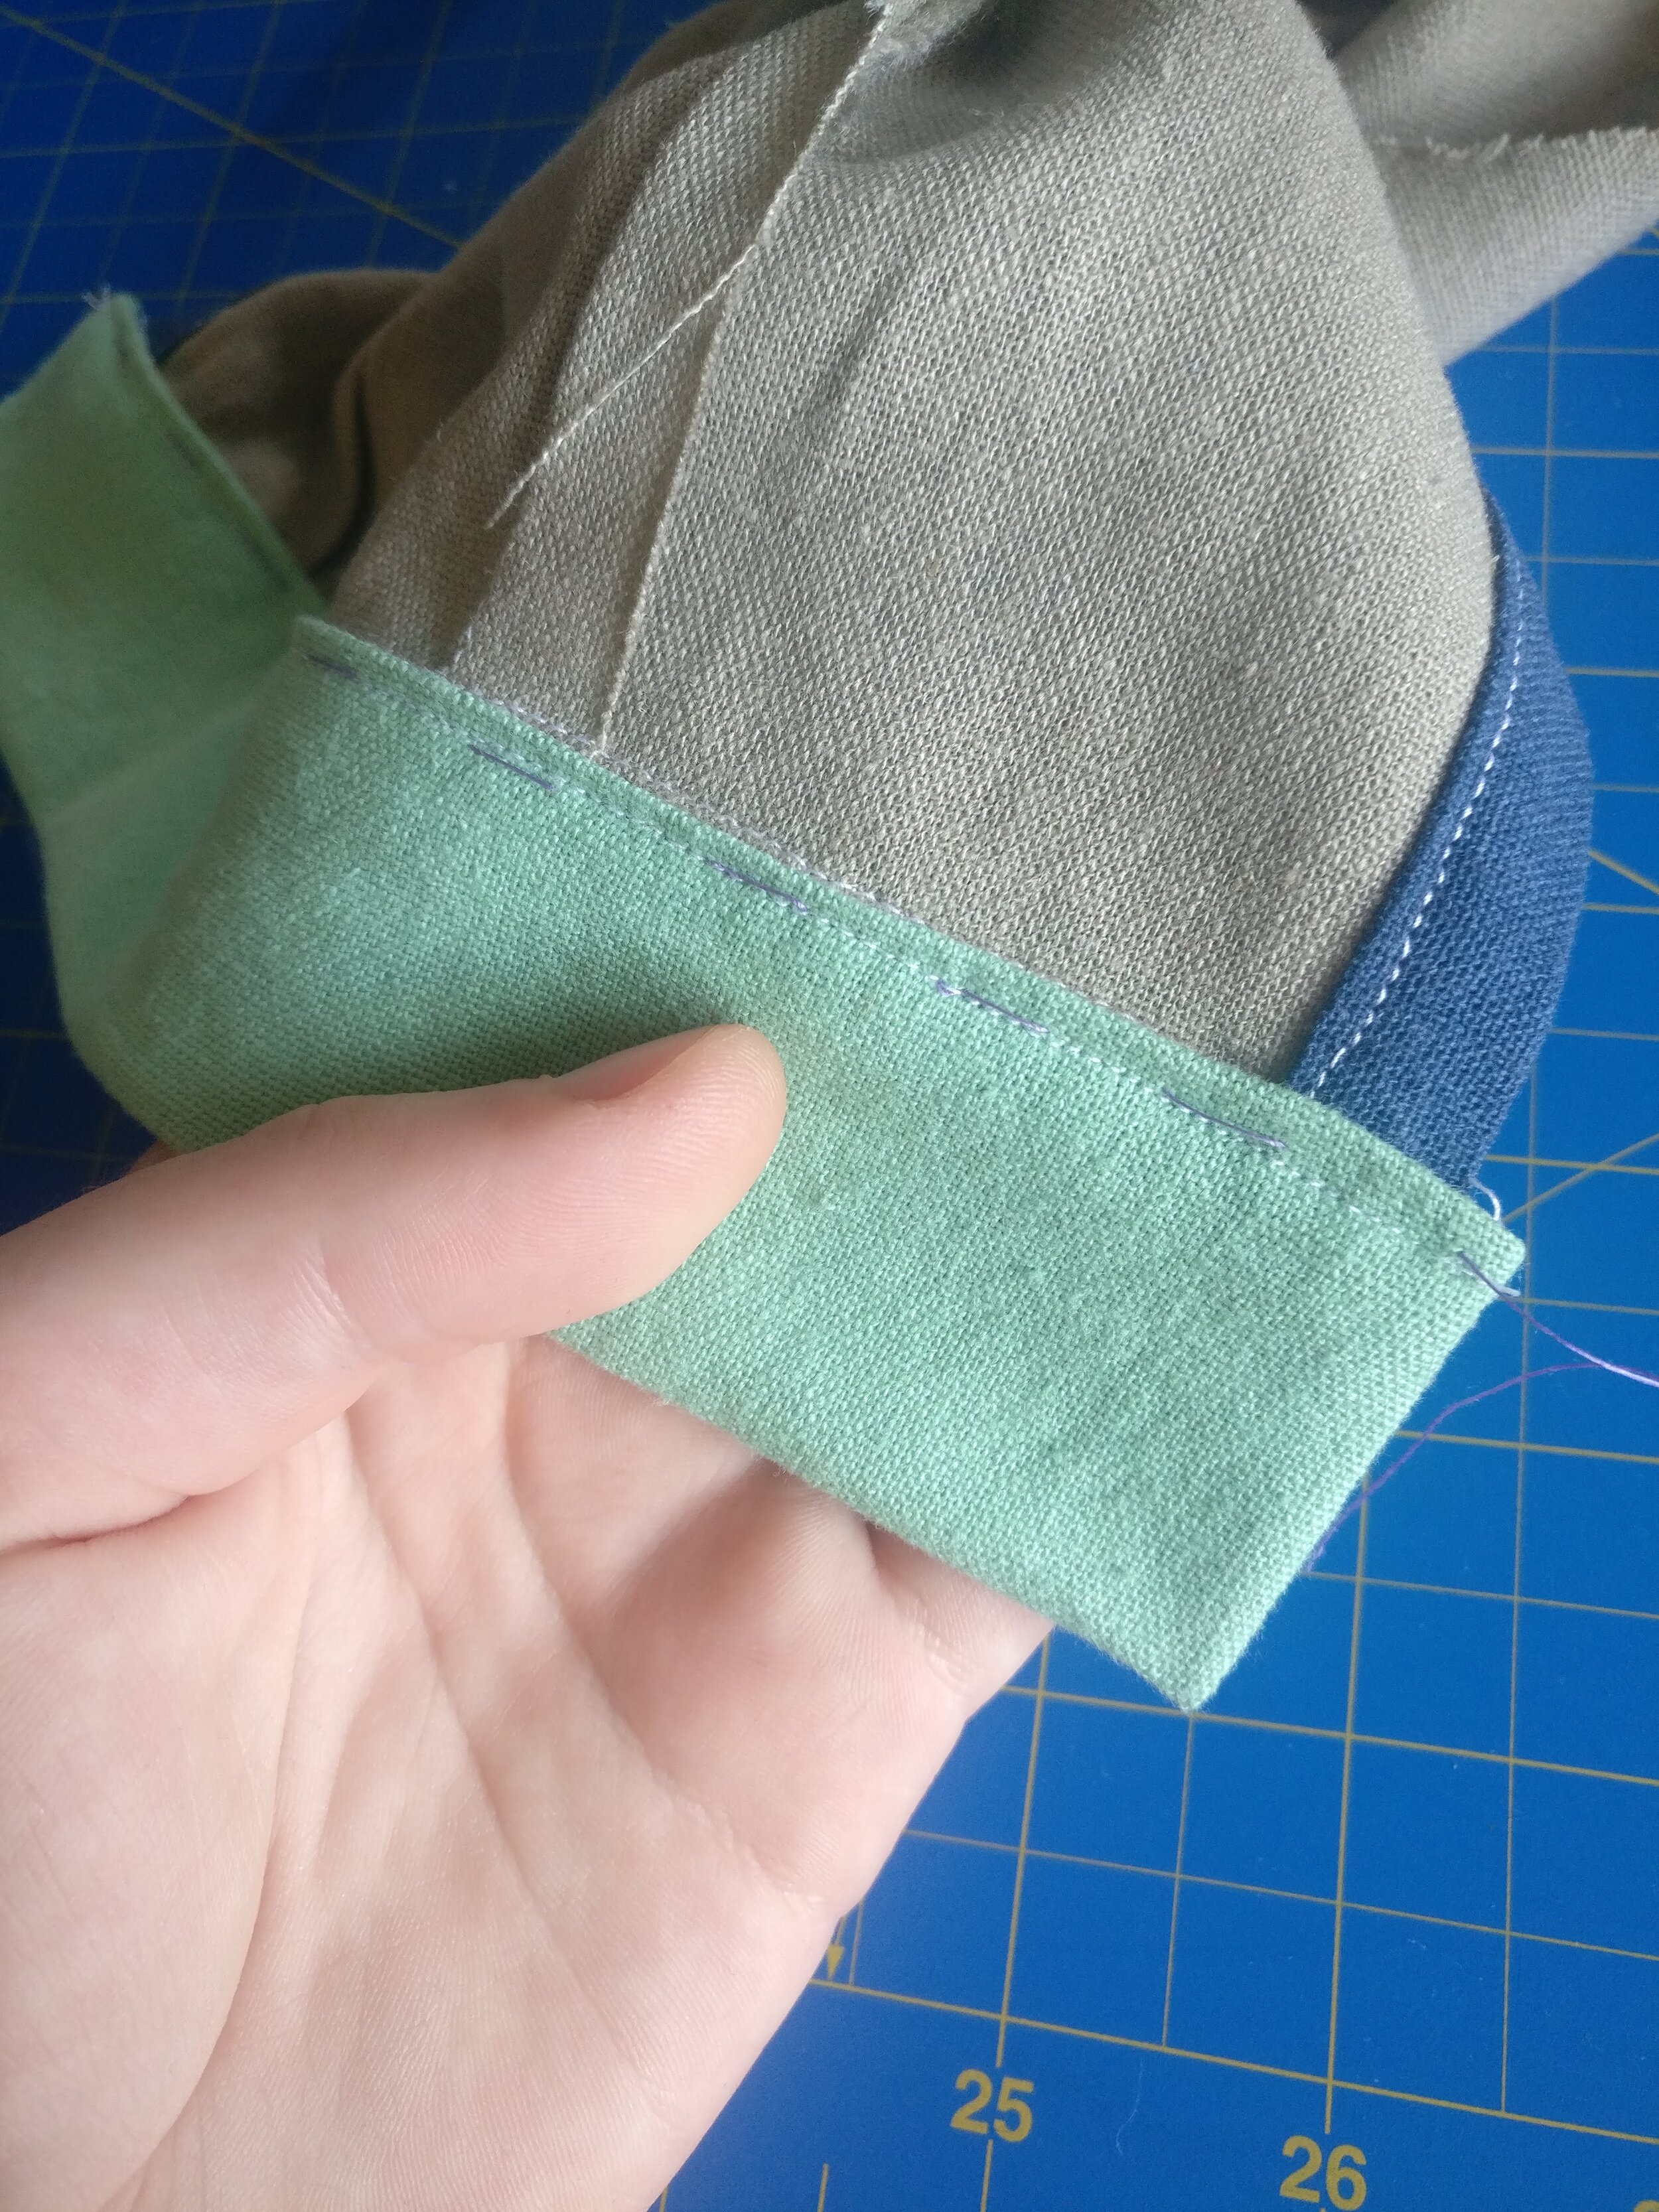
The best way I’ve found to minimize this is to pay attention to the edge of the cuff and the sleeve when you are sewing them together: add a couple of extra pins further down the sides to make sure that it doesn’t move while you are sewing and that you have an equal distance all the way down. I also recommend lining up your cuff so that the edge of the interfacing (or where you plan to put the seam for the sides of the cuff) sticks out just a wee bit from the edge of the placket. This will give you a bit more room to accommodate all the layers of fabric in this area when you turn the cuff right side out, and I find it helps to make things lie flatter, though it may make the edge stick out a bit from the placket. The photo I’ve included below has the edge of the interfacing marked in pencil (this will become the edge of the cuff) and the position of the pins that I use for each end of the cuff at this step.

A sample shirt sleeve made of beige, blue, and green scraps with the cuff partially pinned, laying on a blue cutting mat. There is a pin at the top perpendicular to the edge of the sleeve and one a few inches down parallel to the edge. The line of the interfacing which is on the other side of the cuff piece is marked in pencil to show the placement relative to the edge of the placket.
My final piece of advice to offer you about button up shirt cuffs (and or sewing in general) is that sometimes it’s absolutely worth doing some hand sewing. It might sound a bit counterintuitive, but there are certain parts that I think are just better/easier/faster to do by hand. For example, one thing that I found incredibly frustrating to do neatly by following the directions on shirt patterns is topstitching the inside of the cuff down: if you want the outside to look neat, you can't look at the inside of the cuff. (The same issue comes up with the undercollar/collar stands.) The biggest issue here is that you’re sewing something curved. Pins only hold down the fabric at points, and things can shift so that you can easily end up missing the inside fabric or having a larger flap which you will have to hand sew down anyway.
The inside of a band collar of a beige shirt on a fake wood floor. A section was entirely missed by the topstitching and was sewn down by hand afterwards.
There are two options that I think are good ones to consider using depending on how much hand sewing you are willing to do. The first option is instead of pinning the inside of the cuff before topstitching, instead baste it with a contrasting color thread. This way you can see the inside of the cuff while you are setting it in place, and have more control to make sure it is where you want (and you know you will definitely catch the entire underside if you follow your basting line). I recommend sewing the running stiches from both sides in single stabs to ensure that you don’t get bunching or material sliding around once you remove the pins. (You’re sewing through four or more layers here, so it won’t bend sharply that easily). I’ve included below a picture of the basting process in progress along with a picture after I have done the topstitching but before removing the basting stitches.

A partially pinned and basted inside-out sample sleeve made of beige, blue, and green scraps on a blue cutting mat.
Liam holding a sample shirt sleeve made of beige, blue, and green scraps over a blue cutting mat. The inside of the sleeve is showing and there is a line of machine topstitching overlapping the basting stitches.
The second option, and the one which I now prefer, is to hem the bottom and sides of the cuff by hand and then add the decorative top stitching later as a separate step. Below is a picture of what this looks like for me once finished.
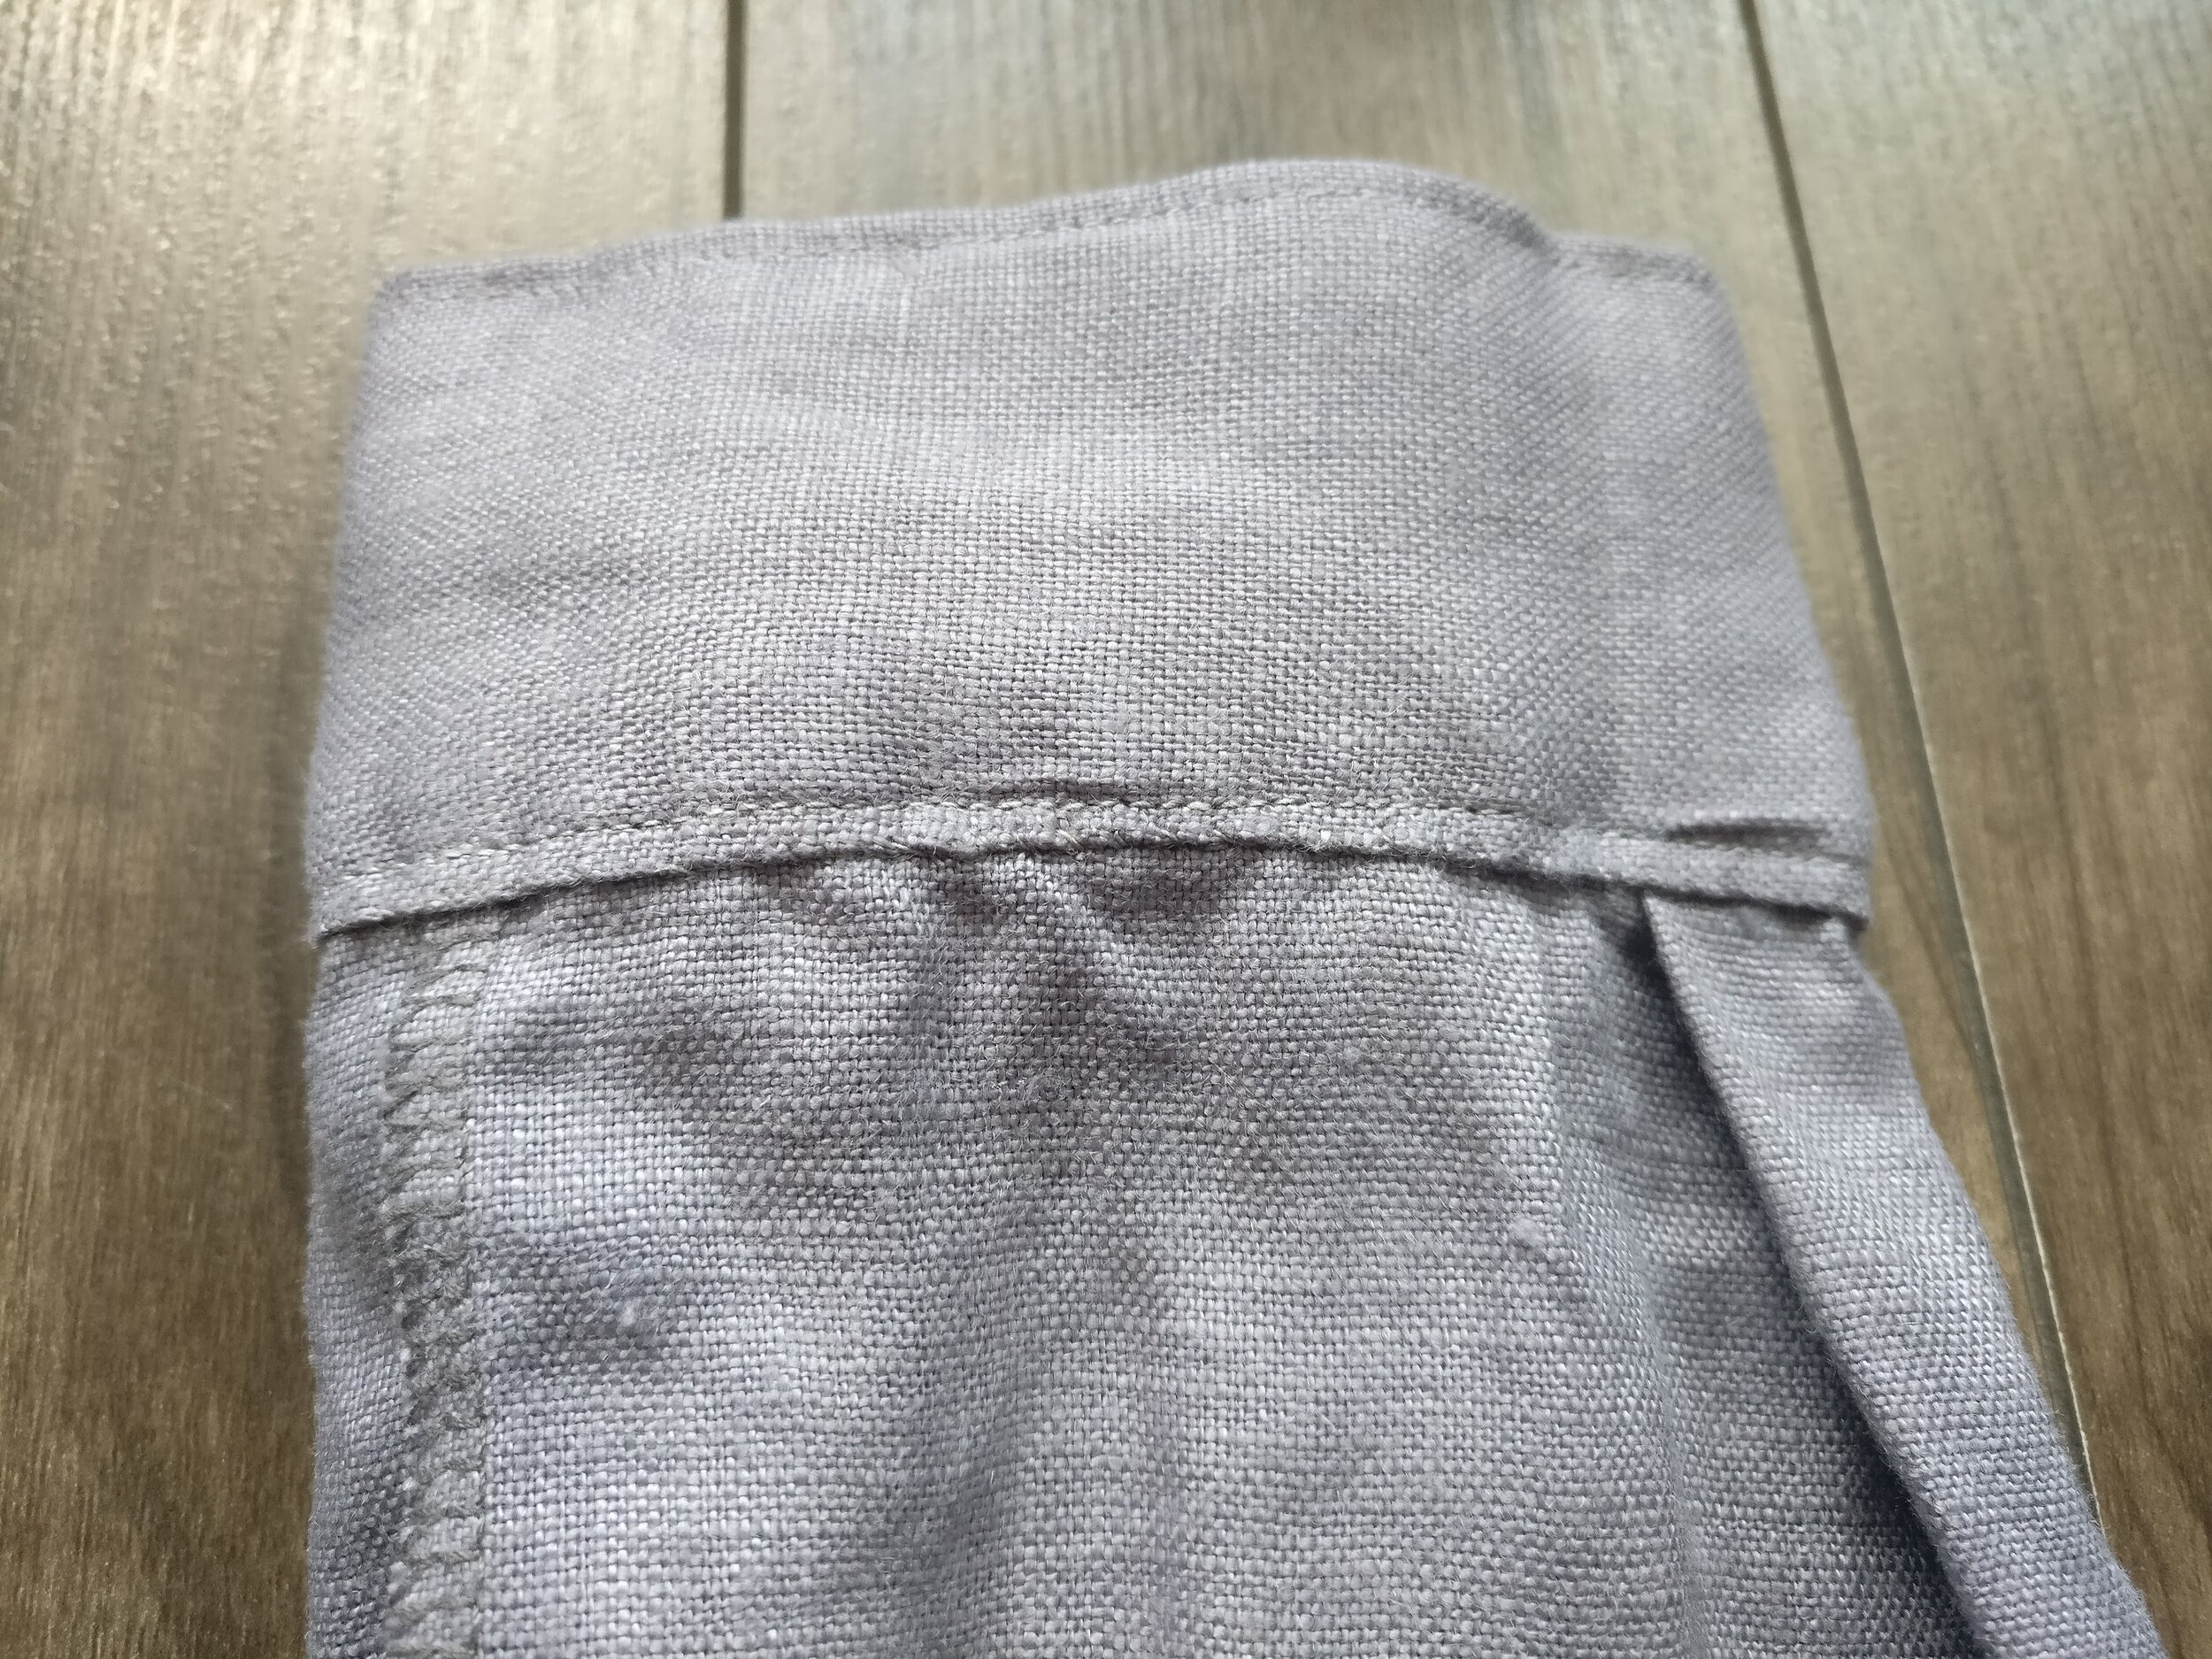
A silver-grey sleeve on a fake wood floor turned inside out to show the hand-stitched inside edge of the cuff next to the machine stitched topstitching.
I find this faster than basting and sewing by machine so that the cuff will be held closed with a single top stitching seam, and it involves much less swearing on my part than anything else I’ve tried. I find the rhythm and feel of hand hemming enjoyable. I also use this same technique on the undercollars/band collars of my shirts as well and have included a picture of this in progress below.
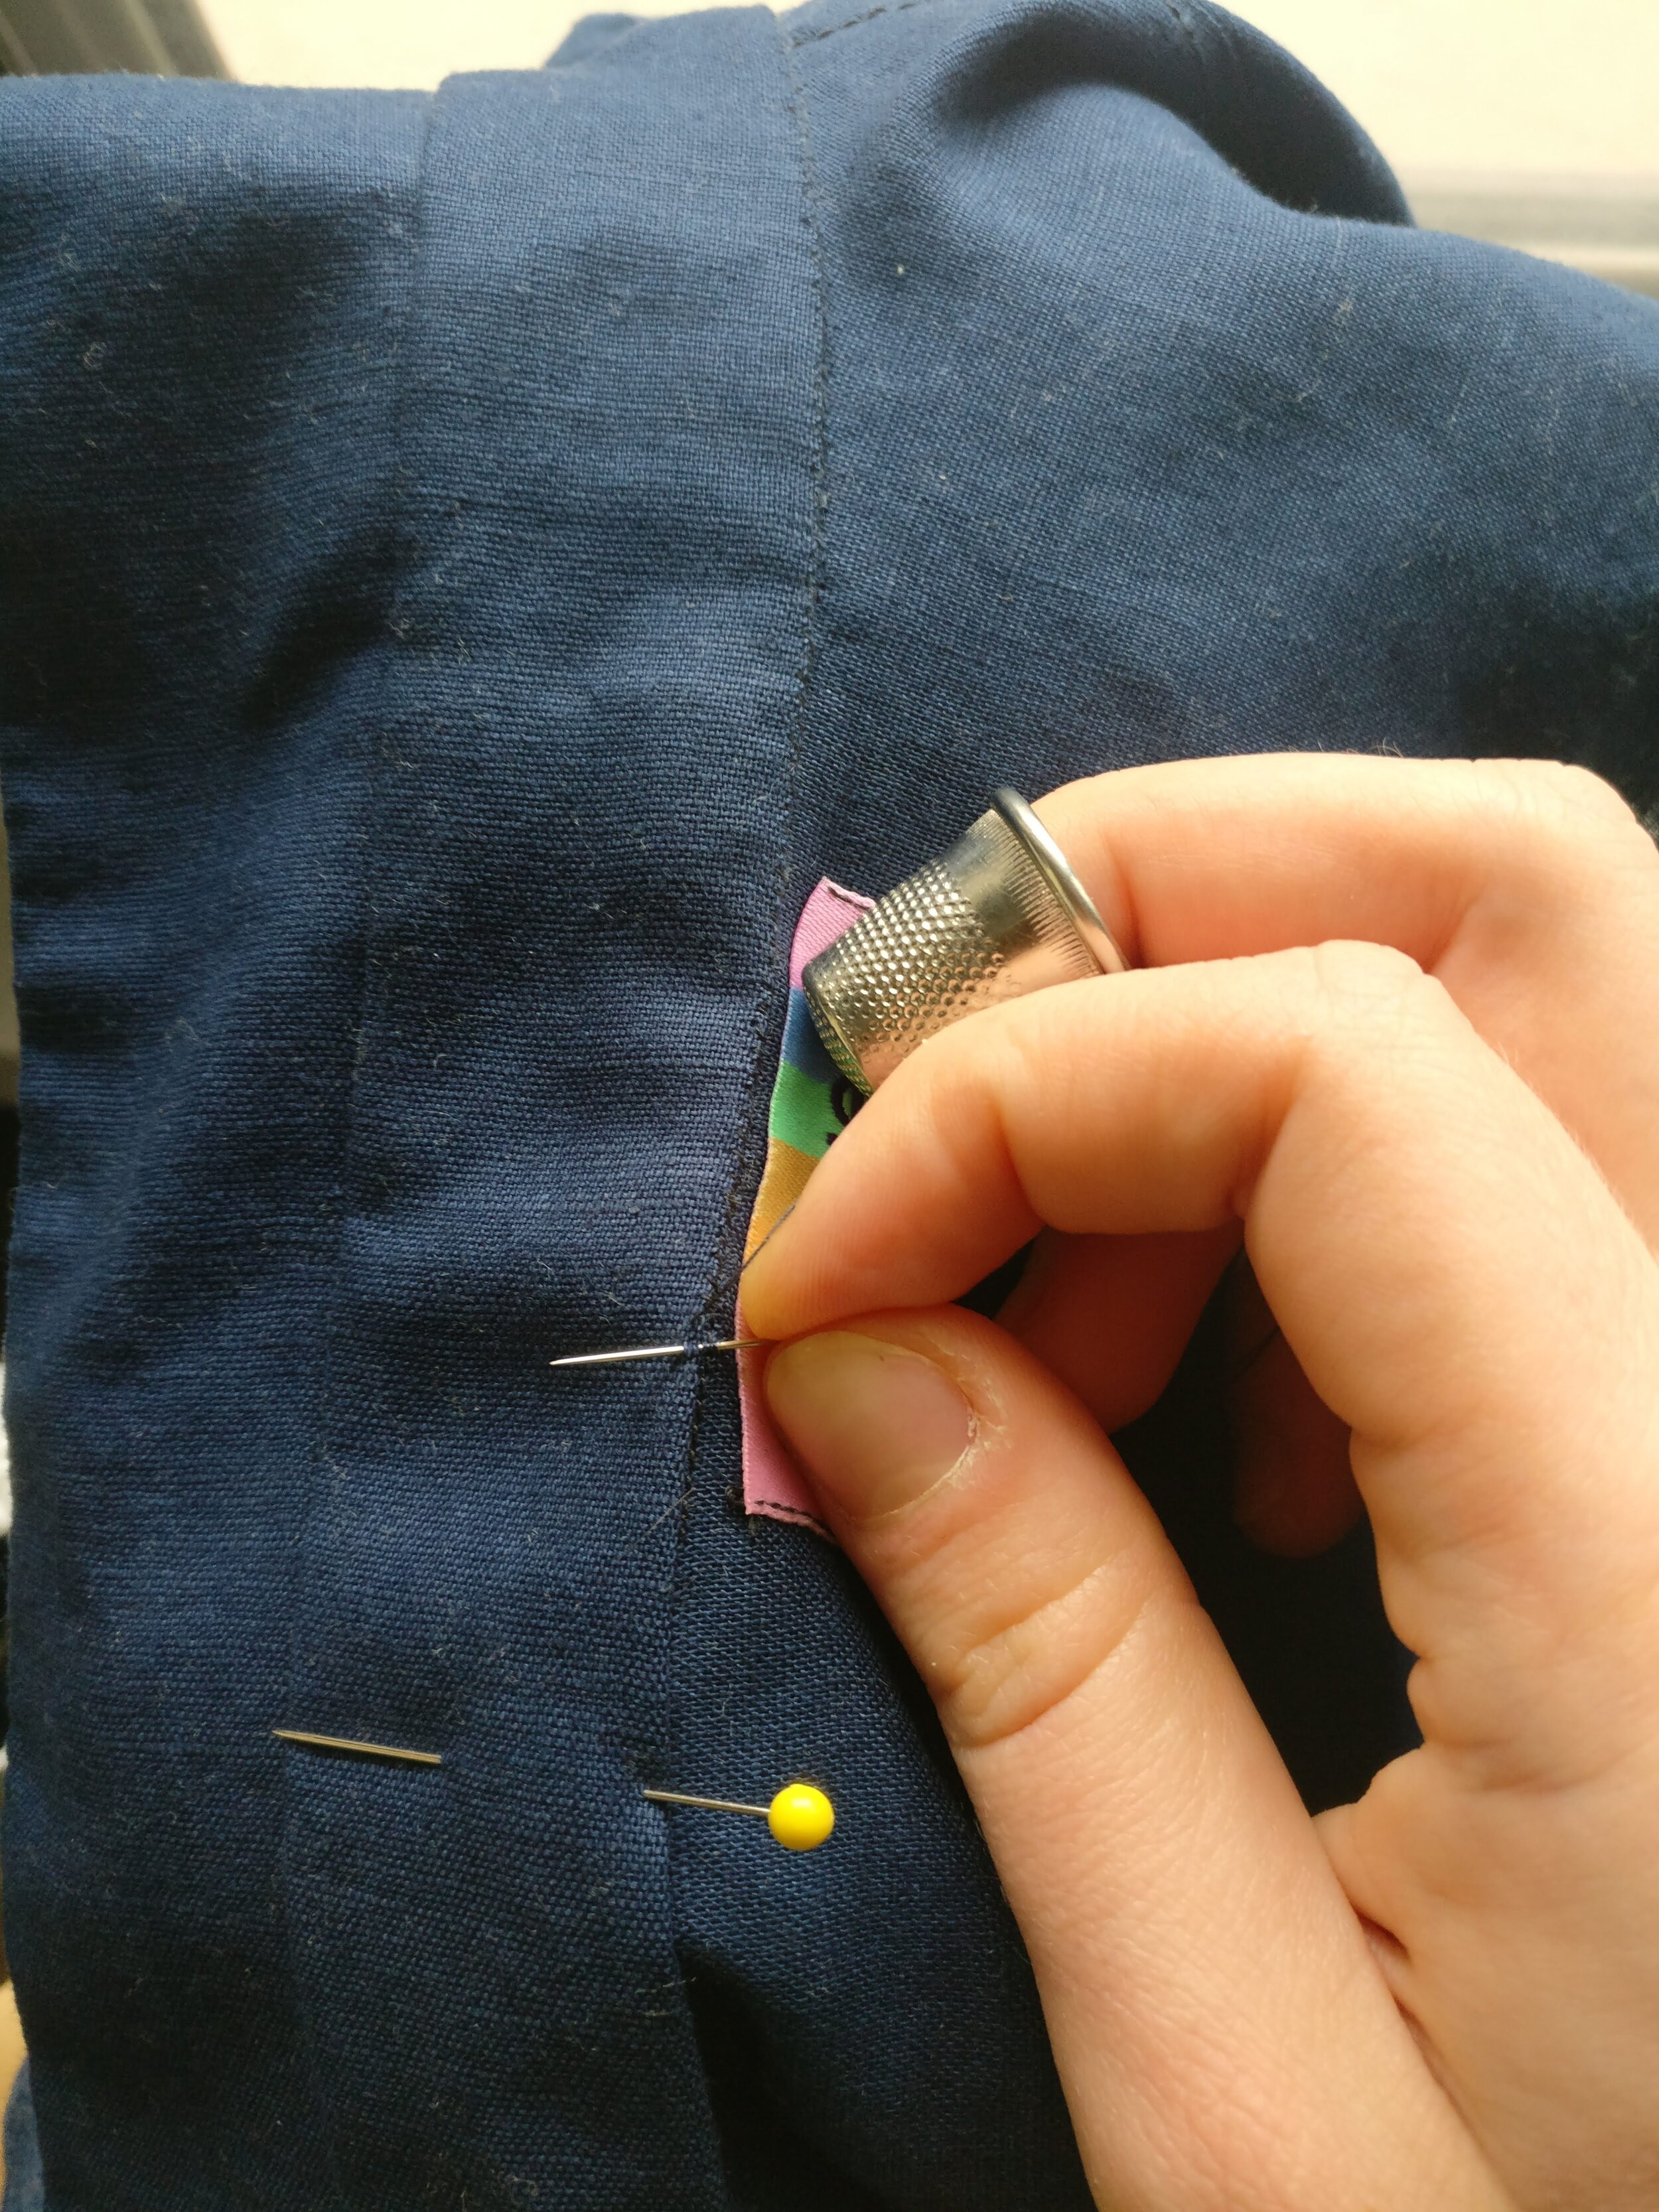
Liam hand-stitching down the inside of the undercollar of a navy shirt with a rainbow Sew Queer label.
There are some good tutorials on how to do the hem stitch on Youtube in the historical costuming community so I highly recommend looking them up, since they’ll do a much better job of explaining and demonstrating than I could do here.
Anyways, I hope that this all has been helpful to anyone who is just starting out sewing clothing and has been feeling intimidated by sleeve plackets, or to anyone who wanted advice on how to make them neater or make them less frustrating to sew. I would love to help enable more people to be able to wear clothing that they’ve made themselves and that they feel especially good in. Wearing clothing that fits both physically and mentally is incredible and well worth the effort.
A selfie of Liam, a white person with glasses wearing a dark red long-sleeved button up shirt. There is an old Kenmore sewing machine in the background.
Liam (he/him) is a white, queer, transman living on Treaty 3 land in Ontario. He is a knitter and sewist who is working on making a wardrobe of clothing for himself that actually fits both his style and body. When not working on his fiber arts hobbies he can usually be found reading or spending time outdoors. You can find him on Instagram @theleaninglarch.
Sew Queer is a community, and we welcome comments and discussion. In order to create a welcoming and multivocal space working towards a more just and equitable future, we review every comment before approval. Comments promoting racism, classism, fatphobia, ableism, or right wing political ideology are not allowed and will not be approved. For more details on commenting, visit our commenting guidelines.