Shannon: Making Room for Hips in Shirt Patterns (or RTW!)
A really common fitting issue in shirtmaking is getting both the chest and the hips of your shirt to fit at the same time. Many of us, especially if we are trans or gender non-conforming, do not fit into the proportions commonly used in the blocks for commercial patterns. Today, I’d like to offer some tips for adjusting a pattern when it fits well in your chest but is too tight across your belly and/or hips.

A fat white person wearing a plaid flannel shirt and carrying an axe.
The Elbe Textiles Cornell Shirt is oversized; however, to get just the right fit I graded out a bit at the hips to accommodate my booty.
This fitting issue is quite common for folks with wider hips, fuller bellies, or fuller butts. You might encounter it if you’ve had top surgery or wear a binder, if your bottom half is larger than your top half, or if you’ve completed our last tutorial about fitting a dartless shirt front but still need some more room in the bottom half.
First, determine where and how much more room you need. If you’ve made a mock-up, is it straining at the lower hem against your hips? At the bottom few buttons against your belly? Riding up at the back because of your butt? If you haven’t made a mock-up yet, you can measure the pattern pieces, add them together (after removing seam allowance), and compare that to your body measurements. That might help you determine where to add your width and which method to use.
No matter your method, you want to keep your center front straight up-and-down to avoid a wonky button band and center back straight to avoid getting off-grain.
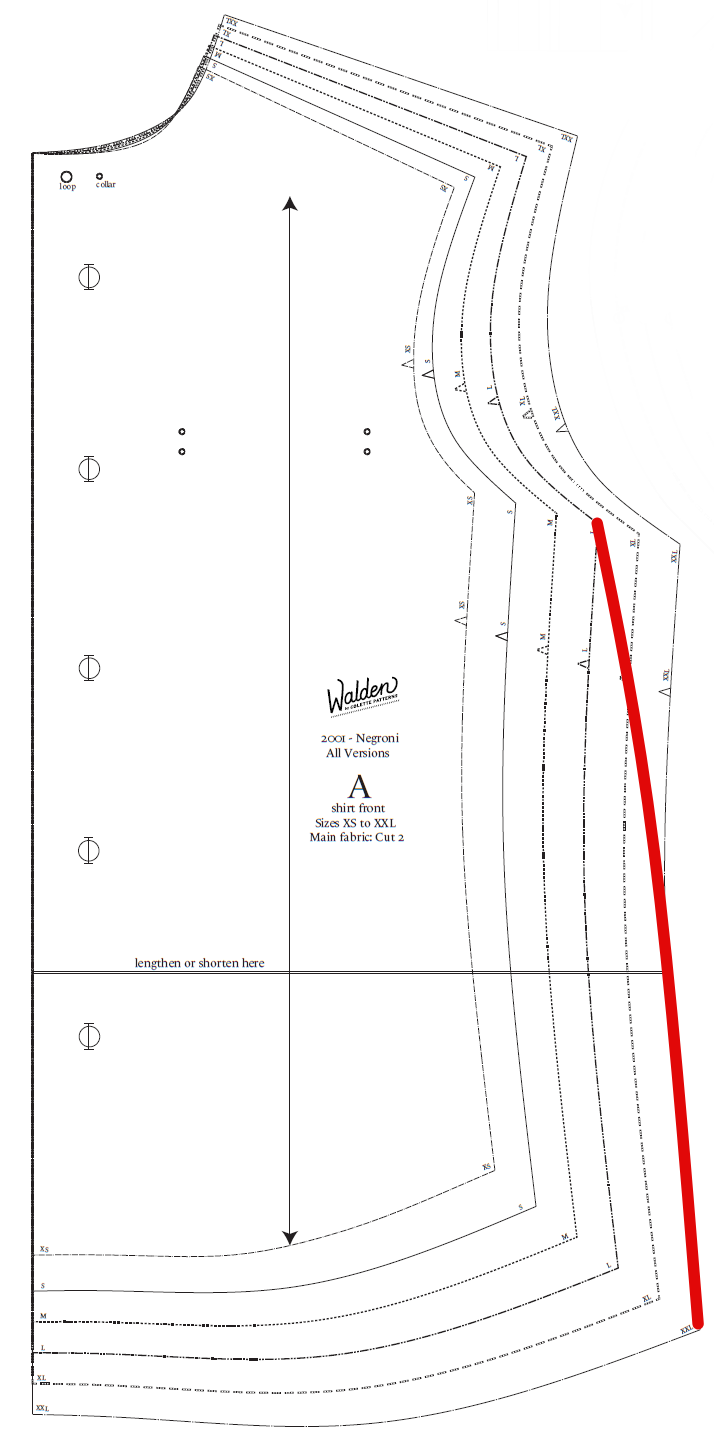
Method One: Grade Between Sizes
Very few of us fall directly into one single size, so a common practice in sewing is to grade between sizes. That means drawing a connecting line that blends from one size to the next, or to one or two after that. There is a limit on how many sizes you can grade – make sure you can get a clean line that doesn’t radically alter the shape of the pattern piece.
You can use the hip measurement on the body measurements chart for your pattern to determine what size to grade to, if there is one. “Menswear” patterns don’t always have a hip measurement, however. In that case, start by measuring the fullest part of your lower body. Add to that measurement the amount of ease you would like — for a non-stretch shirt pattern, this can be about 2–4 inches for a “traditional” fit, or much more for an oversized fit. Then, measure the width of each torso pattern piece (often just a front and back, but sometimes there are side panels as well). Subtract seam allowances, add them together, and double it to get the final circumference (because for each piece you cut a right and left).
The difference between these numbers is the amount you need to add. Divide it by 4, because you’ll be adding it to both side seams, on the front and back pattern pieces. Find the point at which you want the fullest amount added, then measure out the number you just determined from your current side seam.
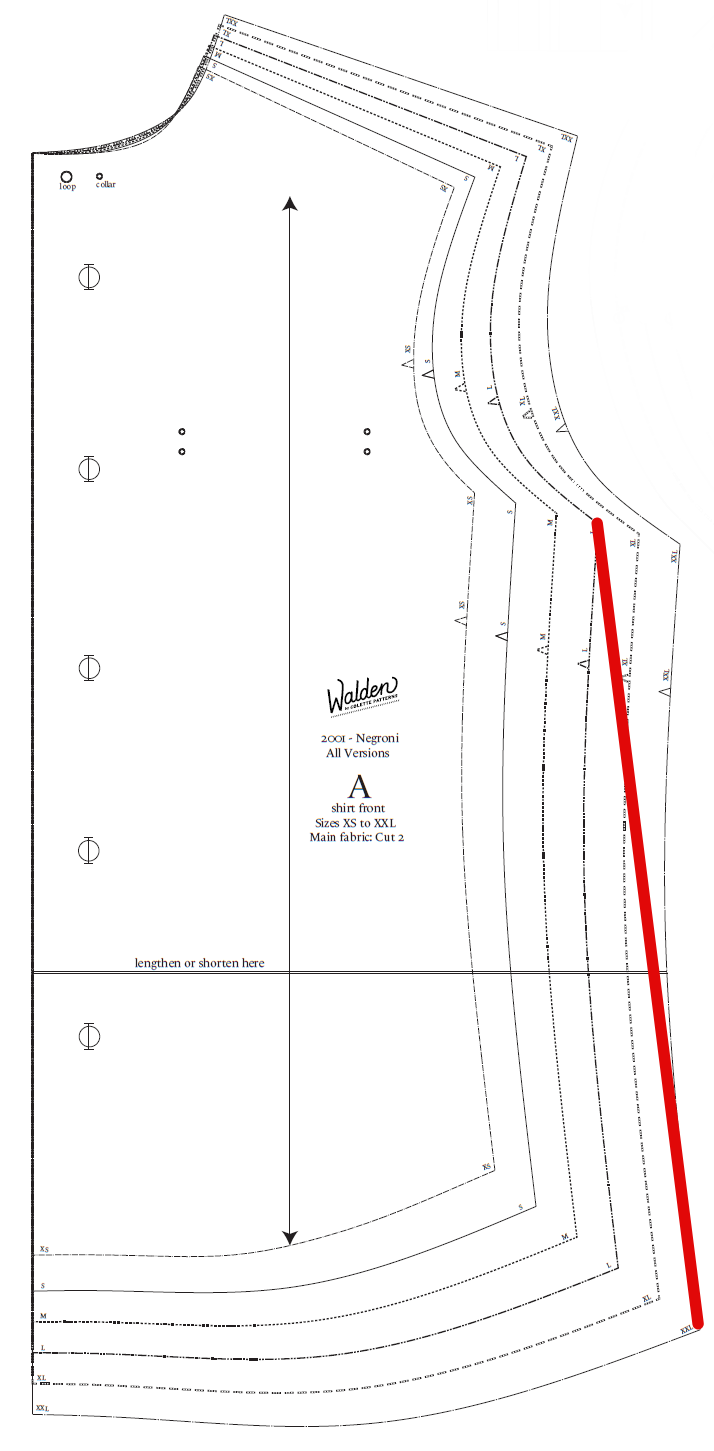

Three techniques for grading out at the hips. The shape of the line varies only slightly but can offer room where you want it or subtly change the silhouette when worn on your body.
Now, you want to draw a smooth connecting line between your existing seam and the new point. If you’d like the shirt to hang straight down from your chest, start at the widest point of your chest. If you want the shirt to fit more closely to your waist, start at the smallest part of the waist. A slight concave curve will often fall better on the body, but making that curve closer to straight will de-emphasize a curved-in waist if desired.
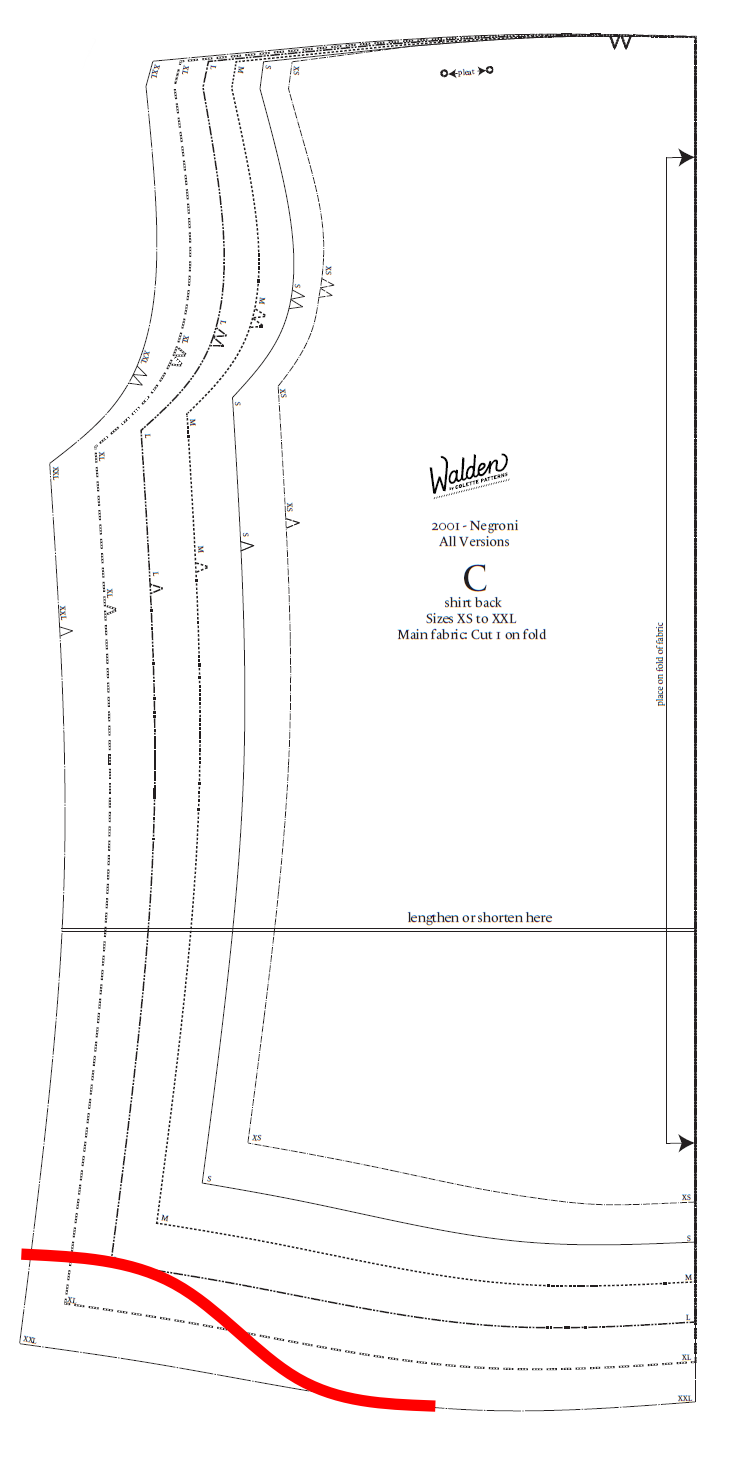
A back shirt pattern piece with a graded line on the side seam highlighted in red
Grade out both the front and the back with similarly-shaped lines. Check the seamlines to ensure they remain the same length, and transfer any notches.
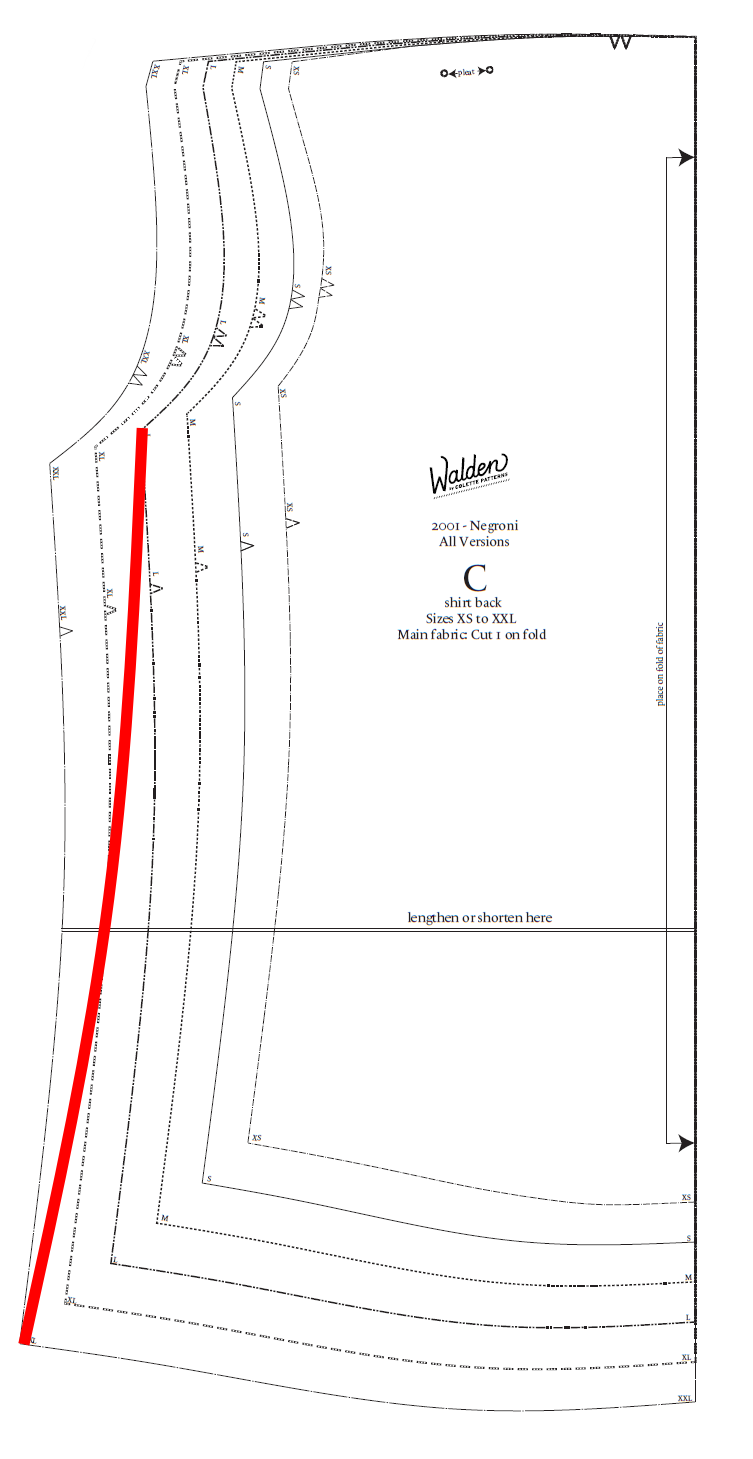
Method Two: Center Back
This method works for shirts that have a two-part back: a shoulder yoke and a back piece, ideally a back piece that has a pleat at the center top. That pleat is the key, so if it doesn’t have one, you will need to add one with this method. Essentially, this method relies on the fact that the pleat hides any extra volume that you create in the center back fold, which is then released by the time the back piece reaches your hips.

A shirt back pattern piece with a red line showing an extension at center back
It’s super easy: take the amount you want to add, divide it by two, and add that amount in a strip along the center back fold. When you construct the garment, you will just make the pleat at the top of the center back larger, hiding the excess within the pleat.
This does add more to the back waist, so is not the best option for a very fitted shirt. Make sure the new center back fold you draw in is parallel to the old one to avoid getting your fabric off-grain and having a weird dip or peak at the top.
Method three: gores
If you just need a little extra space, adding a small triangular gore, or insert, at the side seam can be a good option. This technique is actually common in ready-to-wear as it also adds strength to a part of the garment that experiences strain. You can use it on shirts you’re making from scratch or unpick just enough of the side seams to add them in on a ready-to-wear shirt. It can also be used to give a little pop of contrast!

A close up of a shirt side seam with an inserted gore in contrasting fabric.
There are a number of ways to add these in, both handstitched and machine. You may choose to insert a triangle, finishing the seams on either side and hemming the bottom. Or you may use a square folded in half on the diagonal, with the fold at the hem. This allows you to fully enclose the seams.
The techniques to insert gores vary widely, because they’ve been used for many purposes throughout history. A number of sewists who work in historical practices or make historical costumes have published tutorials — searching for “historical gore insertion” will get you a selection that might be useful. I particularly like OraLinCouture’s video tutorial of creating a historical shirt, which includes methods for inserting neck gussets that could be easily adapted to shirt side seams.
Method four: swoop your hem
This method doesn’t give more space by adding fabric, but by removing it. A classic shirttail hem is curved, with the lowest points at the center front and back and the highest points at the side seams. If your shirt is just a little tight around the hem, swooping the high points at side seams up just a skosh higher can give you the extra room you need. You can unpick the hem on a ready-to-wear shirt and scoop it out a bit before pressing and re-sewing the hem, too.
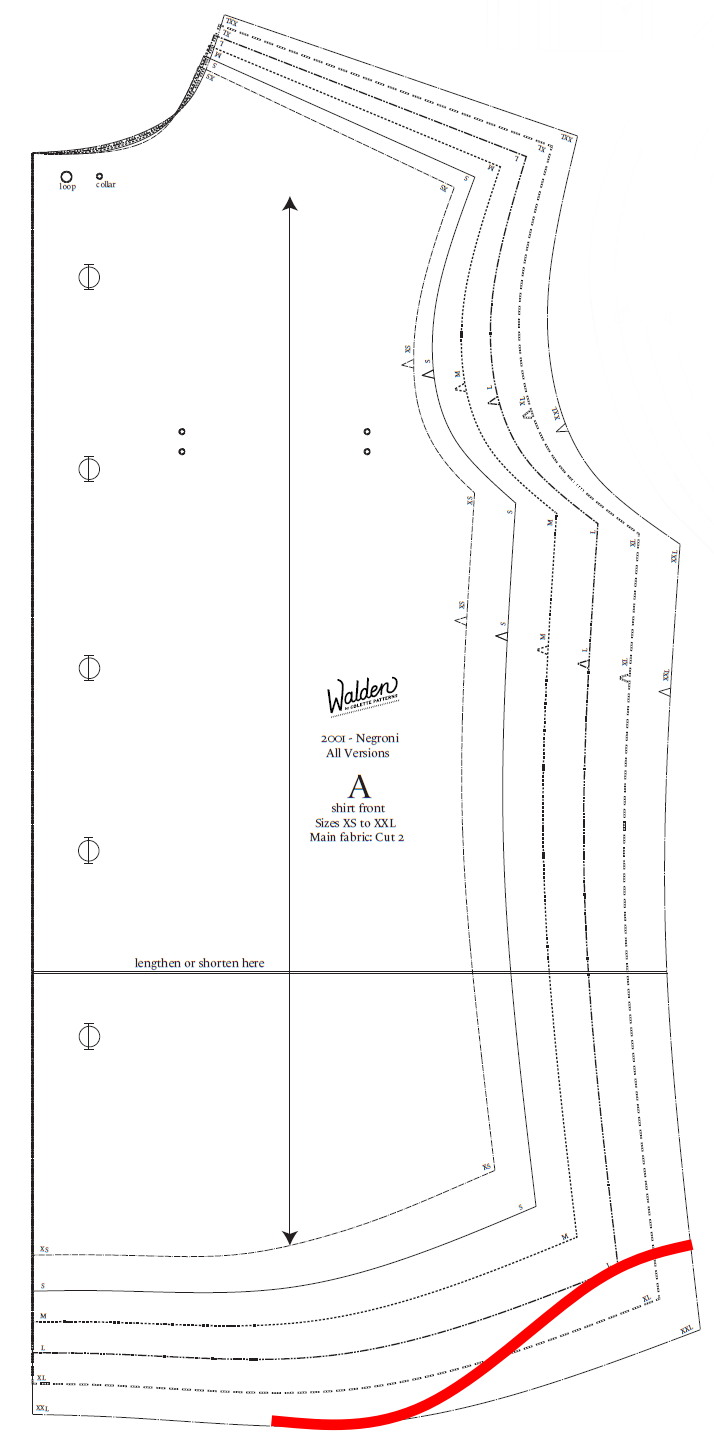
Creating more of a curved hem can allow the shirt to skim above the widest part of your hips
A curved ruler is useful for this, but if you don’t have one, you can use the edge of a round plate or just wing it. Make sure when you’re drawing in the new hem that you remove the same amount front and back. Also, make sure that the peak of the new curve meets the side seam at close to a 90 degree angle. You want to ensure that the top of your curve has a slight flat top to make hemming easier.

A close up of a shirt hem finished with a contrasting bias tape.
Personally, I hate hemming curved hems using a double-fold method, so I always hem my shirts with a bias tape facing! It’s easier and I can make my own bias tape for a cute hidden surprise.
I hope these techniques help you create a shirt that fits just right! Do you have other solutions for adding to the hips in shirts? Drop them in the comments below!
Shannon (she/her) is a queer sewist and art historian, living and teaching in the midwest. She shares her own sewing, mushroom farming, and dollhouse making on Instagram at @rare.device and is the founder of SewQueer.
Sew Queer is a community, and we welcome comments and discussion. In order to create a welcoming and multivocal space working towards a more just and equitable future, we review every comment before approval. Comments promoting racism, classism, fatphobia, ableism, or right wing political ideology are not allowed and will not be approved. For more details on commenting, visit our commenting guidelines.