Katherine: Drafting a Pirate Shirt (Pt. 1)
I am sure that nearly everyone has had at least one moment where they have looked at the size chart on a beautiful sewing pattern and realized that their measurements aren’t even close to matching one of the “regular” sizes. I have been lucky that, for the most part, my size and proportions are pretty close to sewing patterns, but I still always need to make a few adjustments.
When I first went to fashion school and learned how to properly draft my own patterns, I was completely thrilled. I fell in love with the options that it gives you very quickly. When you draft your own patterns to your own measurements, you gain the freedom to design your own clothes in your exact proportions. No more matching the waist measurement of one size and the hip of another!
For this tutorial, I am going to teach you how to draft your own pirate shirt! This is one of my favourites because it can be really easily adapted to look more masculine or feminine, and pirate shirts fit into so many styles.
Before I get into the instructions, you will need:
1. A sloper that fits you well
A sloper is basically a very simple, well fitting pattern. In this case you will need one for your upper torso. You can make them completely from scratch to your measurements, or you can alter either a very simple dress pattern (with waist and bust darts, no princess seams) or a woven shirt pattern, although it would be much more difficult to find a simple enough shirt with no plackets or added ease. If you would like to make your own, I would recommend this video for a more traditionally masculine shape, this video for a more traditionally feminine shape (watch all three in the series), or the textbook that I used for school which is Patternmaking for Fashion Design (5th ed.) by Helen Joseph Armstrong.
2. A straight ruler of some sort.
I especially enjoy a clear, gridded ruler for ease, but any old ruler will do!
3. A pencil.
Technically you can use a pen, but I really advise against it.
4. An eraser.
You will use it a lot, even once you have been drafting for a long time. It’s part of the joy of drafting!
5. A measuring tape.
6. Some sort of large paper.
Gift wrapping paper is great, as are newsprint rolls or pattern drafting paper.
One of the great things about making looser garments, such as pirate shirts, is that your fit does not have to be absolutely perfect on your sloper, and it gives you a ton of room for error. You can also personalize it easily, since any ease or details that you add are completely up to you.
Before you start working on your draft, make sure that you have a solid idea of what details you would like to add and what fabric you will be making it out of. Knowing your fabric will help you draft it. For example, you might add a wider hem for ease of sewing a thicker/heavier fabric, or add in more ease for gathering if you have a very lightweight fabric. You could make this shirt out of a wide variety of fabrics, depending on what look you are going for. A cotton double gauze, poplin, or linen would be great options for it to look more pirate-y. Use a printed quilting cotton for a fun 60s or 70s style shirt, or use a cotton Swiss dot for more of a delicate look. You could also use a simple broadcloth, as long as it is not too heavy-weight. Feel free to play around! This style is pretty forgiving, so it is a great place to experiment.
Instructions
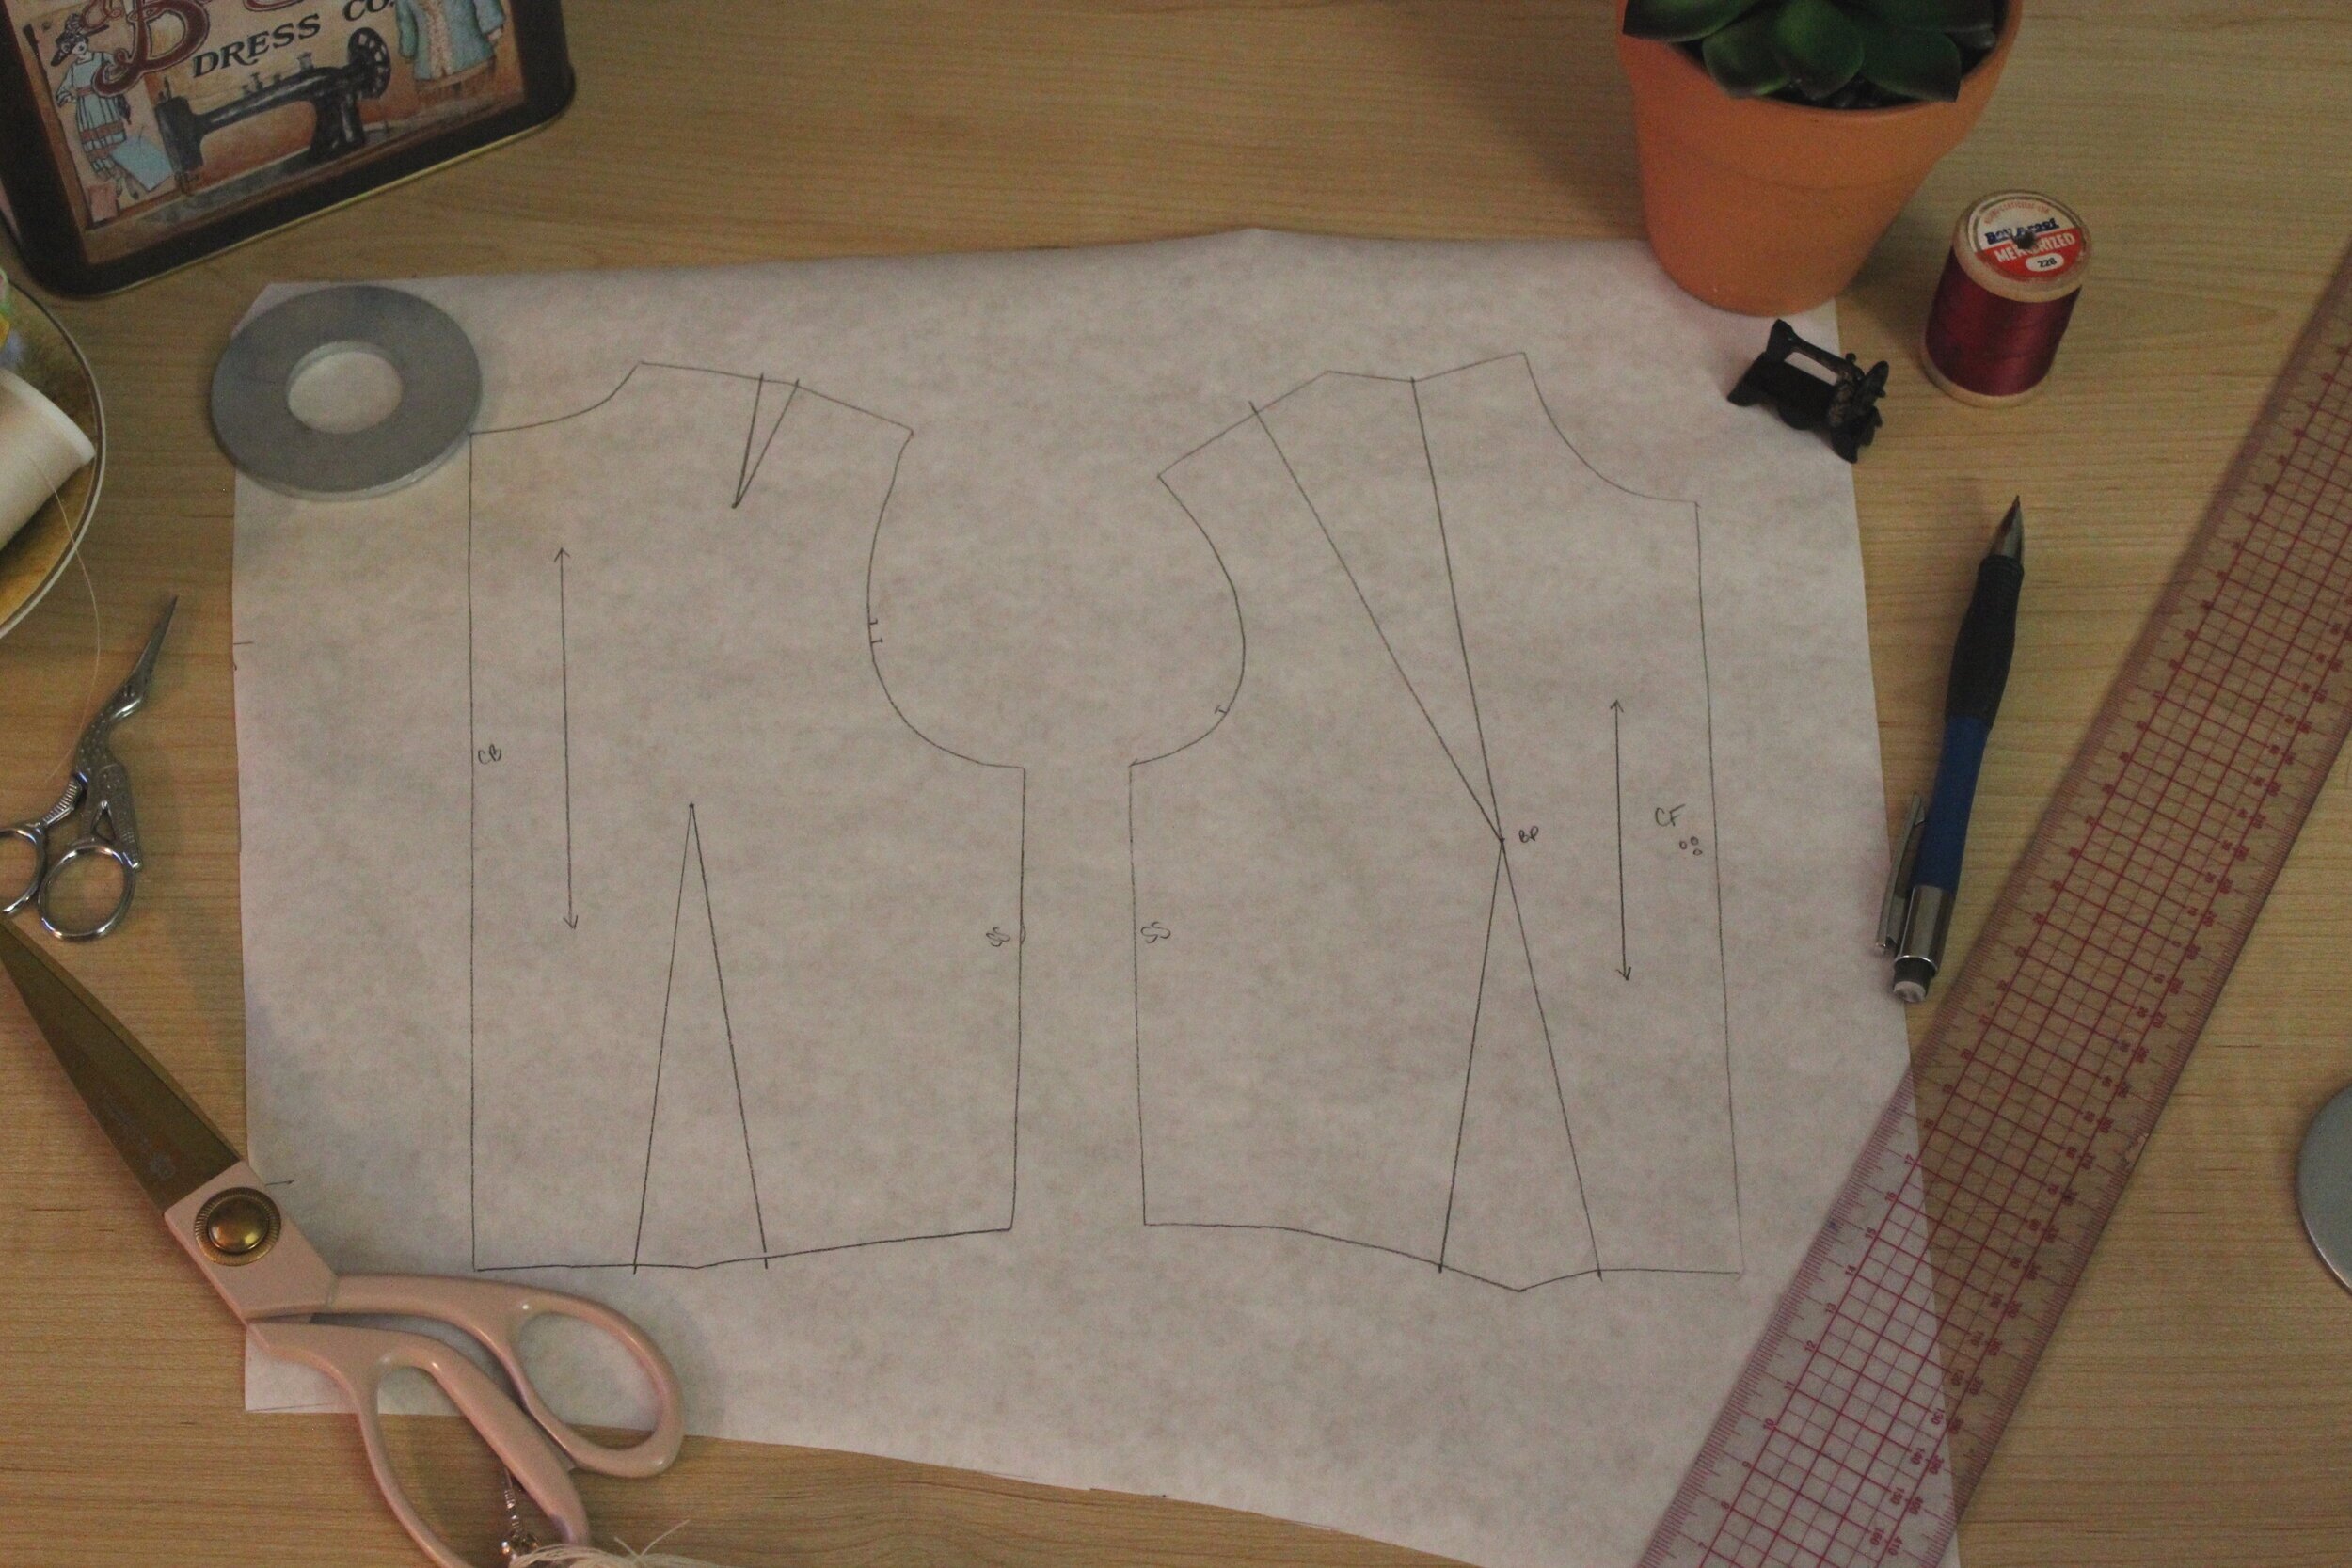
Fig. 1. A bodice front and back sloper that has been traced onto white pattern drafting paper. It includes shoulder and waist darts on both the front and back, as well as a marked grainline along the center front and center back lines.
1. Start by tracing the front half sloper and back half sloper (which should look something like Fig. 1, but with your measurements and proportions). Make sure that you mark the dart points and ends, and your center front (CF) and center back (CB). The darts will be absorbed into this pattern, but it is very important to get used to marking them in at the beginning of every new pattern.
2. This is the best time to add length to your shirt! (I added length later, just because I forgot to do it here.) Measure from the center of your collarbone and add the length at the center front, then add the same amount extra to the side seams and center back. I am adding about 12cm to mine, since I would like the shirt to end at my hip. Lengthen your center front/center back and side seam lines to however long you want them. I straightened my side seams instead of angling them in, since the shirt will be full in the end anyway and has to be wide enough to go over my hips. (This will not be something you will need to really worry about since we are adding fullness soon, but that is why it isn’t a problem to play around with the side seam in this case).

Fig. 2. Bodice sloper with a line drawn across the upper chest for the front piece and upper back for the back piece where the yoke will be. The darts have also been crossed out to indicate that the pattern will not have darts in the final design
3. I am showing you how to make a pirate shirt with a yoke, which is just a more fitted part at the shoulder and neck. I am starting by drawing where I would like my yoke to end. Make sure to square your yoke with the center front and center back lines so that you get a perfectly even yoke. For the front, your yoke will not be cut on the fold, so this is where your opening for your head will be. Keep that in mind while deciding how far down you would like your yoke to go.
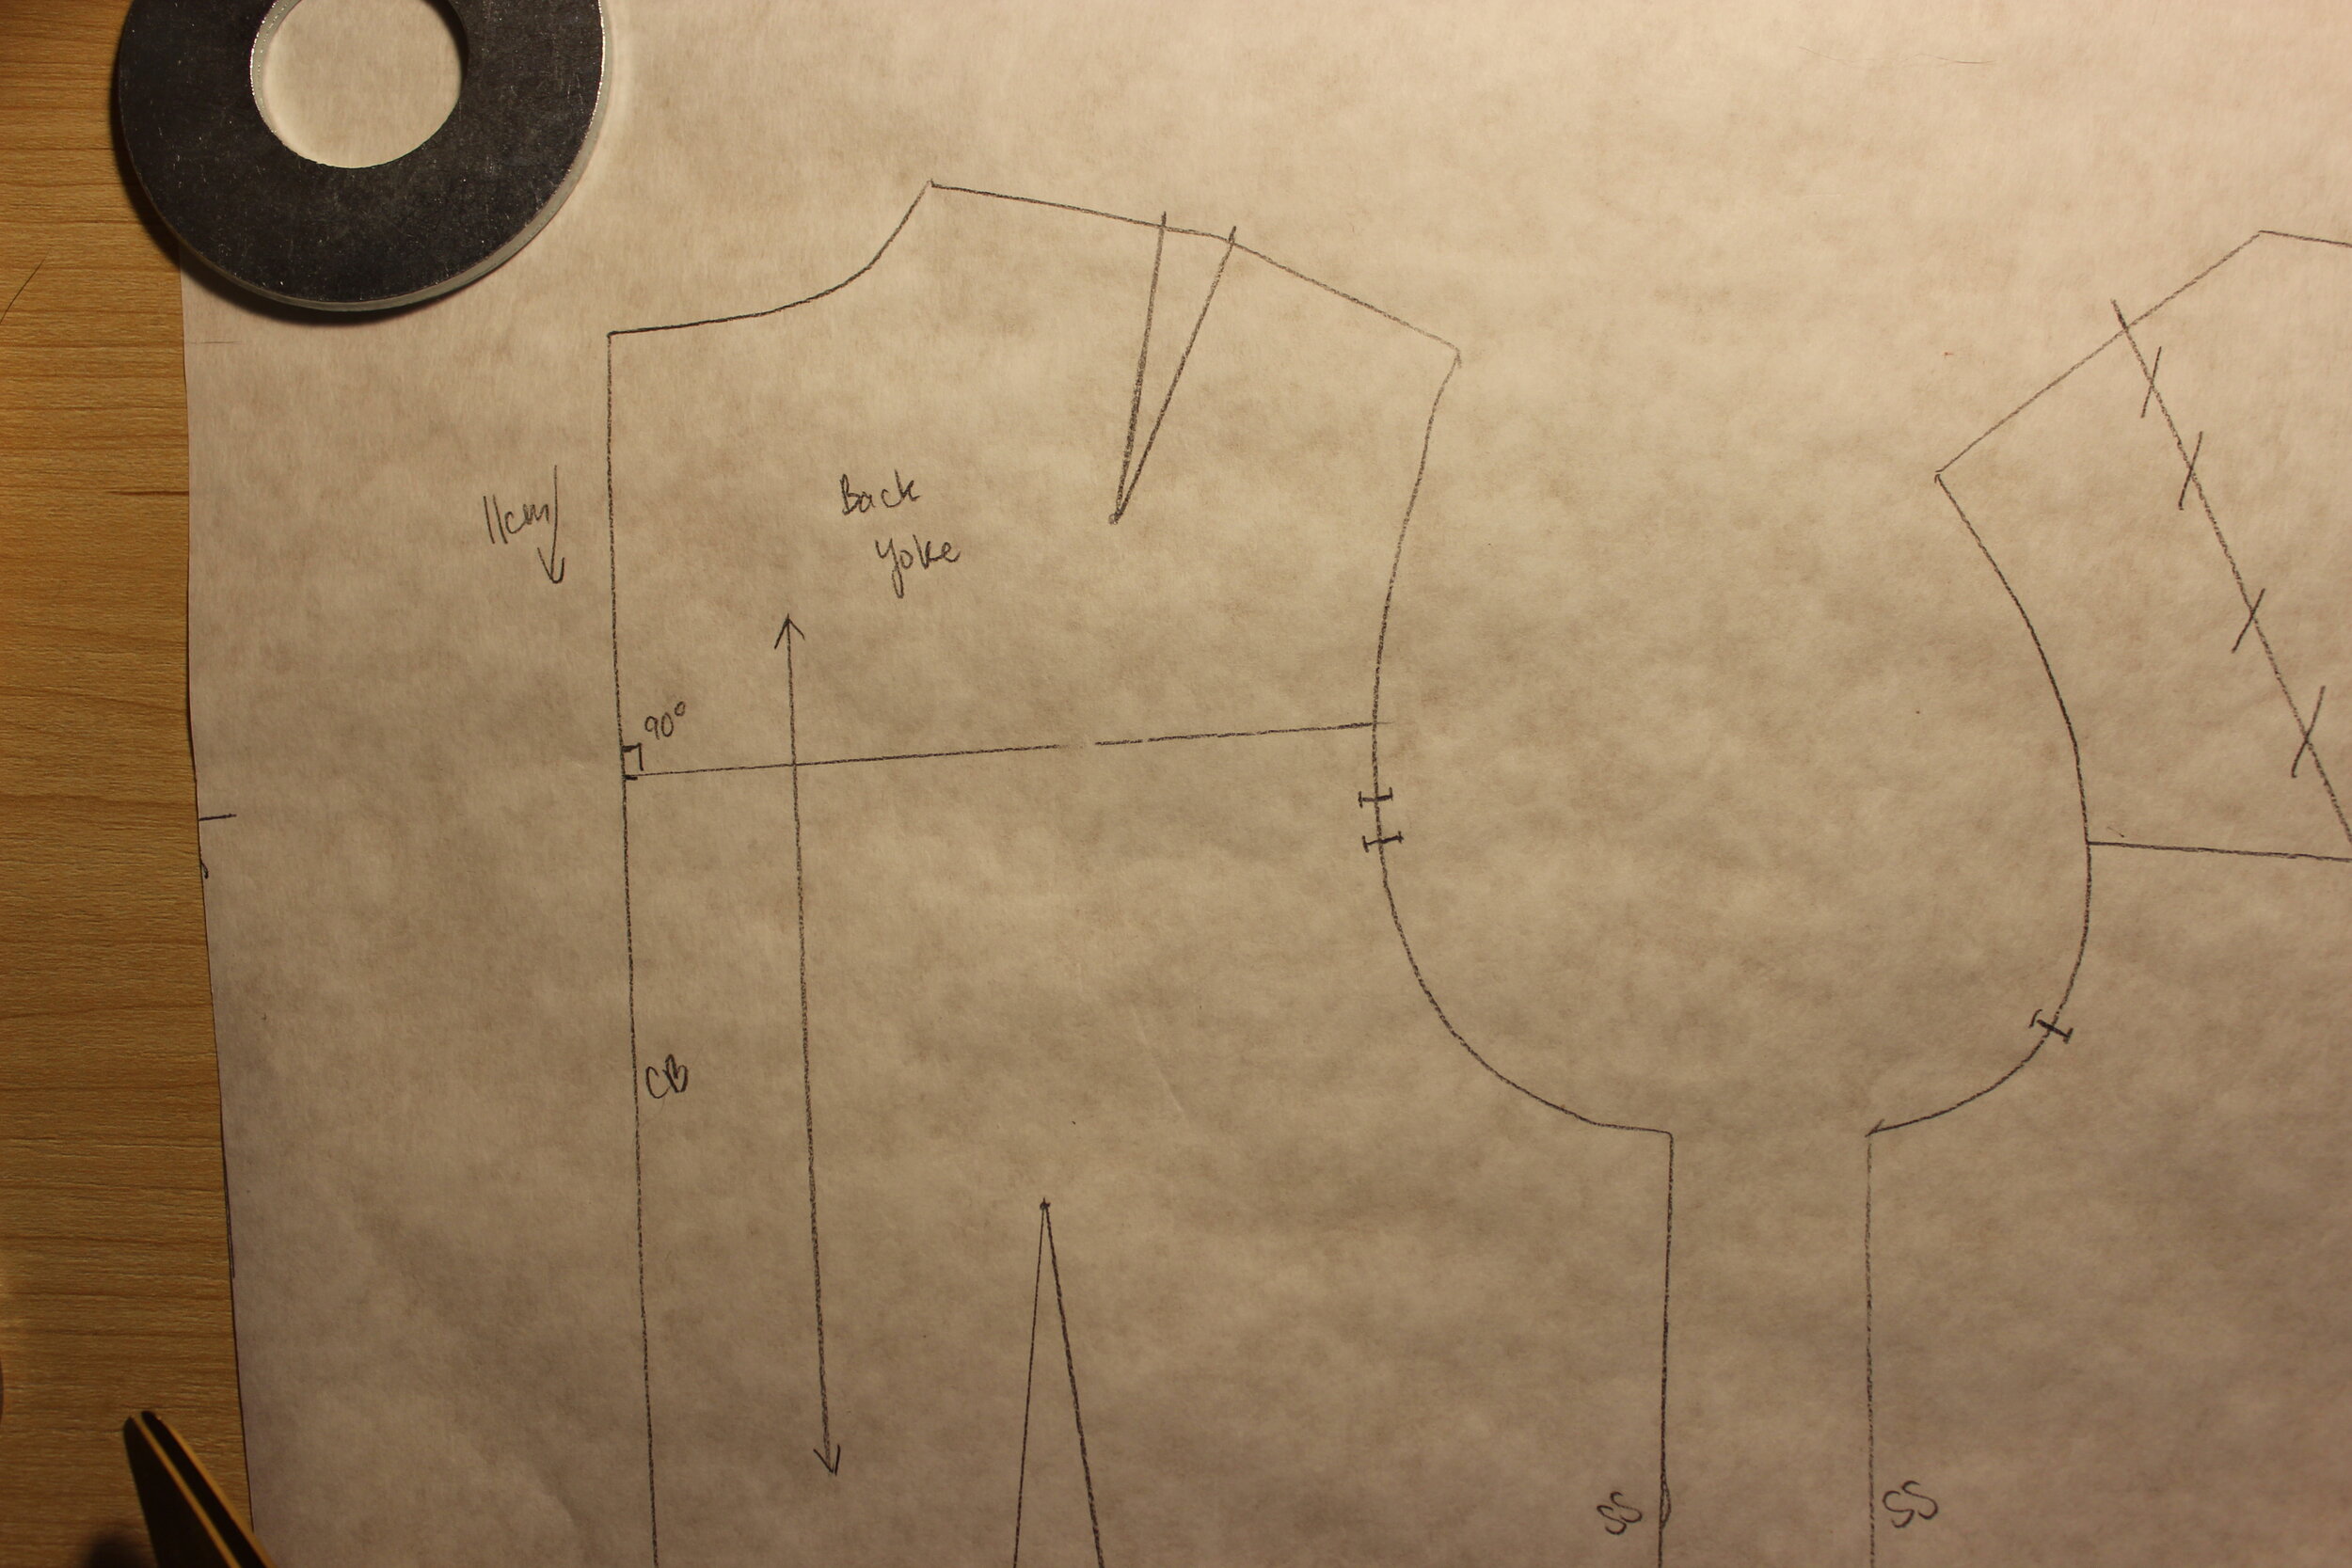
Fig. 3. Close-up of the back yoke with the line squared to (i.e. at a 90º angle to) the center back and a measurement of 11 cm marked from the back neckline to the yoke line. 11 cm is is the measurement I used, but you can place the yoke however far down you would like it to be.
4. From there, I will put a matching notch on both my front and back pieces where the yoke will attach to the shirt. This will make life much easier for you when you go to gather the shirt piece down! While I would usually only mark the lines for all of my alterations on this first draft, then trace it onto a new piece of paper to cut the pieces apart, that can be really difficult to do on opaque paper so I will show you an easier way. Start by cutting the yoke away from the shirt.

Fig. 4. The front yoke, which has been cut away from the rest of the bodice sloper. It has a pair of scissors drawn on one side of the dart line, which indicates that the line will be cut.

Fig. 5. The front yoke piece has been cut away along one dart leg.
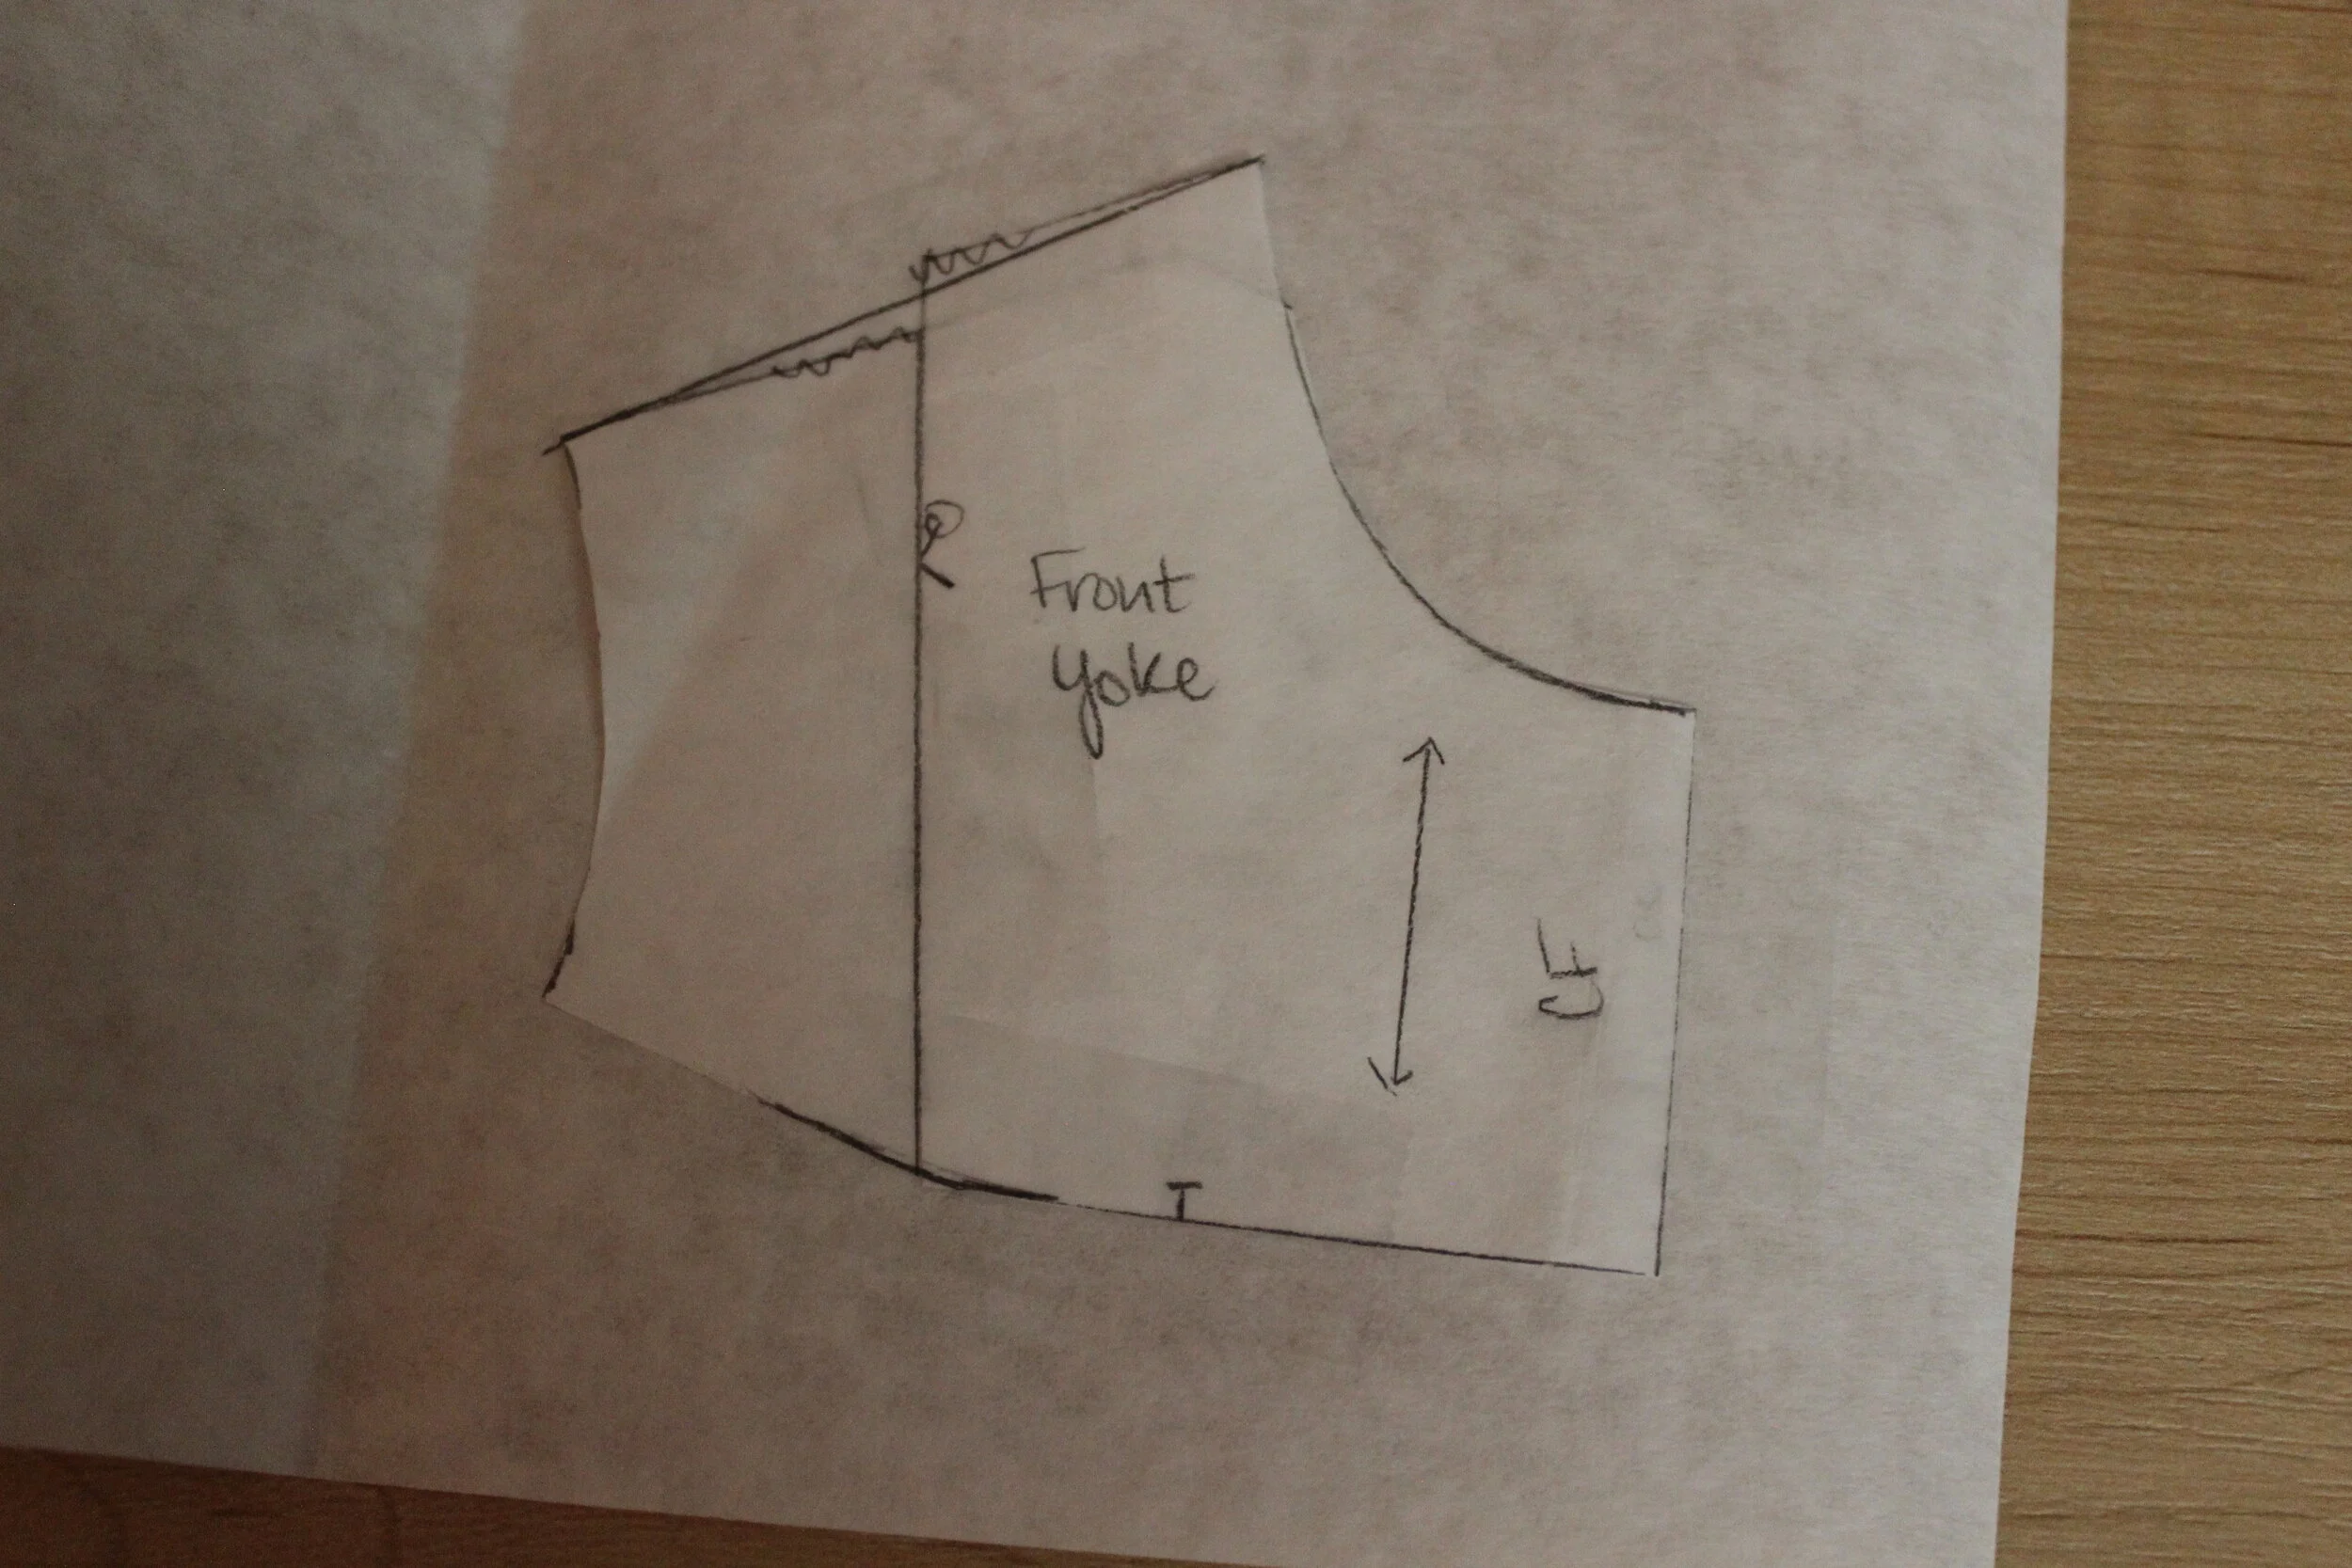
Fig. 6. The dart legs have been taped together, closing the dart and creating a single yoke piece with a curved bottom for shaping. A new line has been drawn for the shoulder seam to keep it straight
5. Once the yoke is separate, cut one side of the dart that goes through the center of the front yoke. (If you don’t need bust darts, you can ignore these steps and just add your seam allowance.) Once you have cut one side of the dart open, close the dart by matching up the lines of both sides of the dart and taping them together. This will make a curved bottom, which will add some shaping to your garment. Your shoulder seam will be wonky after this, so just straighten it out by running a line between the two end points (as shown in Fig. 6).

Fig. 7. The yoke piece with labels indicating what piece it is, what garment it belongs to, and how many pieces to cut, along with the seam allowance and grainline.
6. To finish your front yoke piece, add in your seam allowance (I always use 1.5 cm, but use whatever allowance you are comfortable sewing with) and labels. I label all of my pieces with what garment they belong to (Pirate Shirt), what the piece is (Front Yoke), how many pieces to cut (four in this case: two for the shirt, two as lining), and the year I made it in just in case I need to make adjustments to it in the future. Always mark your grainline – it should be parallel to your center front seam – and your matching notches.
7. I didn’t show the process of making the back yoke since it is very simple. I am keeping the shoulder dart that I have in mine since I have very hunched shoulders, but your sloper might not have any darts at all. That is totally fine! For the back, just add seam allowance on all sides except for the center back, since it will be cut on the fold. Then label it and include the grainline and matching notches.

Fig. 8. The back torso piece, separated from the yoke, with three lines drawn about equal distance apart from each other running parallel to the grainline. Notches at the yoke edge and the sleeve edge have been marked, as well as the center back.
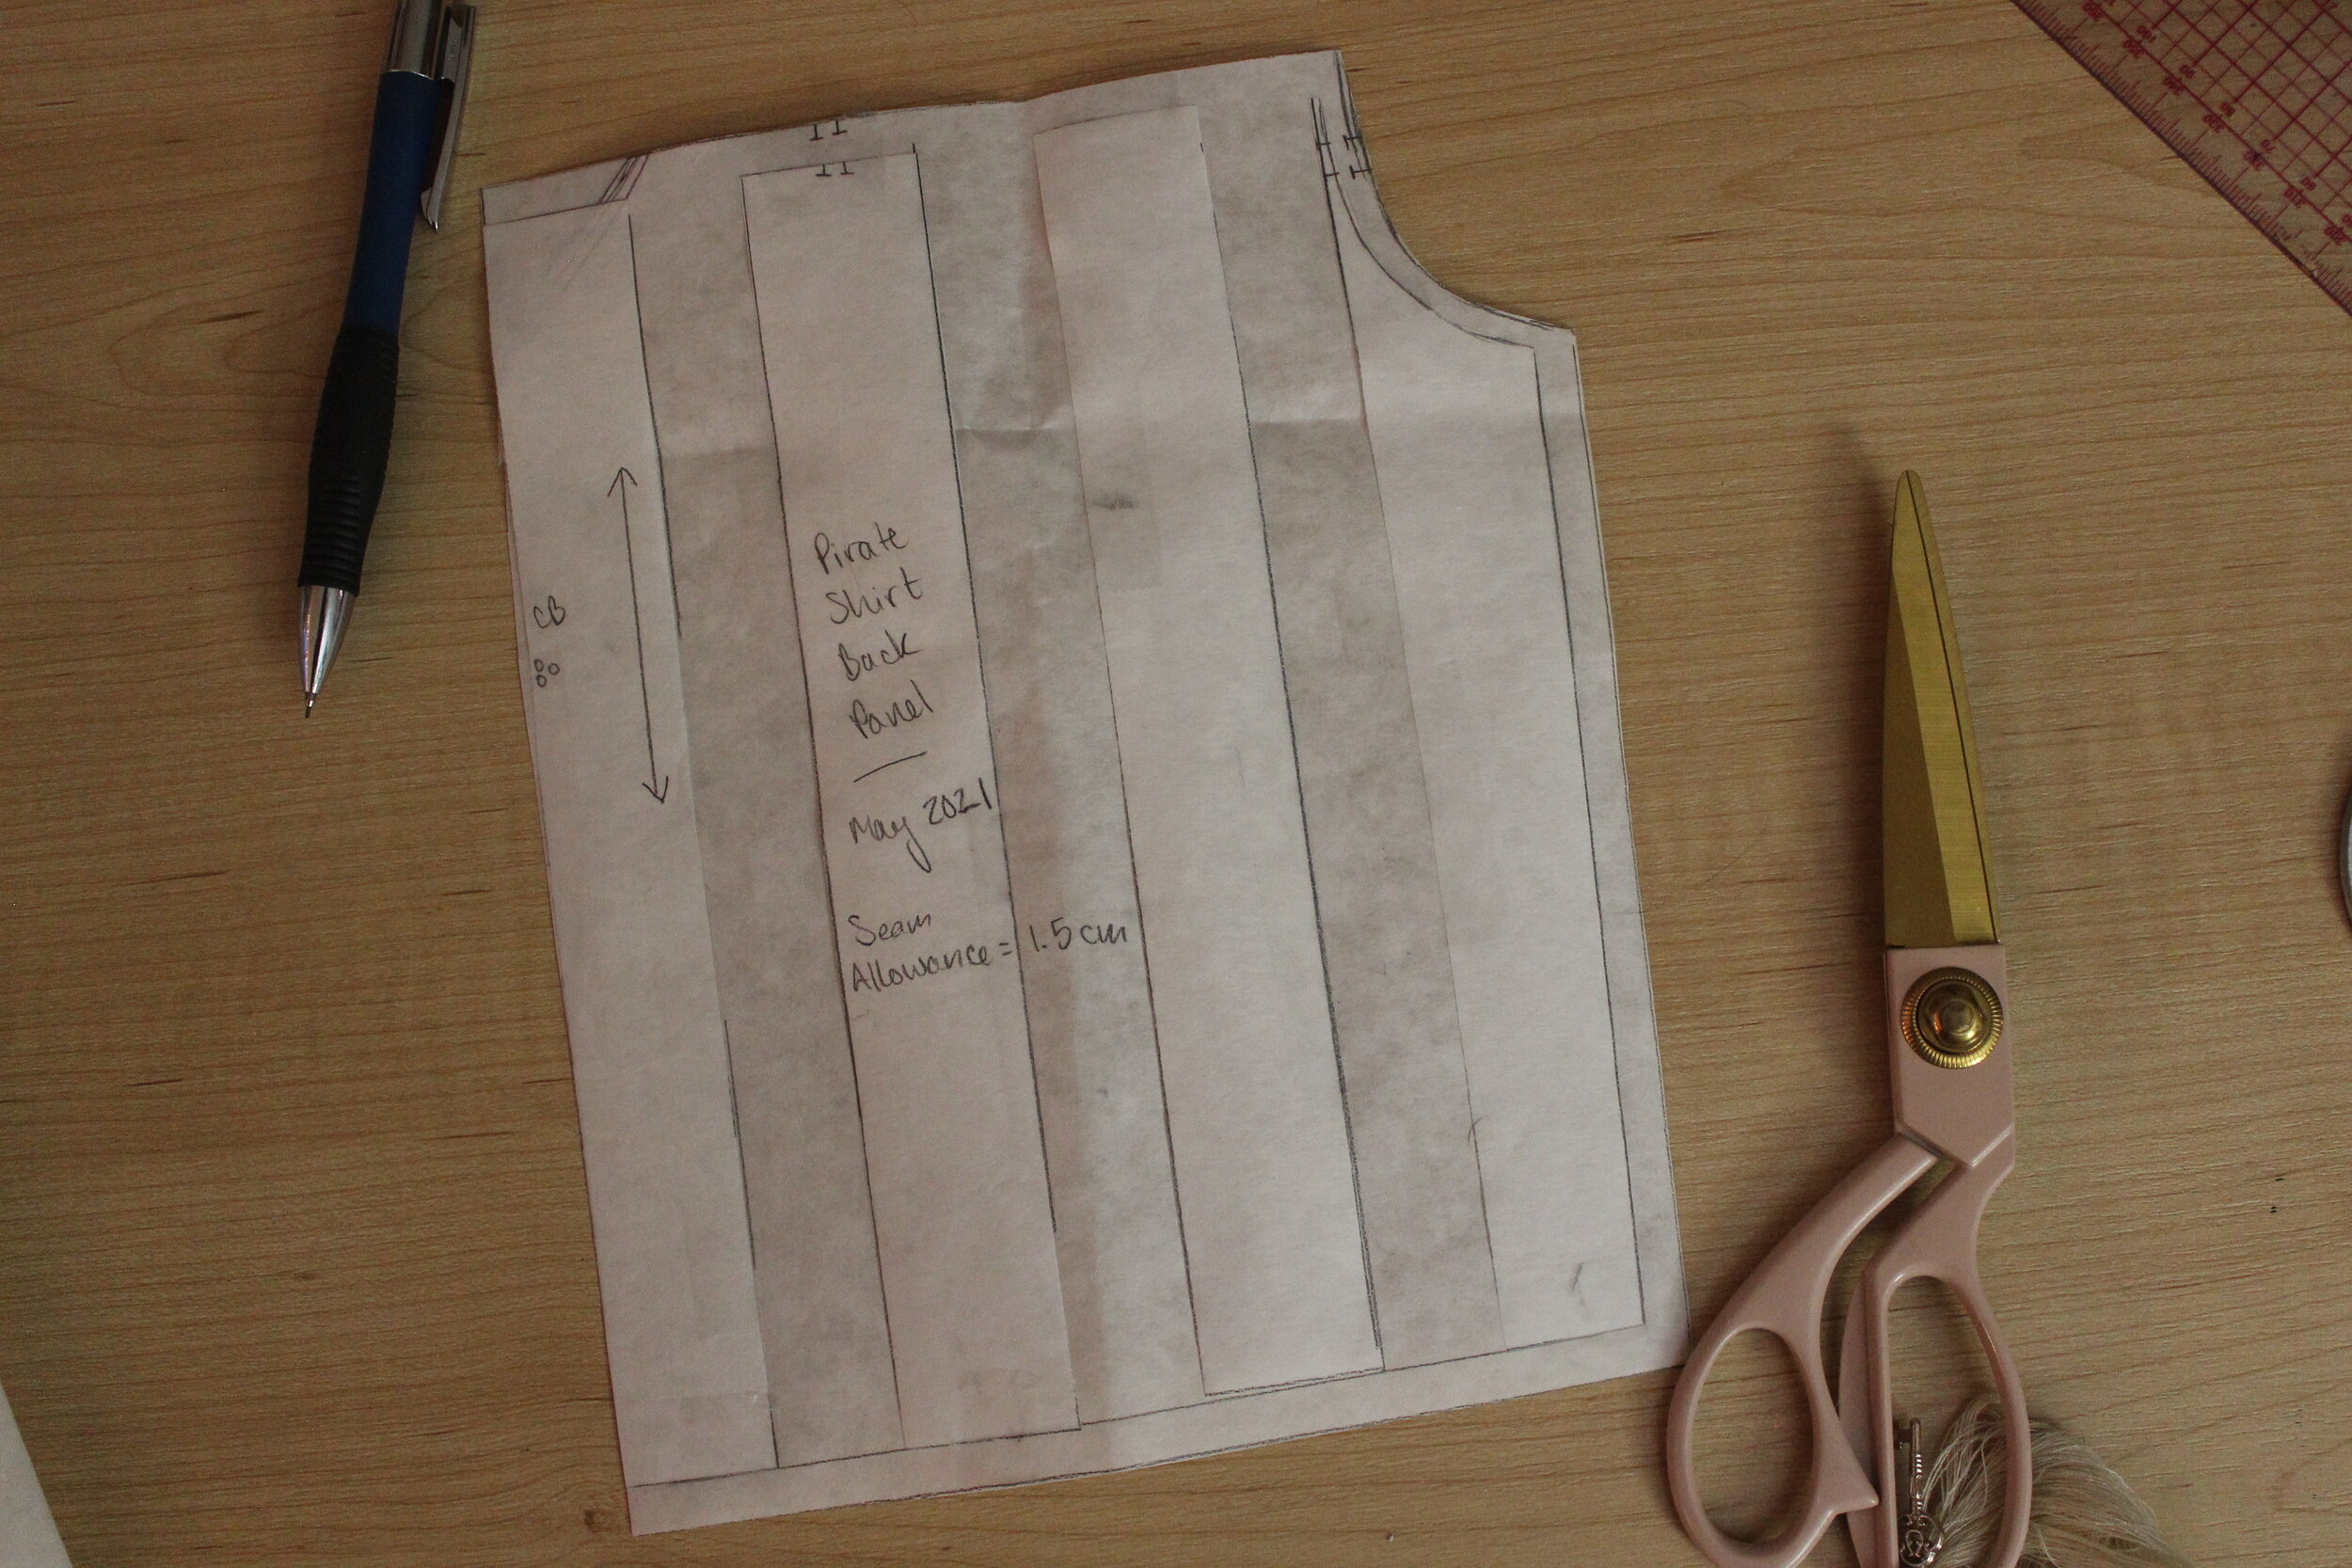
Fig. 9. The three lines have been cut apart and taped to a new piece of paper with 3 cm evenly measured between each piece. This is where the extra fabric for gathering comes from.
8. Now we can move on to the gathered torso piece! I started by marking three slash and spread lines on the front and back pieces, parallel to the grainlines. This is where I will be adding all that fullness to be gathered down. Place them evenly across the torso, though don’t worry too much about being precise. Then cut down these lines, separating each piece completely. Tape this to a new piece of paper with however much fullness you want. This fullness is going to be doubled in the end, since you are just drafting a half pattern, so keep that in mind while spreading the pieces. I decided to measure each piece about 3 cm apart. Measure evenly along each piece as you tape. Do this on both the front and the back, like all of the previous steps.

Fig. 10. A close up of the labels, which include the garment name, piece, grainline, year of draft, and seam allowance. (This isn’t necessary, but I add mine as a habit from fashion school.. There are also three dots along the center back to indicate that it needs to be cut on the fold.)
9. If you would like a straight hem, then all you need to do is add your seam allowance to all edges except the center back (since it is cut on the fold) and copy your notches to the seam allowance. Also add your labels.
10. For a different style, try a shaped hem. If you are doing a shaped hem, square your center front and center back, otherwise they will make a funny shape that you will have to straighten out once you cut it on the fold. Another hem option is that you can make the back hem longer than the front! Add however much length you would like at the center back, then curve it from the side seam. A French curve is fabulous for curving lines, but you can also draw it by hand or use a plate or bowl to trace.
11. Now apply the exact same steps (steps 8–10) to the front torso piece! This one is also cut on the fold, so there are no differences in drafting the pieces.
And now you have the torso of a pirate shirt!
Of course, there are still some pieces to draft (the sleeves, the collar, and the cuffs): I will show you how to do that in my next post, which will be live next week. Here you have learned a few important tricks to pattern drafting: closing a dart, slashing and spreading, and how to finish a pattern piece. I hope you enjoyed this process, and stay tuned for the drafting of the rest of the shirt!
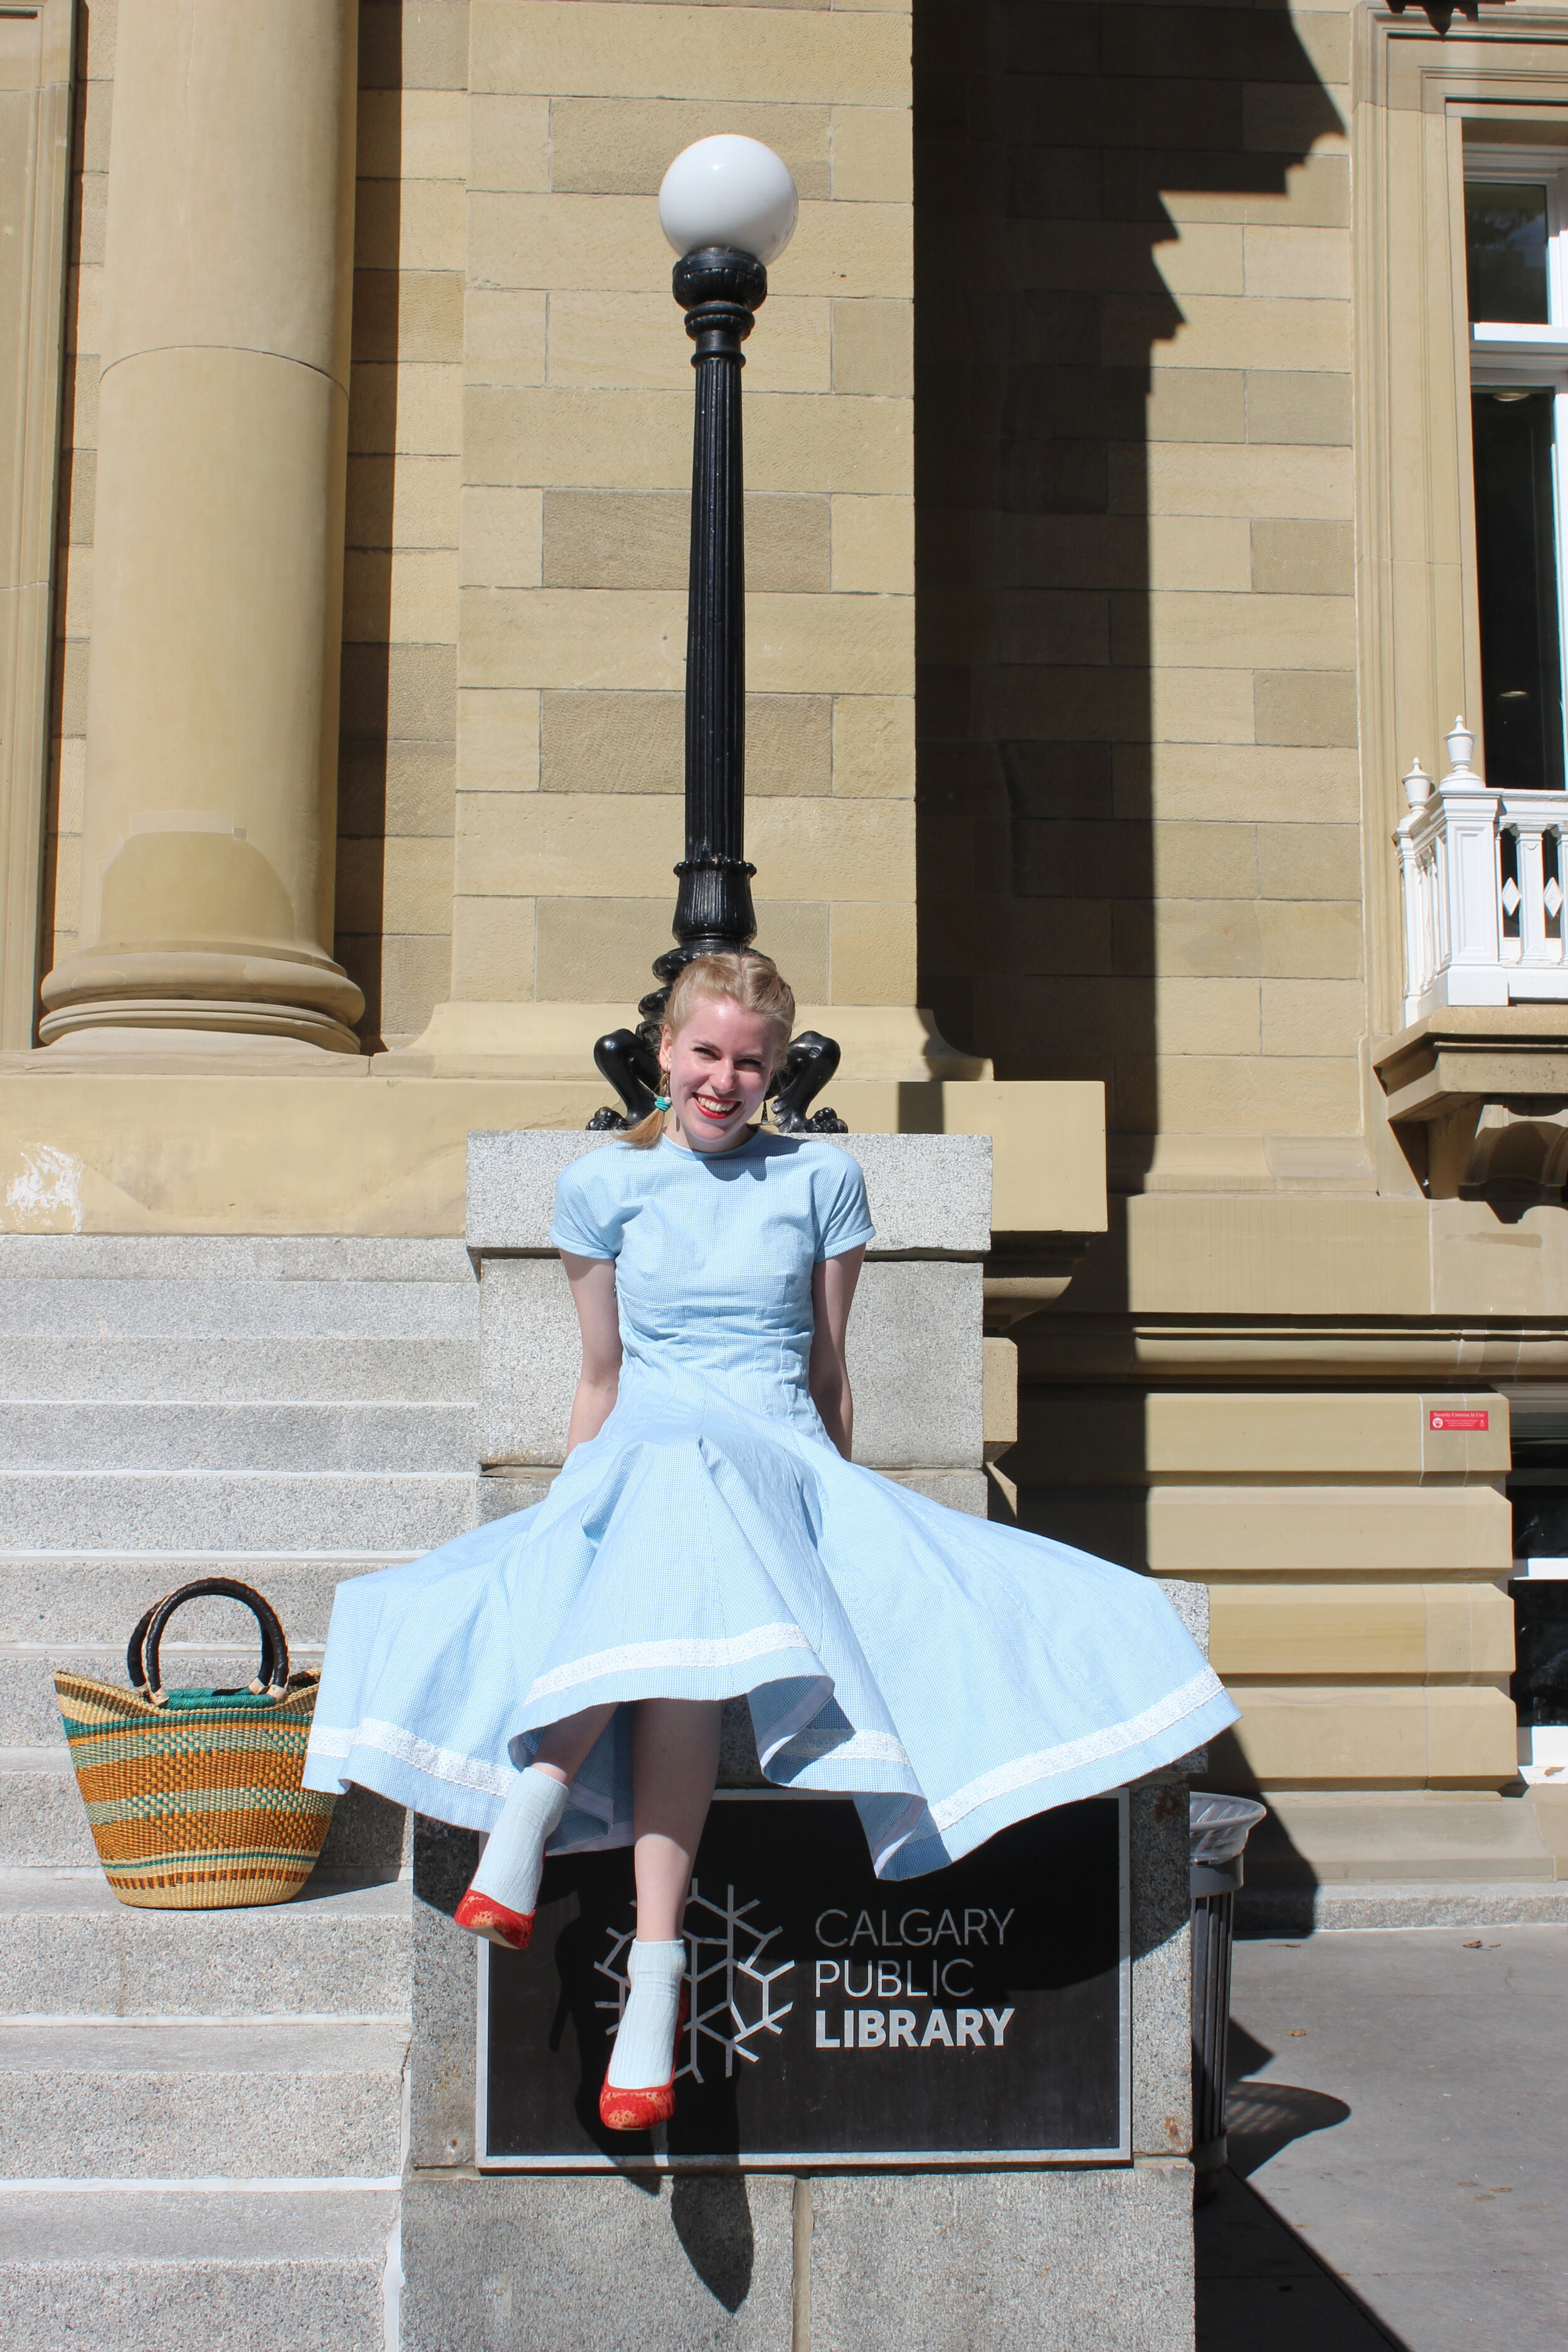
Katherine is smiling and wearing a blue dress while sitting on a half wall in front of an old library. There is a striped woven basket beside her.
Katherine (she/her) is a queer seamstress from Alberta, Canada. She started sewing when she was seven years old, and since then has designed and created garments for multiple fashion shows across the country. Katherine is inspired inspired by vintage and historical fashion, especially the 1930s and 1940s. She believes wholeheartedly that fashion should be for everyone, and learning how to sew for yourself is a skill that can help you create the wardrobe that you have always wanted, and that actually fits you the way you want it to. She can be found on Instagram at @funk_katherine or on her website at https://funkkatherine.wixsite.com/mysite.
Sew Queer is a community, and we welcome comments and discussion. In order to create a welcoming and multivocal space working towards a more just and equitable future, we review every comment before approval. Comments promoting racism, classism, fatphobia, ableism, or right wing political ideology are not allowed and will not be approved. For more details on commenting, visit our commenting guidelines.